The Fundamentals of Rucking
From a biomechanical and physiological perspective

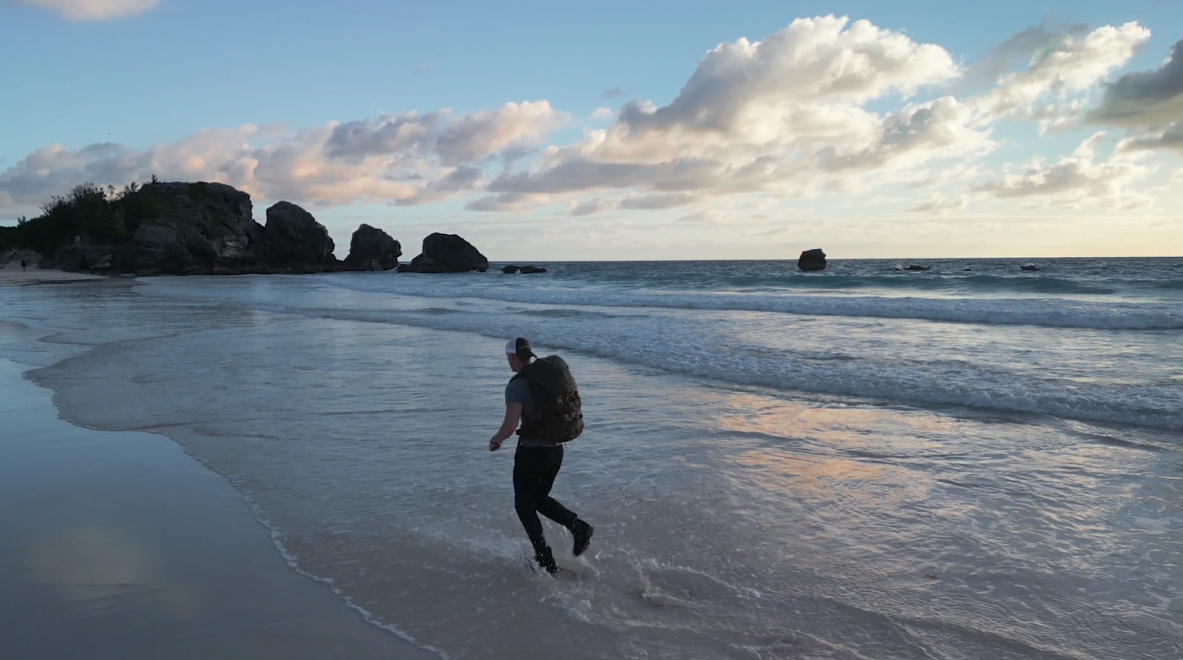
When it comes to the outdoors there are countless guides floating around the internet on the essential items to bring with you, much of which is marketing hype. We have seen everything from the latest and greatest water purification to the most breathable bivy bag. This is not one of those articles. As gear changes and improves over time, we will see many of these items evolve or be made redundant entirely. Instead, I am going to talk about a topic which is timeless. By using classical mechanical physics coupled with a dash of biomechanics, and some common sense we are going to talk about how to “ruck”.
What is rucking? Rucking has had many different names over the years also varying from geographical locations. Tabbing (TAB Tactical Advance to Battle), “going for a stomp”, yomping, I’ve even heard “the ankle express”. Simply, rucking is the act of carrying load on your back for long distances, it’s as old as the Roman Empire and we have learned a ton since then. For those who do this for work or pleasure and wish to continue for decades to come; while minimizing risk and maximizing the benefits, I believe this will help.

This information is aimed at improving your experience while wearing a rucksack—hopefully one of our designs—but if all you have is your inherited ALICE pack in the garage, much of this information will translate. Ultimately, my goal is to help reduce the potential for injury while wearing a rucksack and maximizing one’s health benefits to increase physiological gains. Before we begin—I recommend that you consult with your physician before entering into any new exercise program, I am not your doctor or your trainer, nor do I know the current physiological state of your body.
As a preface, I have a background in Sports Medicine, Physics and Design. Over the course of more than a decade I have treated many active duty and retired service members, mountaineers and adventurers. I have seen countless injuries which have been directly caused by repetitive use and heavy load carriage, everything from spinal compressions, meniscus tears, fractures and syndromes. I have also had my fair share of injuries which are always a setback when attempting to reach new goals. With this knowledge I have seen in my own personal life as a patient and as the clinician, I believe I have found ways to decrease the risk of load related injury and hopefully for all who read this.
As a male in his late 30s who wears a ruck as part of my conditioning routine 4-5 times per week—and have for many years. Contrary to common belief, I absolutely do believe it is possible to live a long and healthy life while incorporating rucking as part of the weekly stimulus. That being said, there is a science to getting this right, getting it wrong will result in acute and potentially chronic pain.
Getting started
We are all very different in our physical abilities, body structure, level of conditioning and age. Learning foundational principles rather than a “routine” is the appropriate way to begin on this journey. Arming you with knowledge as it may be “the boring stuff” is needed for you to utilize physiological principles to design a tailored program specific for you.
First, we must understand the basics on how external forces are managed throughout the body. There is a term in biology called homeostasis, in the human body this is essentially its way of “self-regulating” to maintain a stable internal environment while adapting to external conditions and their imposed demands.
What does this mean?
A good example is a suntan after a weekend at the beach. This is essentially the skins way of regulating absorption of ultra-violet rays. The body produces vitamin D from sunlight and needs a precise amount, not too-high or too-low for proper immune function. Skin tanning is essentially the body using homeostasis to decrease UV absorption in the summer months while lightening in the winter to increase absorption. This is one of the reasons why we have varying skin tones across different regions of the globe. Over thousands of years, we have adapted to handle different climates through the process of homeostasis.
Bodybuilders are another perfect example; over time there are changes that their muscular system will undergo where the tissues grow stronger, larger and denser. This is known as sarcoplasmic and myofibrillar hypertrophy. Rucking isn’t exactly the same resistance training found with barbells and dumbbells. However, there is indeed a small muscular adaptation in areas and hypertrophy that occurs over time.
In relation to any strenuous activity where one’s goal is to progress, we must understand that there are different systems which adapt at different speeds. Being cognizant of this, is the first pillar for preventing injury. For example, the cardiovascular system adapts relatively quickly, whereas the skeletal system adapts very slowly—Progress is only possible with persistence and patience.
 In skeletal anatomy there is a very slow adaptation to demands imposed upon it, this is known as Wolff’s Law. It states that when progressive increased load is placed on bone over time, the bone will remodel itself and become stronger to better resist these forces in the future. The internal architecture of the trabeculae (scaffolding) inside the bone; and the external cortical periosteum (hard outer shell) will undergo adaptative changes and become thicker. These changes happen very slowly and can happen over a long period of time. The inverse is also true, if one becomes sedentary the skeletal system will decrease its density. If you’re getting back into rucking from many years ago. Remember, your bones are NOT the same as they were when you were young in the military. If you are brand new to rucking, the same also applies.
What is unique about rucking, unlike other physical activities is it will challenge the cardiovascular, muscular and skeletal systems simultaneously. This makes it an excellent form of exercise—but a very potent spice. Due to the varying speeds of human adaptation coupled with rucking’s high potency, one MUST follow the rule of micro-progression. Whether, one day your goal is a higher sustained heart rate, or higher load. Implementing the rule of micro-progression is imperative. Micro-progression is essentially taking a fraction of step forward, rather than a full step. Many athletes who are self-motivators, goal setters and envelope pushers are typically vulnerable to ignoring this rule, resulting in injury and ultimately preventing them from reaching their goals.
In rucking I incorporate 5 forms of stimuli which can be each individually manipulated up or down, which are ultimately micro-progressed over time:
- Load + –
- Duration + –
- Speed + –
- Terrain + –
- Climate + –
= INTENSITY
Creating a good rucking program intelligently uses all of these variables in different combinations and magnitudes. This will emphasize the intensity on the different systems of the body. Some rucking enthusiasts may only focus on progressing weight, while others focus only on decreasing the time of a set distance. These are both viable yet limiting by their nature if that is all they focus on.
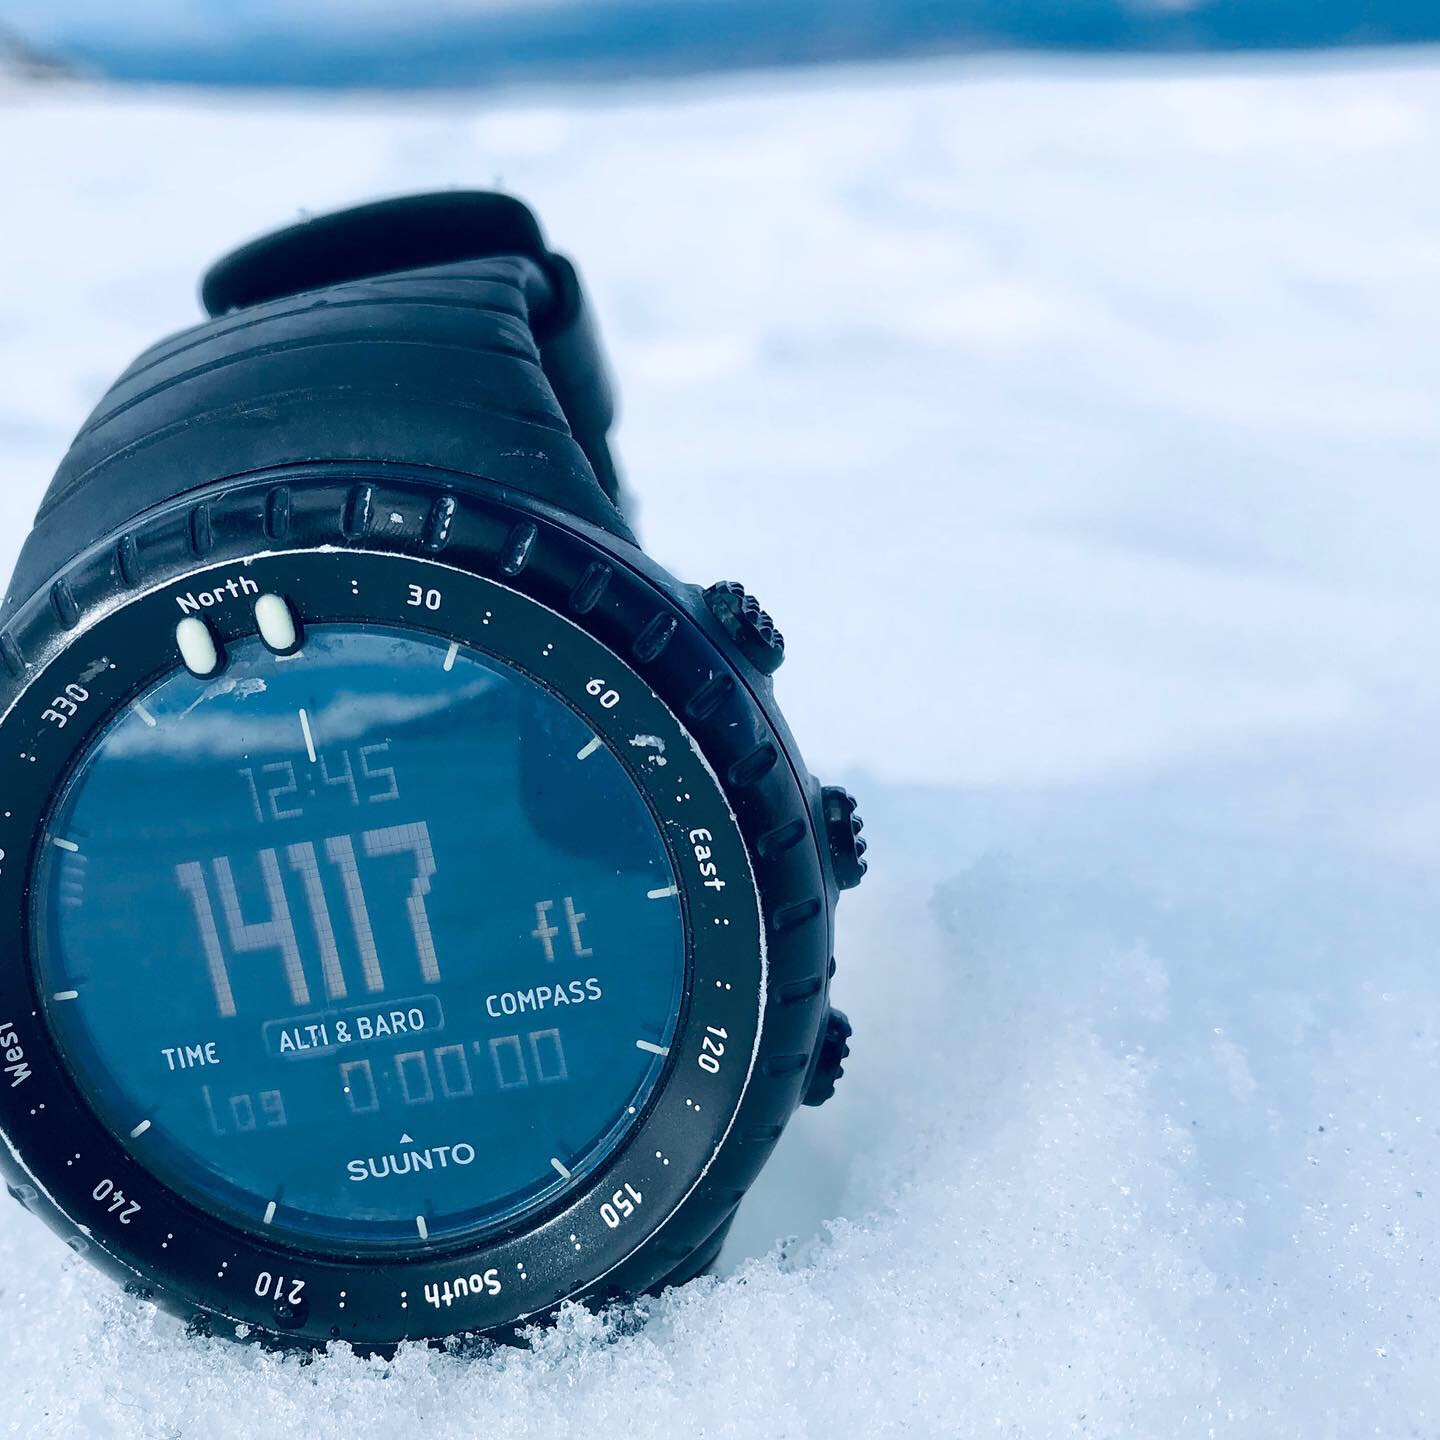
As I am writing this, just yesterday I hit a woodland trail for my ruck training. This is a trail which I visit frequently. I had pre-packed my ruck for a multiday trip next week. This brought my load a good bit higher than normal. Additionally, it was muddy with freezing rain, I had on my boots with stiffer soles and chunky lugs. Just with these changes alone, my variables were at much different values. Did I complete with the same time and speed which I normally can on this circuit? Of course not—I was much slower. However, arguably the intensity was much higher.
Less than optimal approaches are when one bases their program off of a “Military Selection Standard”. This is a specific standard set to different levels varying on the country, branch and unit job requirements. These standards have their place as a starting point, anything below would be considered substandard and unsuitable for the role—DEI is the antithesis to any standard and should have no place in the Military. Standards are most effective at weeding out candidates through attrition and should be treated as a selection tool—not a goal. However, this doesn’t mean we throw the baby out with the bathwater. I am merely suggesting we don’t focus on “set standards” but only use them as a reference point to assess overall progress over time, while manipulating variables—ultimately you should progress beyond these standards.
When implementing a training program, it is beneficial from time to time to assess one’s level of fitness based off of set points and standards, but not obsess over them.
Simply put, “One can’t play the game while focusing on the scoreboard, but instead one should focus on micro-achievements across the spectrum to achieve long-term victory.”
I propose instead manipulating all of these variables up and down to increase longevity while preventing injury, plateauing and burnout. To do so we need to understand the impact of each variable on the body. However, before doing so one must identify their goal. Are you preparing for selection, training for your first summit above 8,000m, or are you looking to improve your conditioning while fighting the clock of aging?
With a realistic long-term goal identified, understanding the variables and how they play a role as stimuli will allow you to set micro-goals for several miniature achievements along your journey.
Load – The weight packed into the ruck Variables = duration, speed, terrain, climate
Duration – How long is the workout? Variables = load, speed, terrain, climate
Speed – How fast can I move point to point? Variables = load, duration, terrain, climate
Terrain – How challenging is the terrain? Variables = load, duration, speed and climate
Climate – Altitude, humidity, temperature Variables = load, duration, speed and terrain
Example – Increasing weight requires a decrease in either speed, duration, terrain, climate, or a combination thereof.
Manipulating variables are only to be done in progressions where you know your body can handle it. Don’t jump up in weight and distance at the same time if you haven’t progressed one first.
For example, if 35lbs is my standard load and I have a standard distance of 5 miles. If I choose to increase weight to 40 or 45lbs, I will micro-progress with several sessions to adapt before increasing mileage. Inversely, I can also decrease from 35lbs to 25lbs while picking up pace while increasing duration/distance.
Preparing the Body
Back to what I have mentioned earlier, your body’s systems develop at different speeds, the bones being the slowest. Keeping in mind that rucking inherently puts a good amount of stress on the bones and joints, there are a few rules to follow to prevent injuries as the load increases.
Let’s start from the ground up—the feet.
Rucking naturally increases forces through the foot due to the additional weight carried on the upper body. Proper footwear is essential and should never be overlooked. The heavier you increase the load beyond bodyweight, the rougher the terrain, the faster the speed—all will require more support.
I can’t stress enough how having proper footwear is one of the most important factors to rucking. Your foot is what manages ground reaction forces, poor footwear is a guarantee for problems in the feet. These problems can also develop up the chain and create more. There is a very close biomechanical relationship between the foot and the hips; as mobility in the foot decreases the forces and motion are redirected up the chain, partially into the knee but mainly into the hips. My recommendation is that you understand these tradeoffs and pick appropriately the footwear for that day.
Boots vs Shoes? To keep it simple, don’t wear shoes for rucking. It’s not worth the risk. One hard step on a root or rock is a quick way for a metatarsal fracture; not to mention almost all foot injuries take FOREVER to heal. Would you use a sports car to haul bricks to the landfill? Boots manage supporting your feet in ways much like the design of a truck chassis. To the autistic minimalist guys out there, just wear boots.
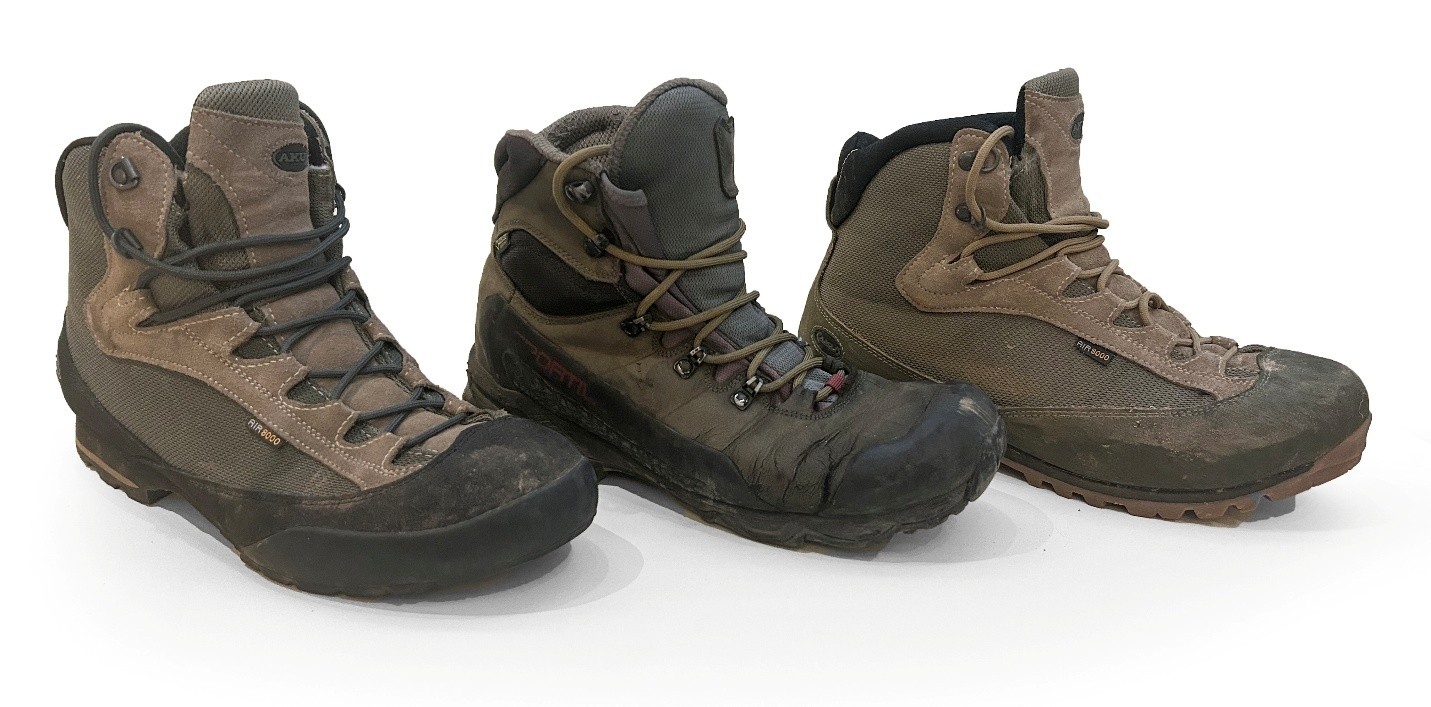
First and foremost, there is no perfect boot for every type of terrain. If you do this long enough you may end up with several boots—the right pair for the day.
Arch support– One of the most misunderstood areas of foot mechanics is the understanding of arch articulation and its support mechanisms. Getting the right amount of arch support can be a bit of an art and require “trial & error” to find the optimal amount for your feet.
How much arch support?
A common phrase I hear a lot is “you need good arch support for rucking”. What does that even mean? It’s commonly interpreted that “good” means “more”. This couldn’t be further from the truth. You can indeed have too much. To decide how much is optimal, we need to understand how midfoot mechanics’ work.
To be able to take a deep breath in, you must have been able to first breath out; to be able to breathe out you must have been able to first breath in. In a simplistic way your foot does a similar thing, it will pronate and then supinate at different points in its cycle during gait. The midfoot, typically where arch support is found in footwear is to prevent a “hard” collapse onto the bones and soft tissue. This collapsing of the arch is a natural and required part of pronation (breathing out). Phase 1- During pronation, kinetic energy is stored through the musculature of the foot and lower leg. Phase 2 – Pronation reaches its end point and starts to redirect that energy into the explosive part of gait called supination (breathing in). The movement from pronation to supination is what generates forward momentum. We also need to take into consideration that one person’s architectural structure of their foot may be different than the next. While I may have a high arch, you may have a flatter foot. This is important when matching a boot to your foot. If you’re flat footed, don’t buy an insole with a high arch.
Furthermore, if one decides to use an overly stiff insole, the arch will be unable to fully collapse during the pronation phase, therefor limiting the ability to generate explosive force through the foot. This will result with the hips having to overwork to generate the additional needed force.
In rucking this is where arch supports can become problematic, we need arch support while carrying additional weight. However, if the arch support is too rigid, motion is diminished. If the arch support is too soft, the tissues on the bottom of the foot can become inflamed from repetitive hard collapsing. In non-loaded conditions, arch support becomes less needed, however as distance and load is increased so should the rigidity of the insole, but not too much. The ideal insole is a dynamic one, it should give under pressure with resistance. The resistance factor of the insole is determined by how much weight you are carrying.
Every foot is different, my recommendation is to find several different insoles to experiment with until you find the perfect one for you.
Tread–
The tread on the sole is like the tires which provide traction. Selecting a boot for road marching would prefer a smoother sole, while selecting a boot for dirt or mud trails would prefer a lugged sole. Pay attention to the side and heel edges around the perimeter of the sole. They are equally as important as the main sole. A rounded edge is great for pivoting and changing direction, but lacks grip offroad and cannot bite into hills, especially leaf litter—this is how I tore my MCL. Urban assault boots are terrible for anything offroad. Whereas a stiff mountaineering boot will punish your joints on a road march.
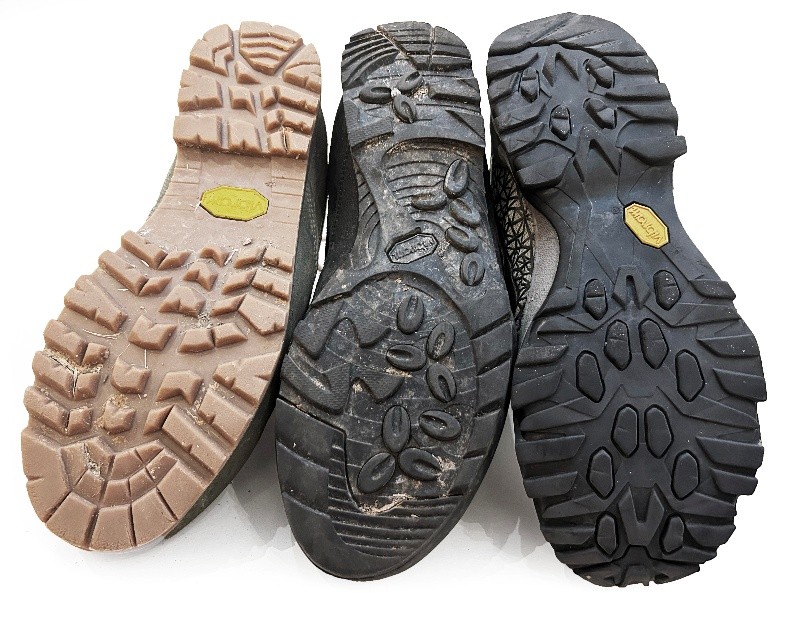
Shock absorption– As this is needed for the reduction of compressive forces on the body, the trade-off is an increased foot height above the ground. One might believe that more shock absorption is better.
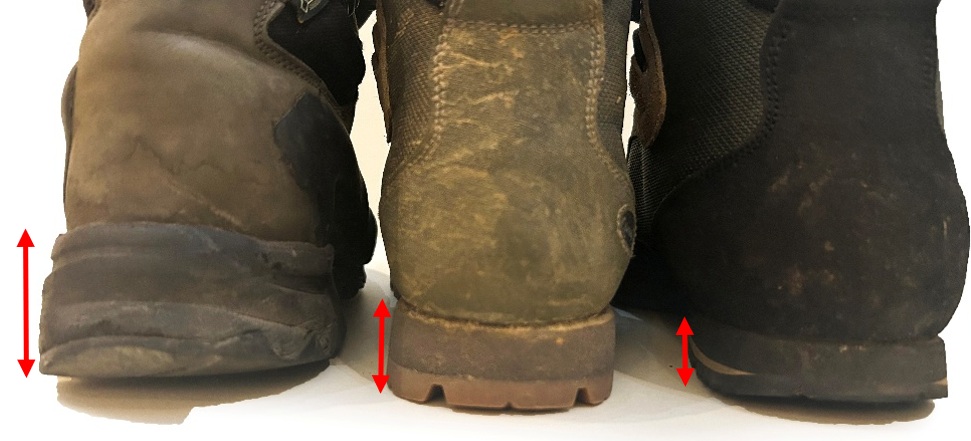
Unfortunately, the trade-off is that the higher your foot is above the ground, the more likely you are to roll an ankle on an off-camber rock or root. Leverage always wins, the further away from the ground, the larger the moment arm acting on the inversion and eversion axis of the foot—Pick accordingly to the terrain.
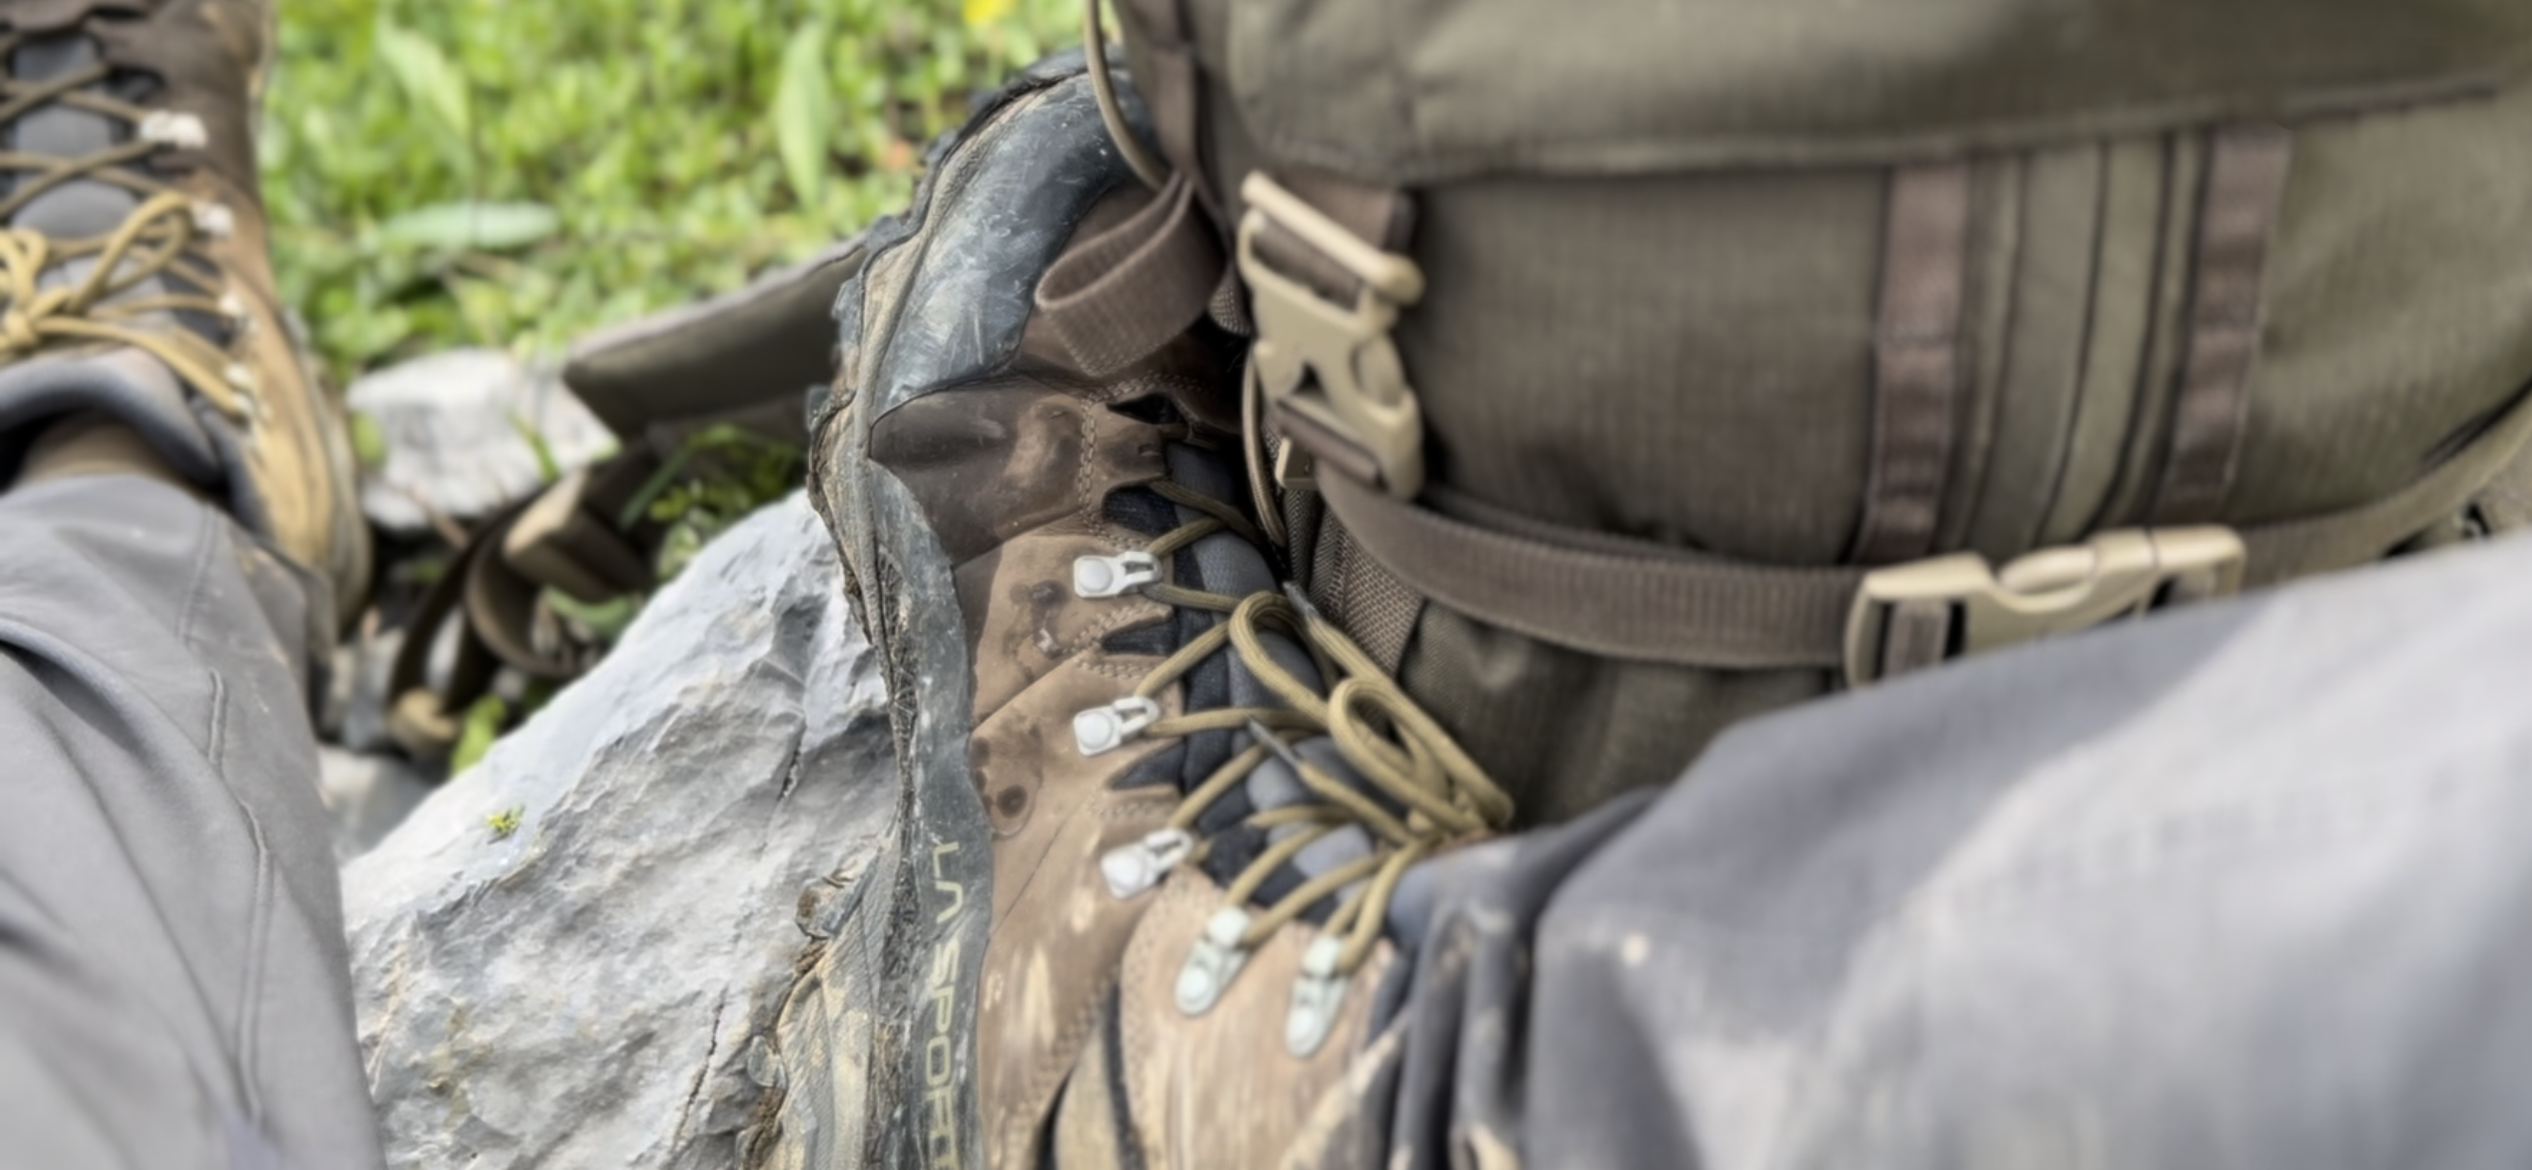
Sole stiffness– There are also tradeoffs for sole stiffness. A stiff sole found in a mountaineering boot (image 3 below) can provide a ton of support for heavy weight and rough terrain. This extra support will protect the smaller bones of the foot from stress fractures; however, it sacrifices forefoot movement. Allowing the forefoot to dorsiflex (bend upwards) as it rolls under the hips is required for normal gait. However, if too much load is on the body due to a heavy rucksack, it is smart to support the forefoot with some added stiffness. This will provide needed metatarsal and sesamoid bone protection. The tradeoff with reduced forefoot movement is a smaller stride. With a stiff sole your hips have to generate more force to compensate for the deficit in foot propulsion; over distance this will exhaust your hips faster. With a flexible boot and a lightweight sole (Image 1) you will increase speed and efficiency, but with limited protection—pick wisely for the day.

Toe-box– Everyone has a slightly different shaped foot; some feet are wider than others. Your boots’ interior footprint should match the width of your foot. It is crucial that your foot is allowed to naturally splay outwards during specific parts of its cycle of supination and pronation.
Ankle support– One important area of a boot is the proper amount of ankle support. Depending on the load and terrain, the need for support will vary. There are several muscles in the leg which cross the ankle and are used to generate force. Much like in the arch and forefoot, these too need to be able to generate force. Imagine walking with zero ankle mobility, how would that feel? You’d be walking while recruiting it all in the hips (picture a woman walking in stilettos). This can happen with boots which are too stiff or tight around the ankle. The ankle needs to move freely while rucking, however the musculature can be overworked causing it to become fatigued and possibly inflamed. This means we do need ankle support for rucking, but be cautious on going too tight with it. If you notice your hips becoming overworked, consider shifting more load back to the feet by decreasing the support mechanisms of the boot. The opposite is required if you notice your feet becoming overworked.
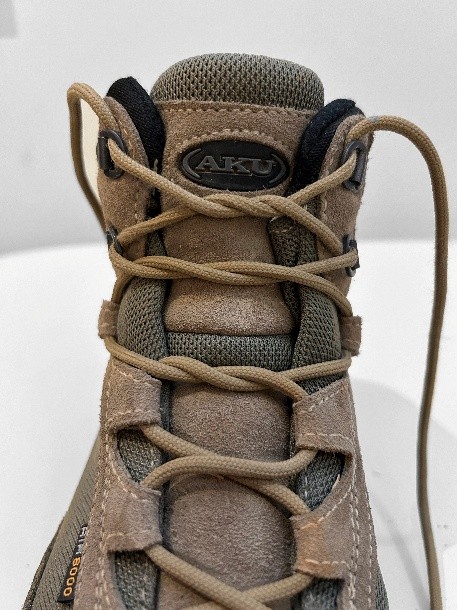
If you start to notice plantar facia pain (bottom of foot) or peroneus brevis/tertius pain (lateral foot and ankle), you probably need more ankle support. This can be done through the design of the boot, or by adjusting lacing tension and pattern around the ankle. Personally, I recommend several levels of friction knots before you tie your final knot, this will allow you to decide where movement or restriction occurs.
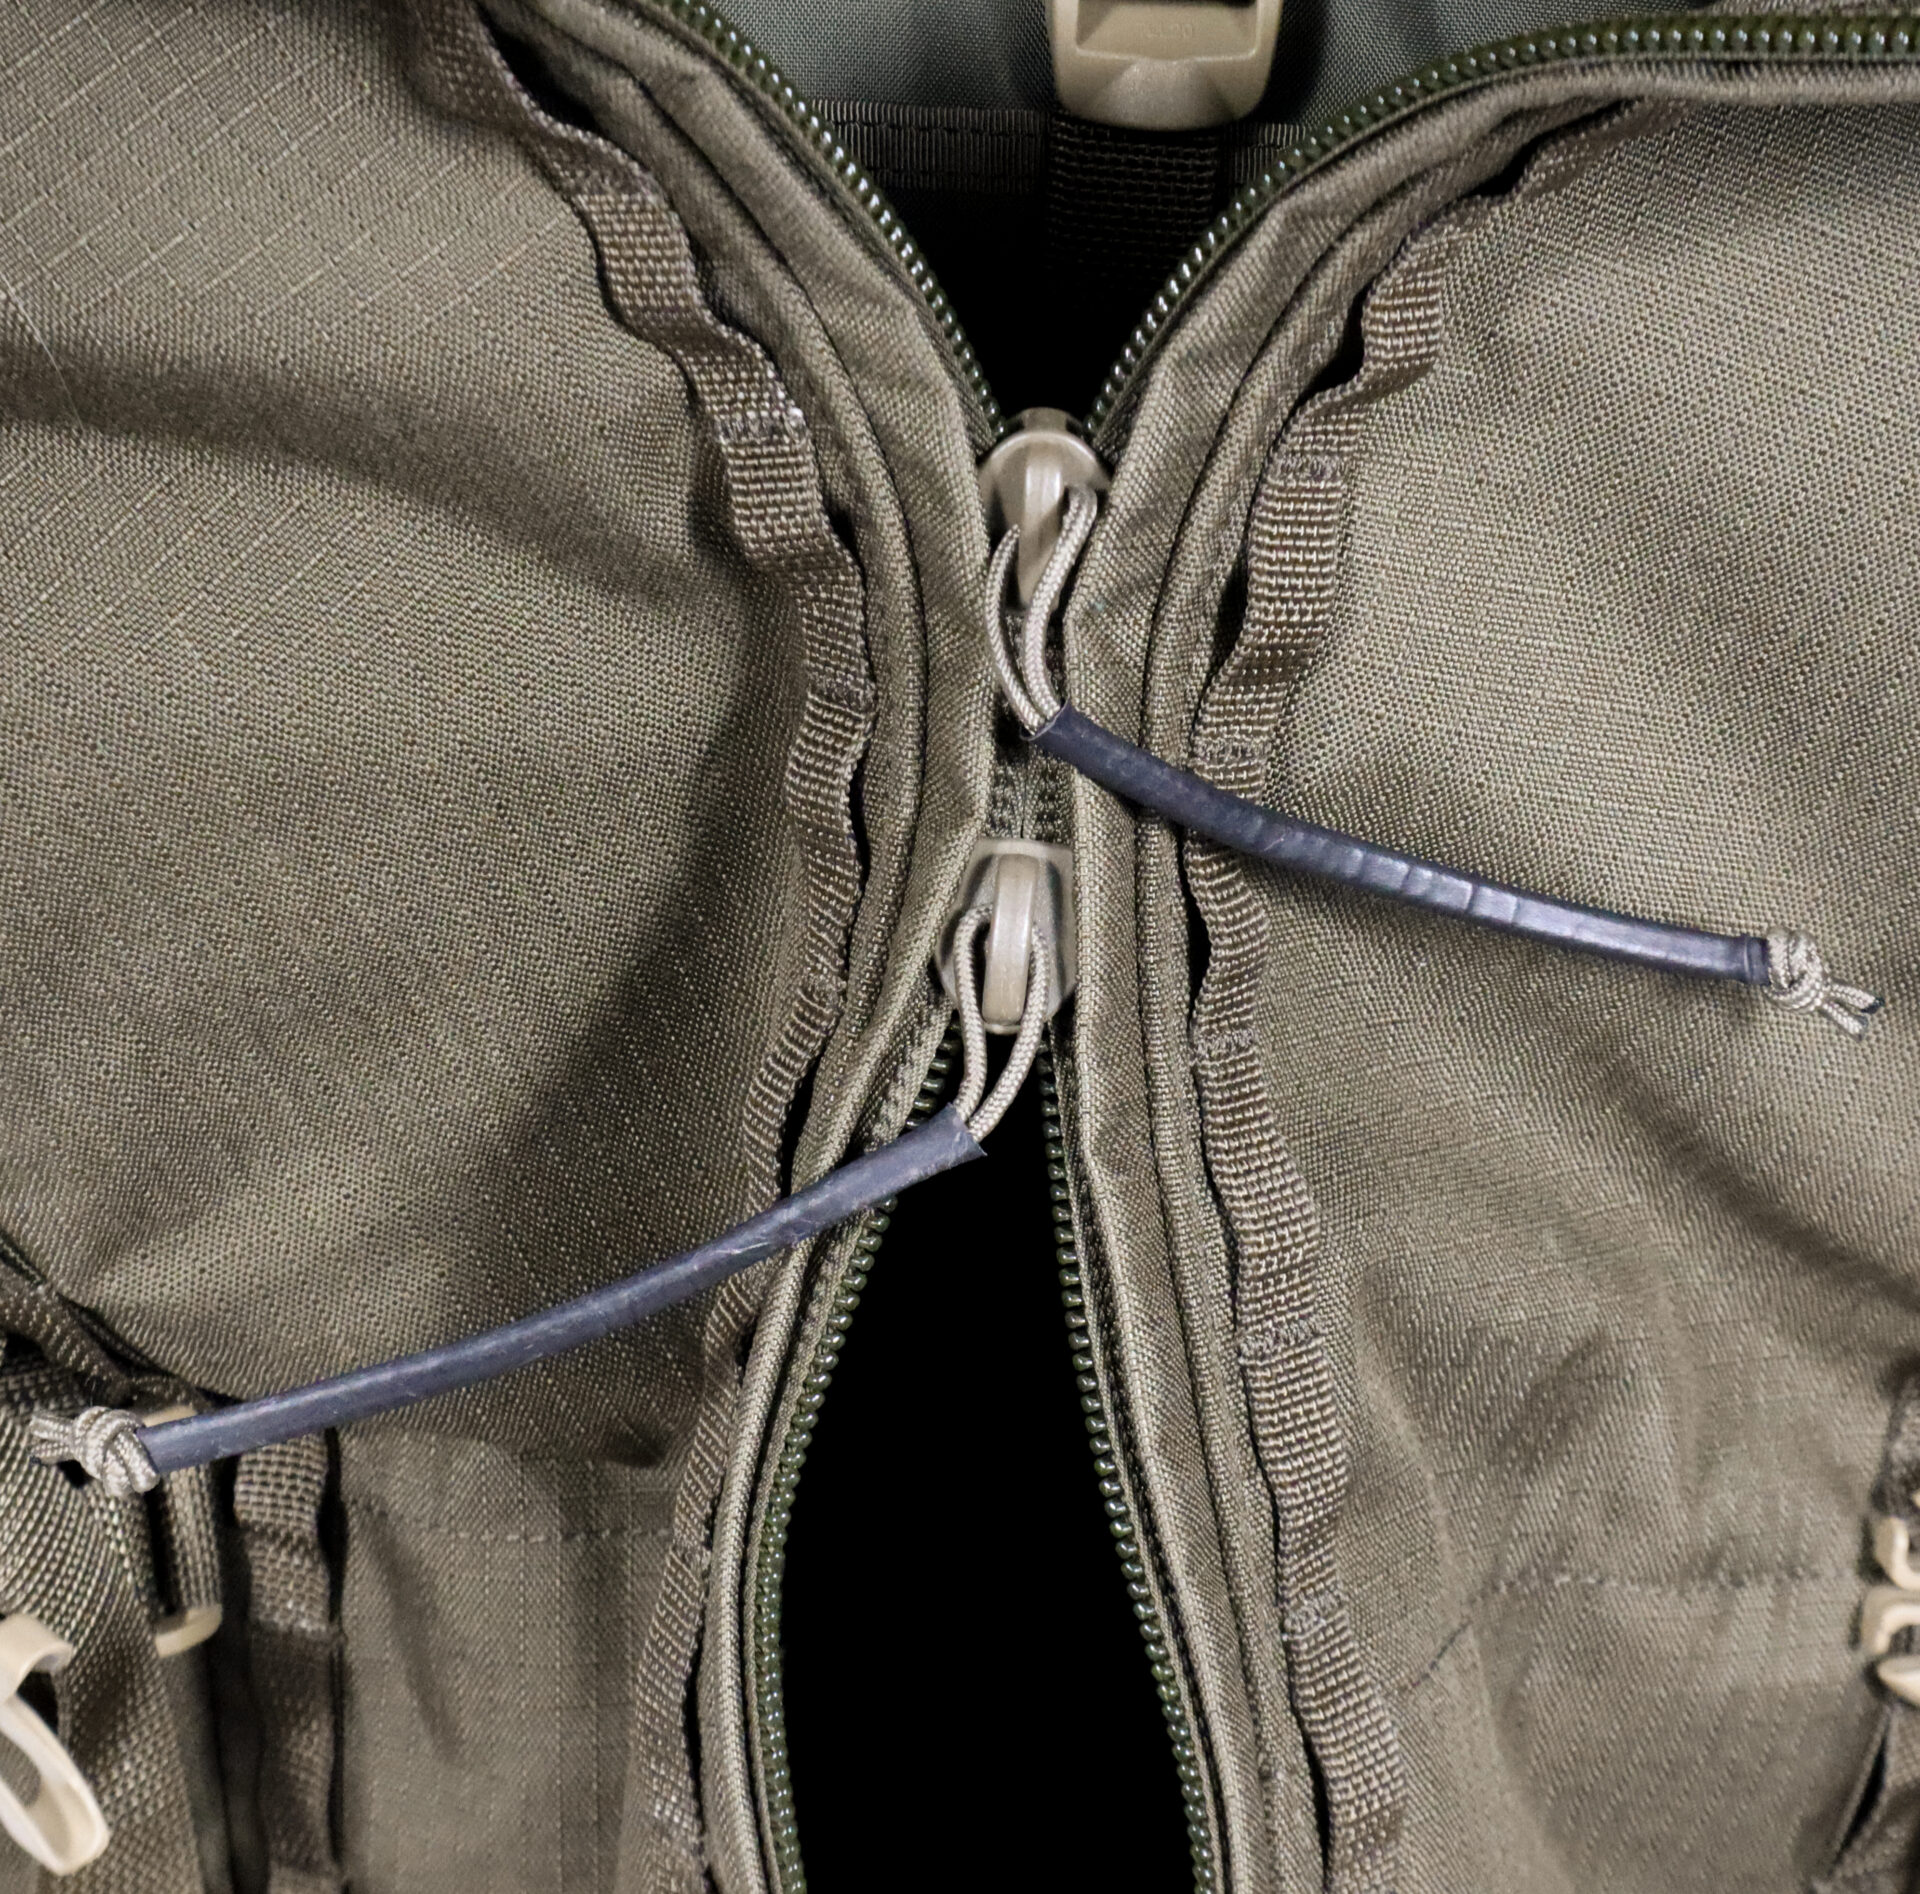
Laces– There have been more broken boot laces than one can count. Consider using 550 cord to give more strength and friction to the laces. The additional friction of 550 cord will aid when adjusting lace tension at each level. Packing an extra set of 550 in the lid is a good idea for your buddy when his laces eventually break. Contrary to what some might think, there is not an ultimate way to tie your boot. Experiment with the many lacing patterns and knot techniques floating around the internet. Find which works best for your needs. They all have developed over time geared towards different activities.
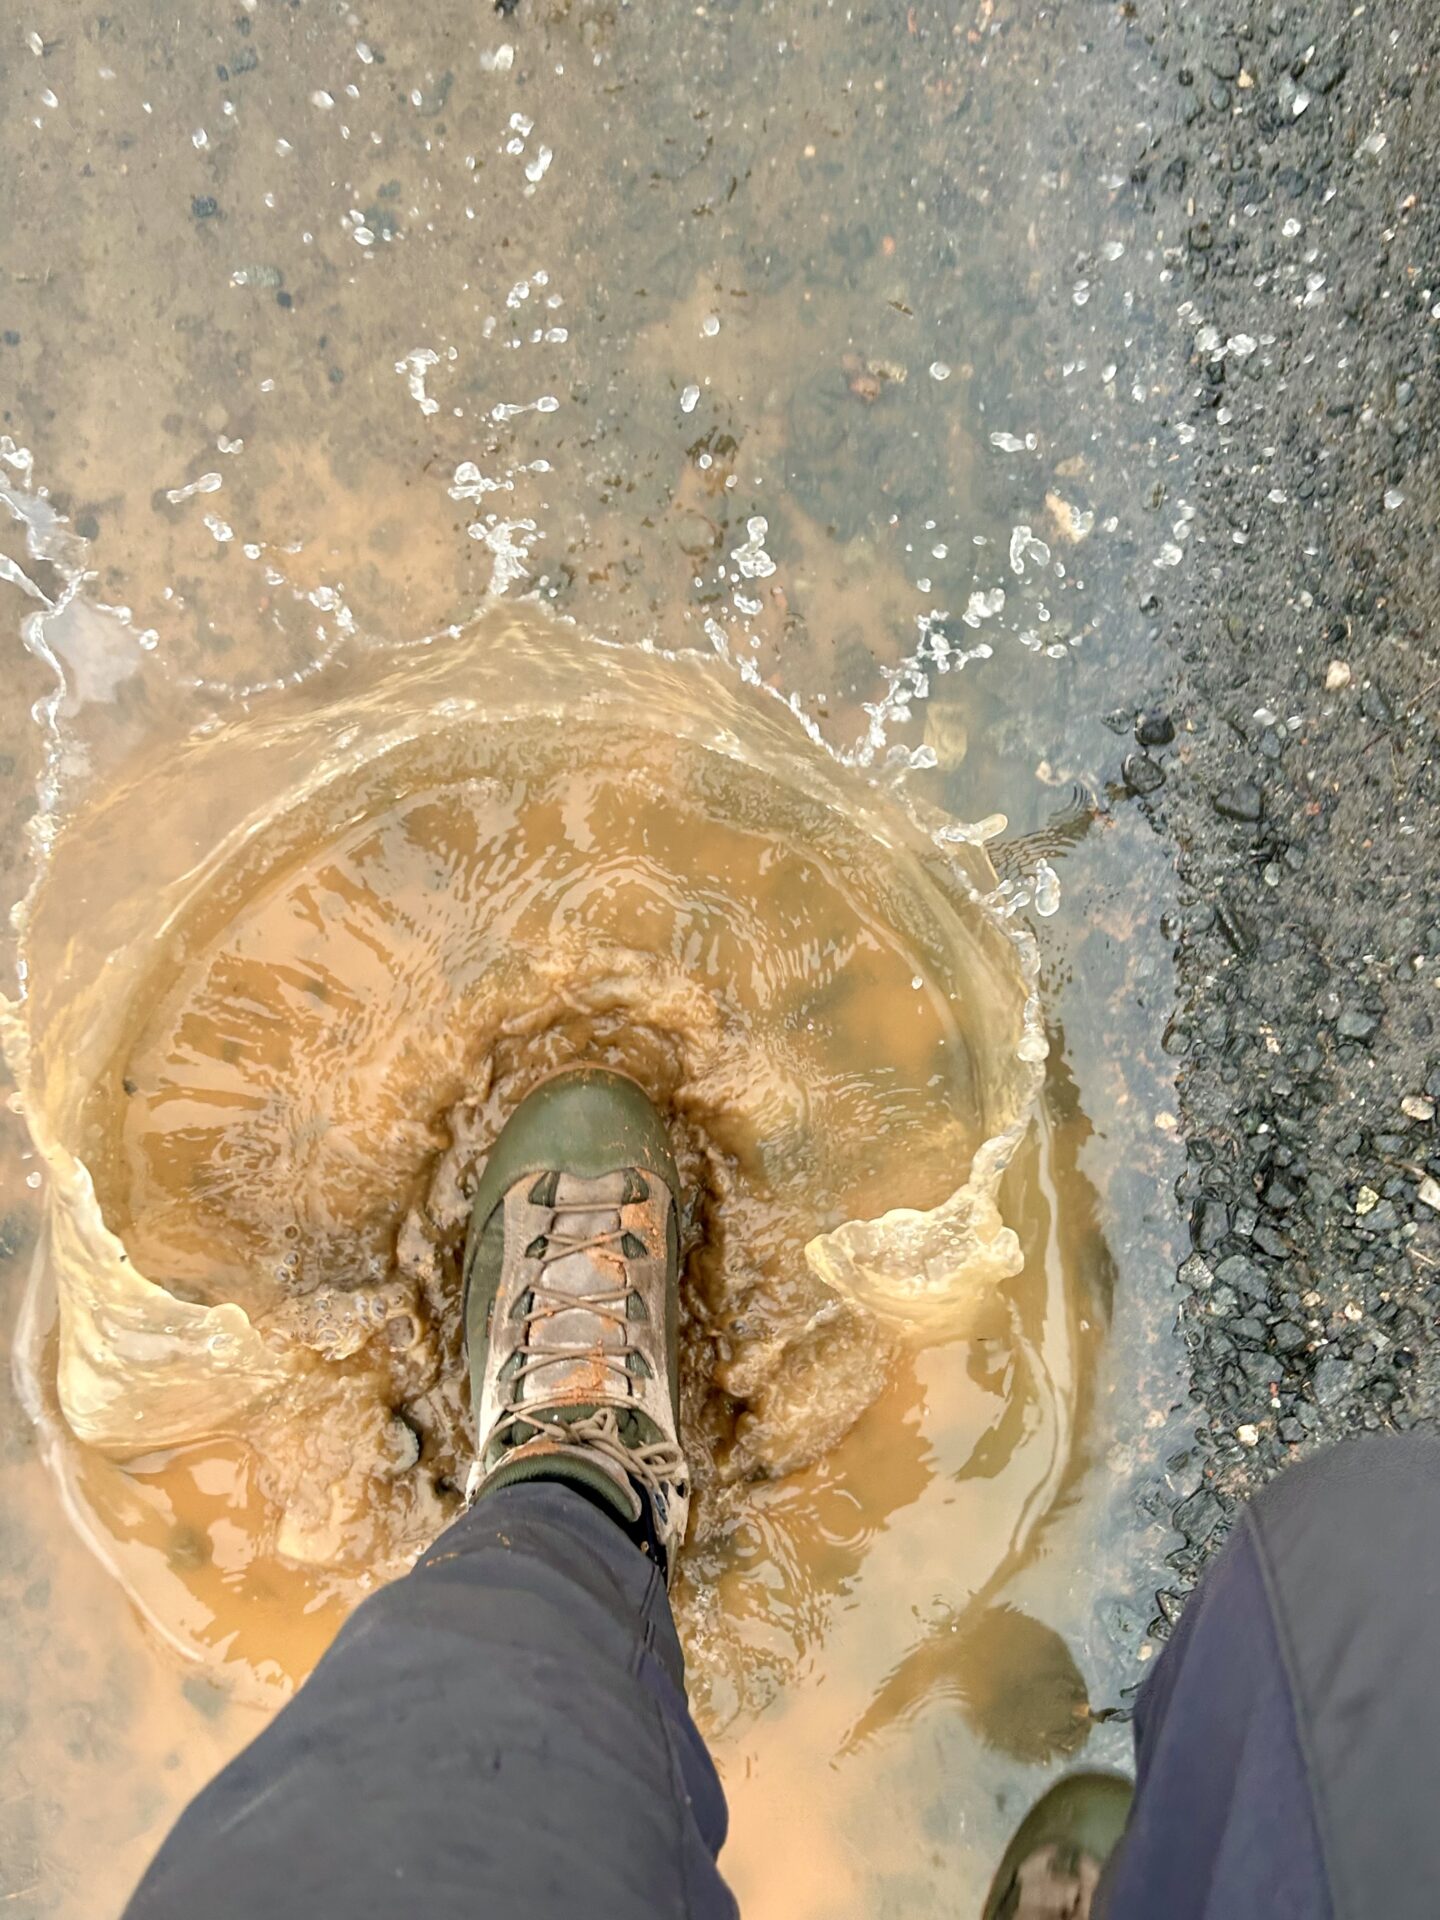
Socks– This depends on personal preference, find out what works for you. I believe the kind of socks one should wear are dependent on the climate and environment. In cold wet environments I prefer a double layer, usually a sock liner paired with a shin high waterproof merino wool sock. This keeps your feet dry no matter how much moisture makes its way into the boot. This combo is useful against heavy rain and stream crossings. During hot climates I use a thinner, breathable sock paired with a liner. If it’s a wet place, pack spares, or go with a lightweight waterproof sock—SealSkinz are excellent.
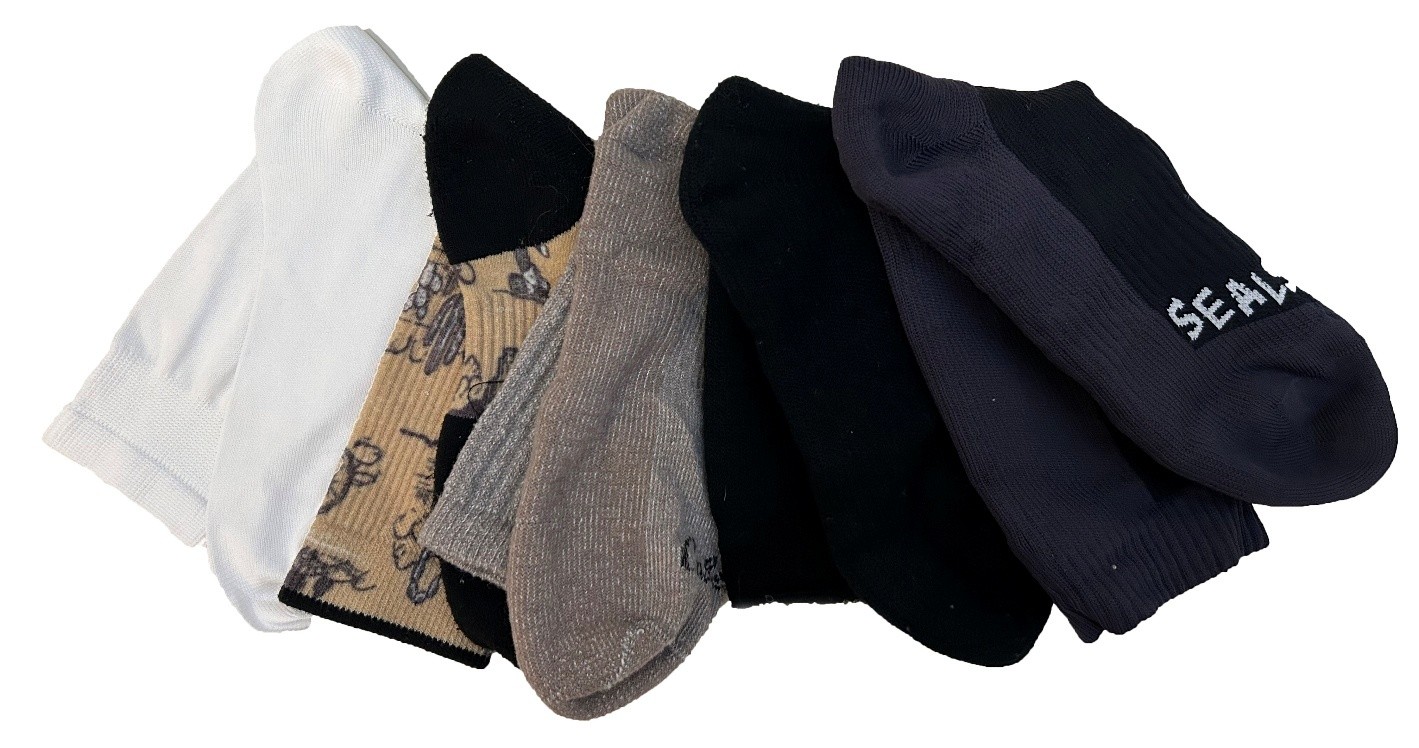
Stay dry– moisture causes the skin around the foot and ankle to become soft and supple. A worst-case scenario is moisture and friction between the skin, and a poorly fitted sock. Sprinkle in some bacteria from that creek crossing a mile back and it’s the perfect environment for a full-blown infection two days later. To combat friction there are several products on the market. I keep it simple with a two-layer system using liners and the main sock. Having two layers allows the inner sock to stick to your feet while the second layer can slide with ease when it grabs the interior of the boot—not your skin. This technique redirects the friction in-between the two sock layers, rather than a sock layer and your skin. When in the field for several days, ensure that you rotate socks and dry them out when feasible.
—Most importantly keep your feet clean and dry as much as possible—
Climate– The age-old debate, waterproof boots vs drainable. This I can’t answer for you, it depends. IF you are in a freezing wet or snow climate, waterproof with gaiters is the way to go. In a hot tropical climate where drying can actually occur, full drainage and fast drying makes more sense. That being said, figure out what works best for your climate and terrain.
Dorsal side protection- While rucking, depending on terrain you may want to have a highly protected top side and toe area on your boots.
Austere environments can cause soft topped boots to become destroyed easily, possibly even fracturing your foot if a rock were to roll on it. Consider a boot which fits the requirements for the terrain.
Sizing– For each category of boot, if you intend on doing this year-round in hot and below freezing temperatures. I would recommend having two pairs, your summer size and winter size. My winter boots are a half size up which allows me to use thicker socks for warmth. When you move, your feet will swell from increased blood flow—you need to account for this. If your feet cannot get adequate blood flow in a cold environment, this is a recipe for frostbite. If you feel numbness in the 1st or 5th toe, or pain in the center of the forefoot, this is an indicator your boots are too small, try loosening up the laces around the toe-box. If this doesn’t relieve symptoms, go up in size and gift the boots to a friend who can fit them.
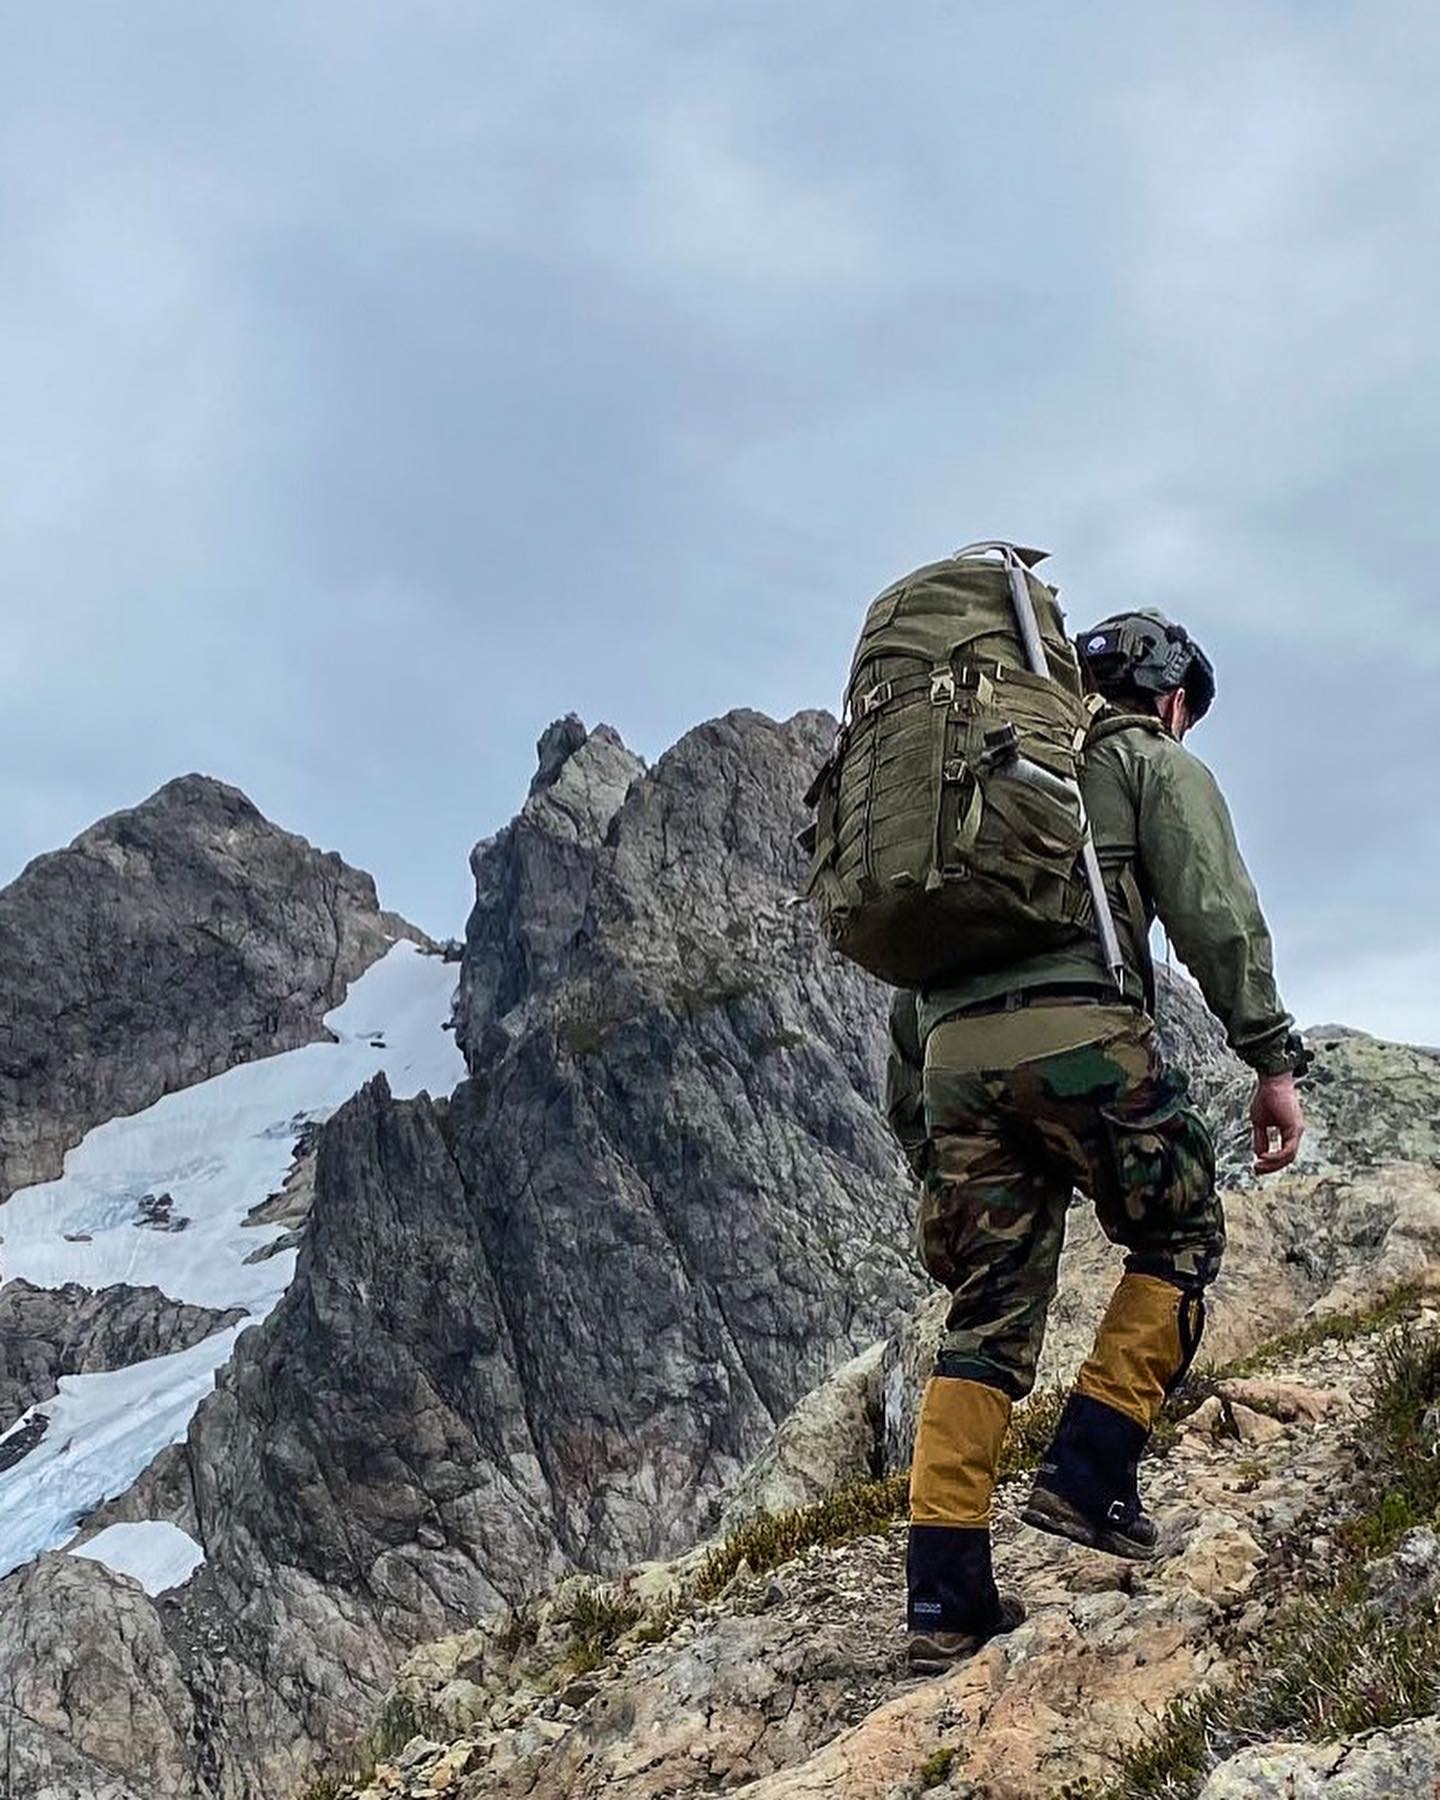
Break in-There are boot manufactures out there who claim their boots don’t need to be broken in. Regardless of their claims every boot needs to be broken in, some more than others. Factor this into your training schedule as you transition to new boots over time. There is no science to breaking in a boot as they are all different and made of a wide range of materials. Wearing the boots and allowing them to break into your foot is the only way, it takes time.
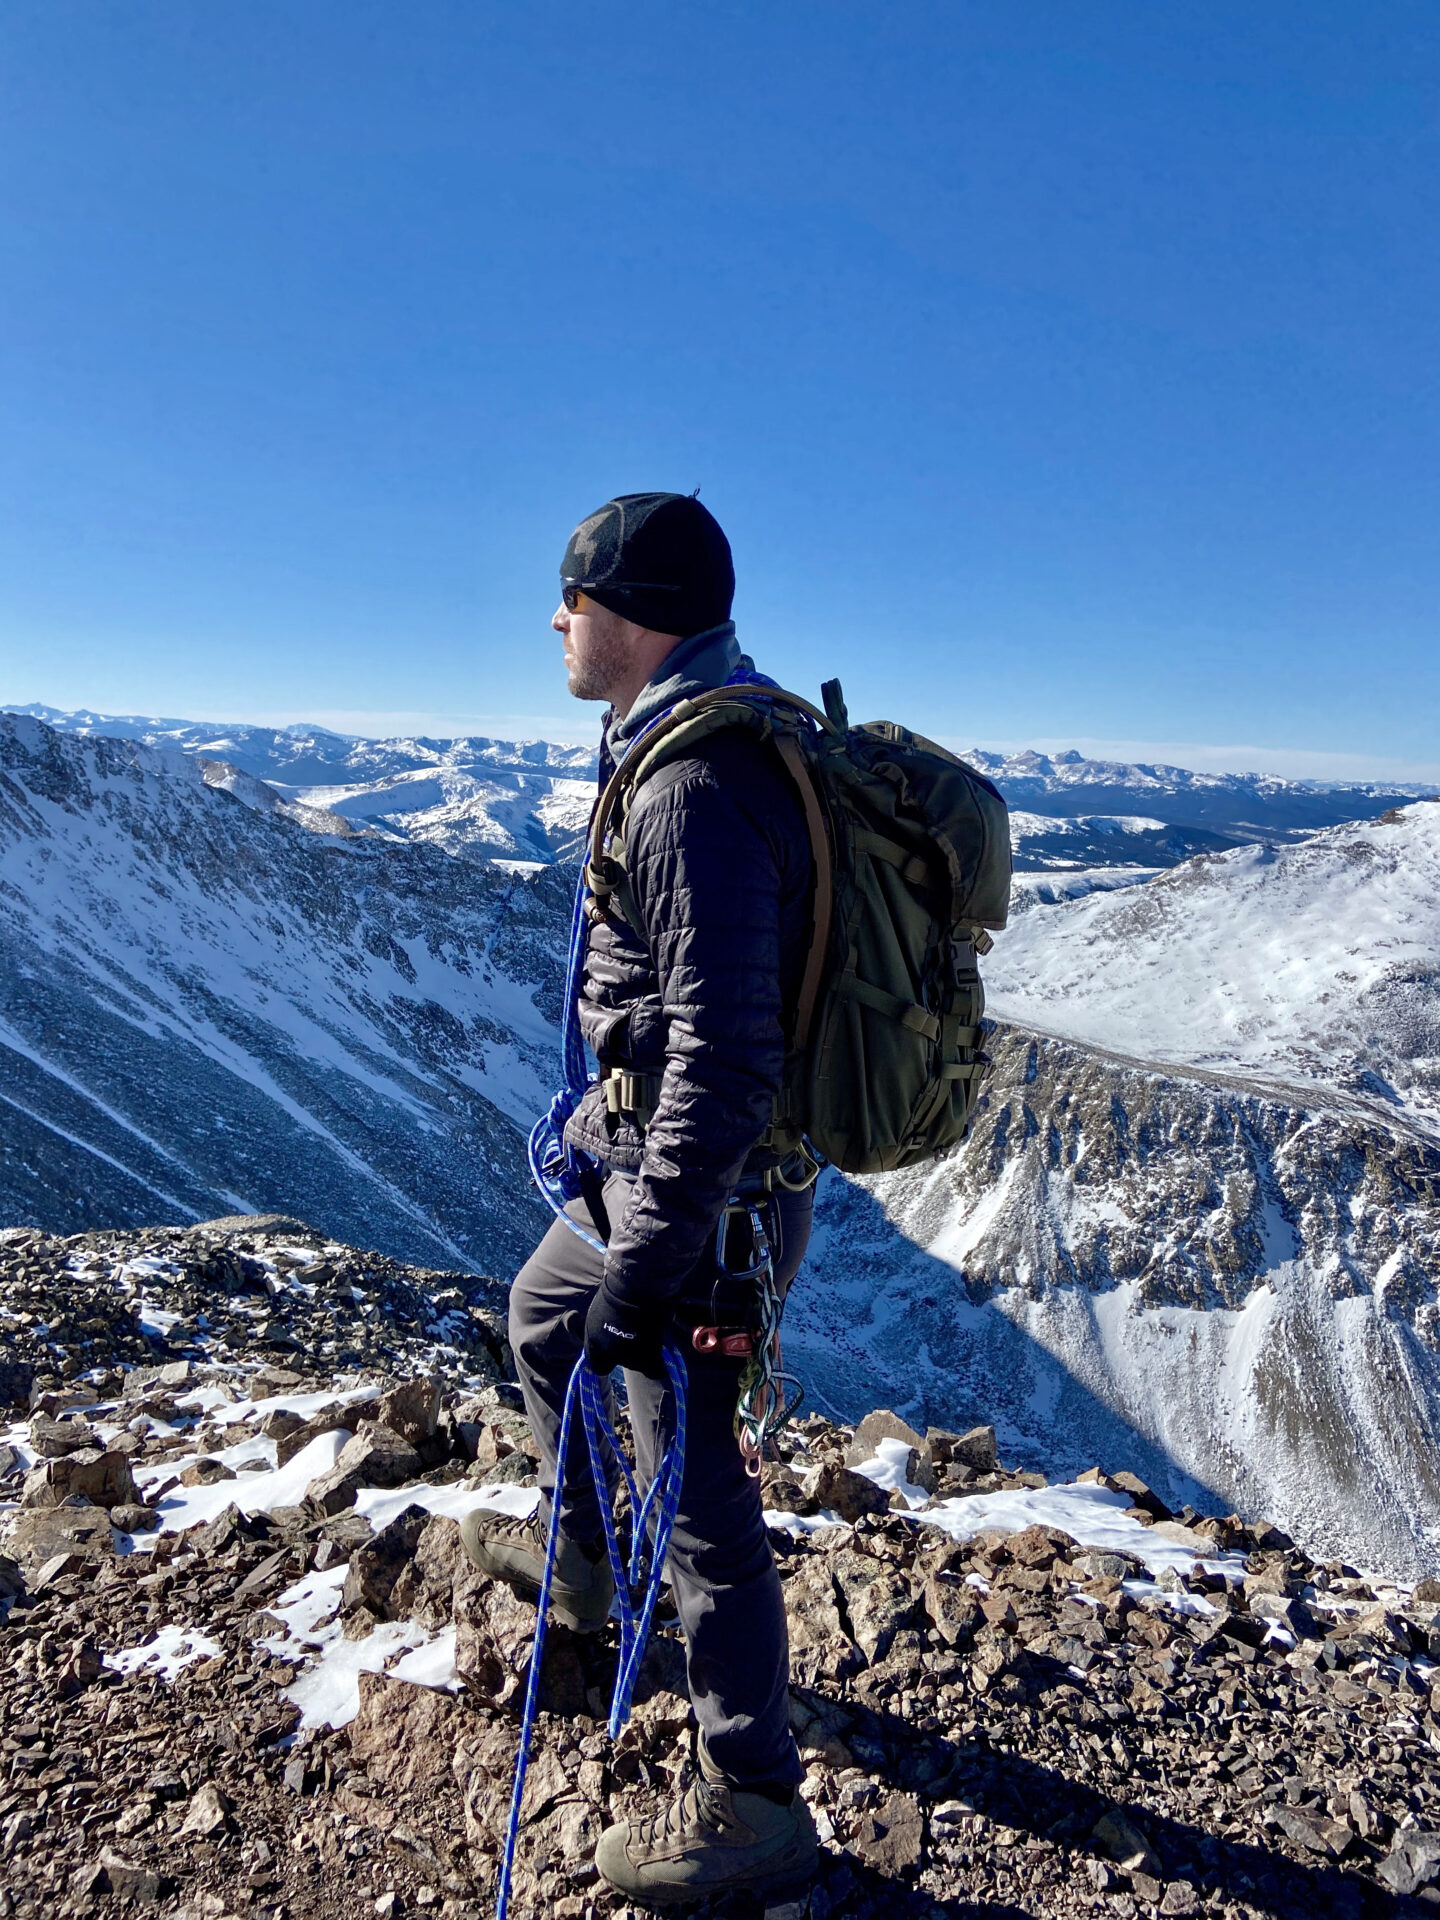
In the photo above, I ignored this principal and barely broke in my boots before the ascent. This climb was to tackle four separate 14ers in one day, I successfully completed it, but it was not enjoyable. I learned the hard way. My big toe swelled painfully for a few days and went black and blue. Then two weeks later a nice little final surprise—the toenail fell off—forcing me to tape my toe for several months as the new nail grew back.
Quick Reference Guide
—Remember, when selecting boots everything is a tradeoff—
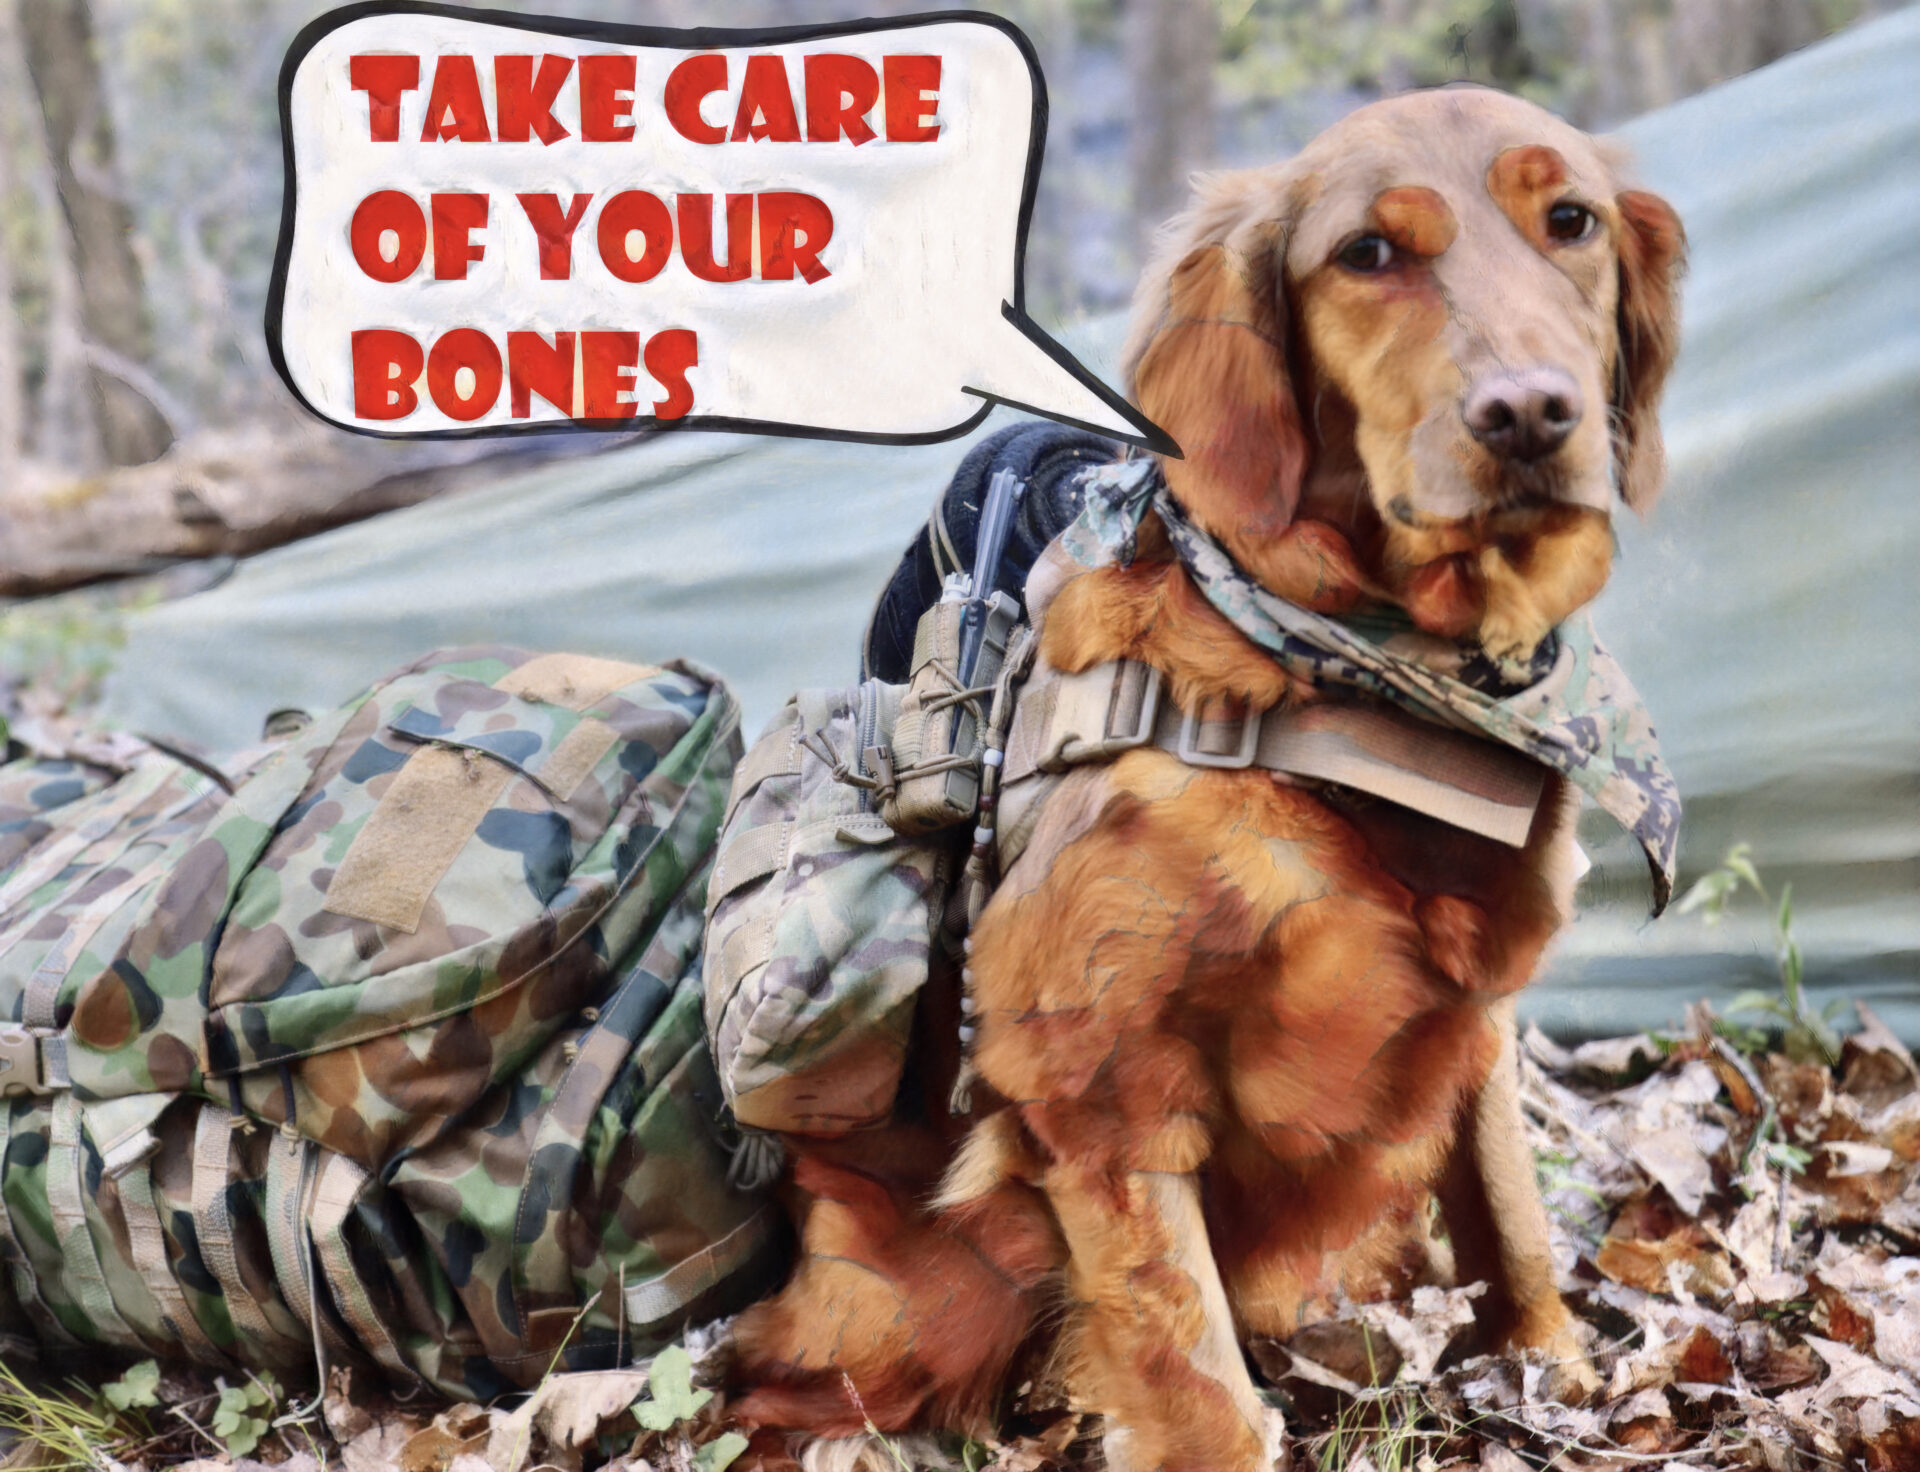
—Take care of your feet first, getting this wrong can lead to a ton of problems—
Resistance training
There is a common misconception about rucking; I have heard some mainstream ruck organizations tout it as a substitute for strength training. I have heard “…walking with weight builds muscle, mood, and momentum. (Yes, it counts as strength training Yes, it boosts bone density. Yes, it’s for you)” end quote…
To be perfectly clear, it is not, nor is it good for building strength like squats and lunges are good for. It does not count as strength training. NOR IS IT FOR EVERYONE, I can think of a plethora of conditions which rucking would be highly irresponsible and contraindicated to recommend to someone.
Rucking does indeed challenge the muscular system with an increased resistance compared to cardiovascular training, like running. However, it is not an excuse if you have been skipping leg day.
The reality is that rucking isn’t an adequate amount of resistance for gaining strength. Rucking is excellent at improving your ability to carry load while conditioning the joints for extended distances. I like to use the phrase, “rucking hardens you”; and it does it better than just strength training alone. However, rucking gets you better at medium resistance endurance tasks. Long distance running would be considered a low resistance endurance task. Rucking which has a much higher resistance to running, yet just low enough to prevent exhaustion as seen with high resistance short duration tasks, like weight training.
- Strength training = gets you stronger (high resistance short duration task)
- Cardiovascular training = builds aerobic efficiency (low resistance endurance task)
- Rucking = hardens your bones and your soul (medium resistance endurance task)
—One can only improve their strength through traditional resistance training, which needs to be at a resistance high enough to cause an adaptation through hypertrophy—
Furthermore, even if there were marginal muscular strength increases from rucking, there are still several muscle groups which are completely ignored while rucking. Rucking is not a substitute; it’s its own thing.
Rucking and resistance training should be considered complimentary and completely separate to each other; they both target different things. There may be marginal crossover if we were to look at a Venn diagram, however, they are best implemented as separate activities with their own intrinsic goals. Pair them together to complement each other to achieve your ultimate goal. Doing this is an excellent recipe for a well-rounded approach to strength and conditioning.
Non-Standard Rucking
There are a few other less than common ways to incorporate using a ruck which have functional benefits and convenience. One of my favorite recipes is utilizing a stair climber with a ruck. I live in a fairly flat area of my state and have to drive 45-90 minutes for any semblance of a mountain. As a climber I should probably move. Unfortunately, that’s not an option right now. I have instead incorporated a stair climber into my rucking routine. Typically, three times per week I am on the stairs with a loaded ruck. This is soft on the joints and increases the heart rate well above what road rucking usually does for me. Due to its nature of being a more controlled motion, it is incredibly gentle on the joints. As a climber who needs to mimic ascending a mountain, I find it a good substitute for what I have available to me on a daily basis.
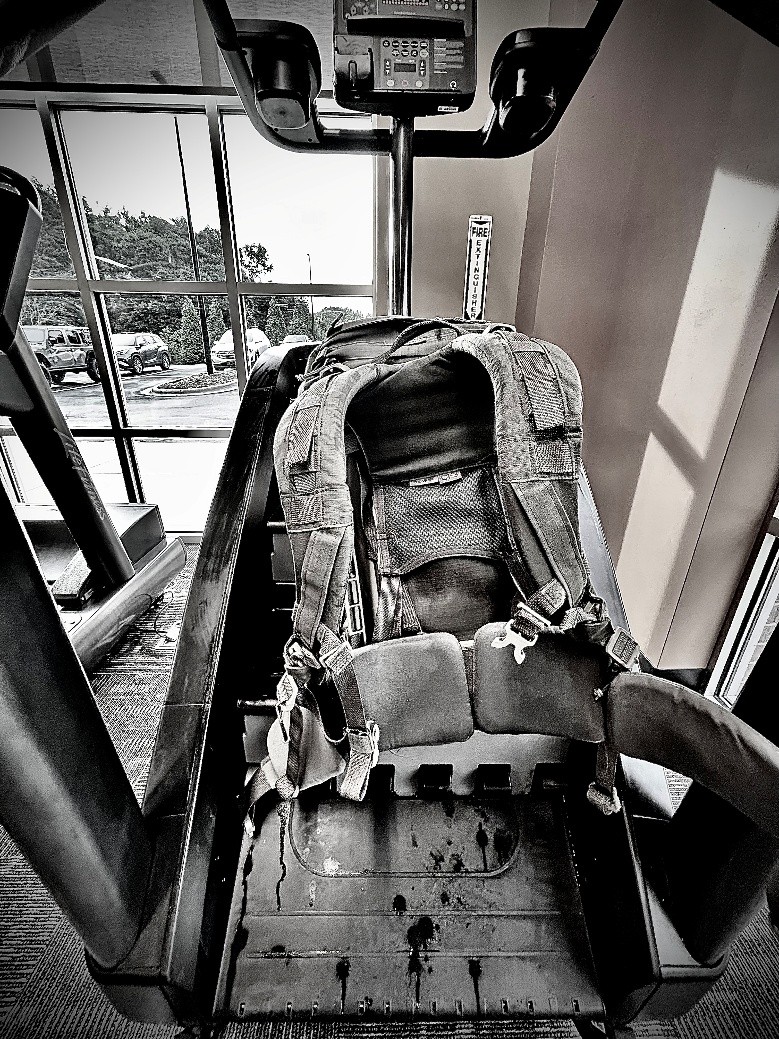
Rucking on treadmills are another option if weather, location or schedule doesn’t permit a road march. Remember, treadmills are a belt moving underneath your feet, 1 mile on a treadmill requires much less effort than 1 mile on the road. A treadmill on a 0-degree incline is a waste of time. Assuming you have used a progression to know your limits, I recommend setting the incline as high as you can tolerate. Having a high incline can simulate walking up hill (to an extent). It’s not the same as a real hill, but if you live in a flat area, it’s the best option. It is also important to note, I see this at the gym all the time. Don’t hang onto the treadmill bars and lean back, this essentially defeats the entire purpose of simulating walking up hill—Don’t be that guy.
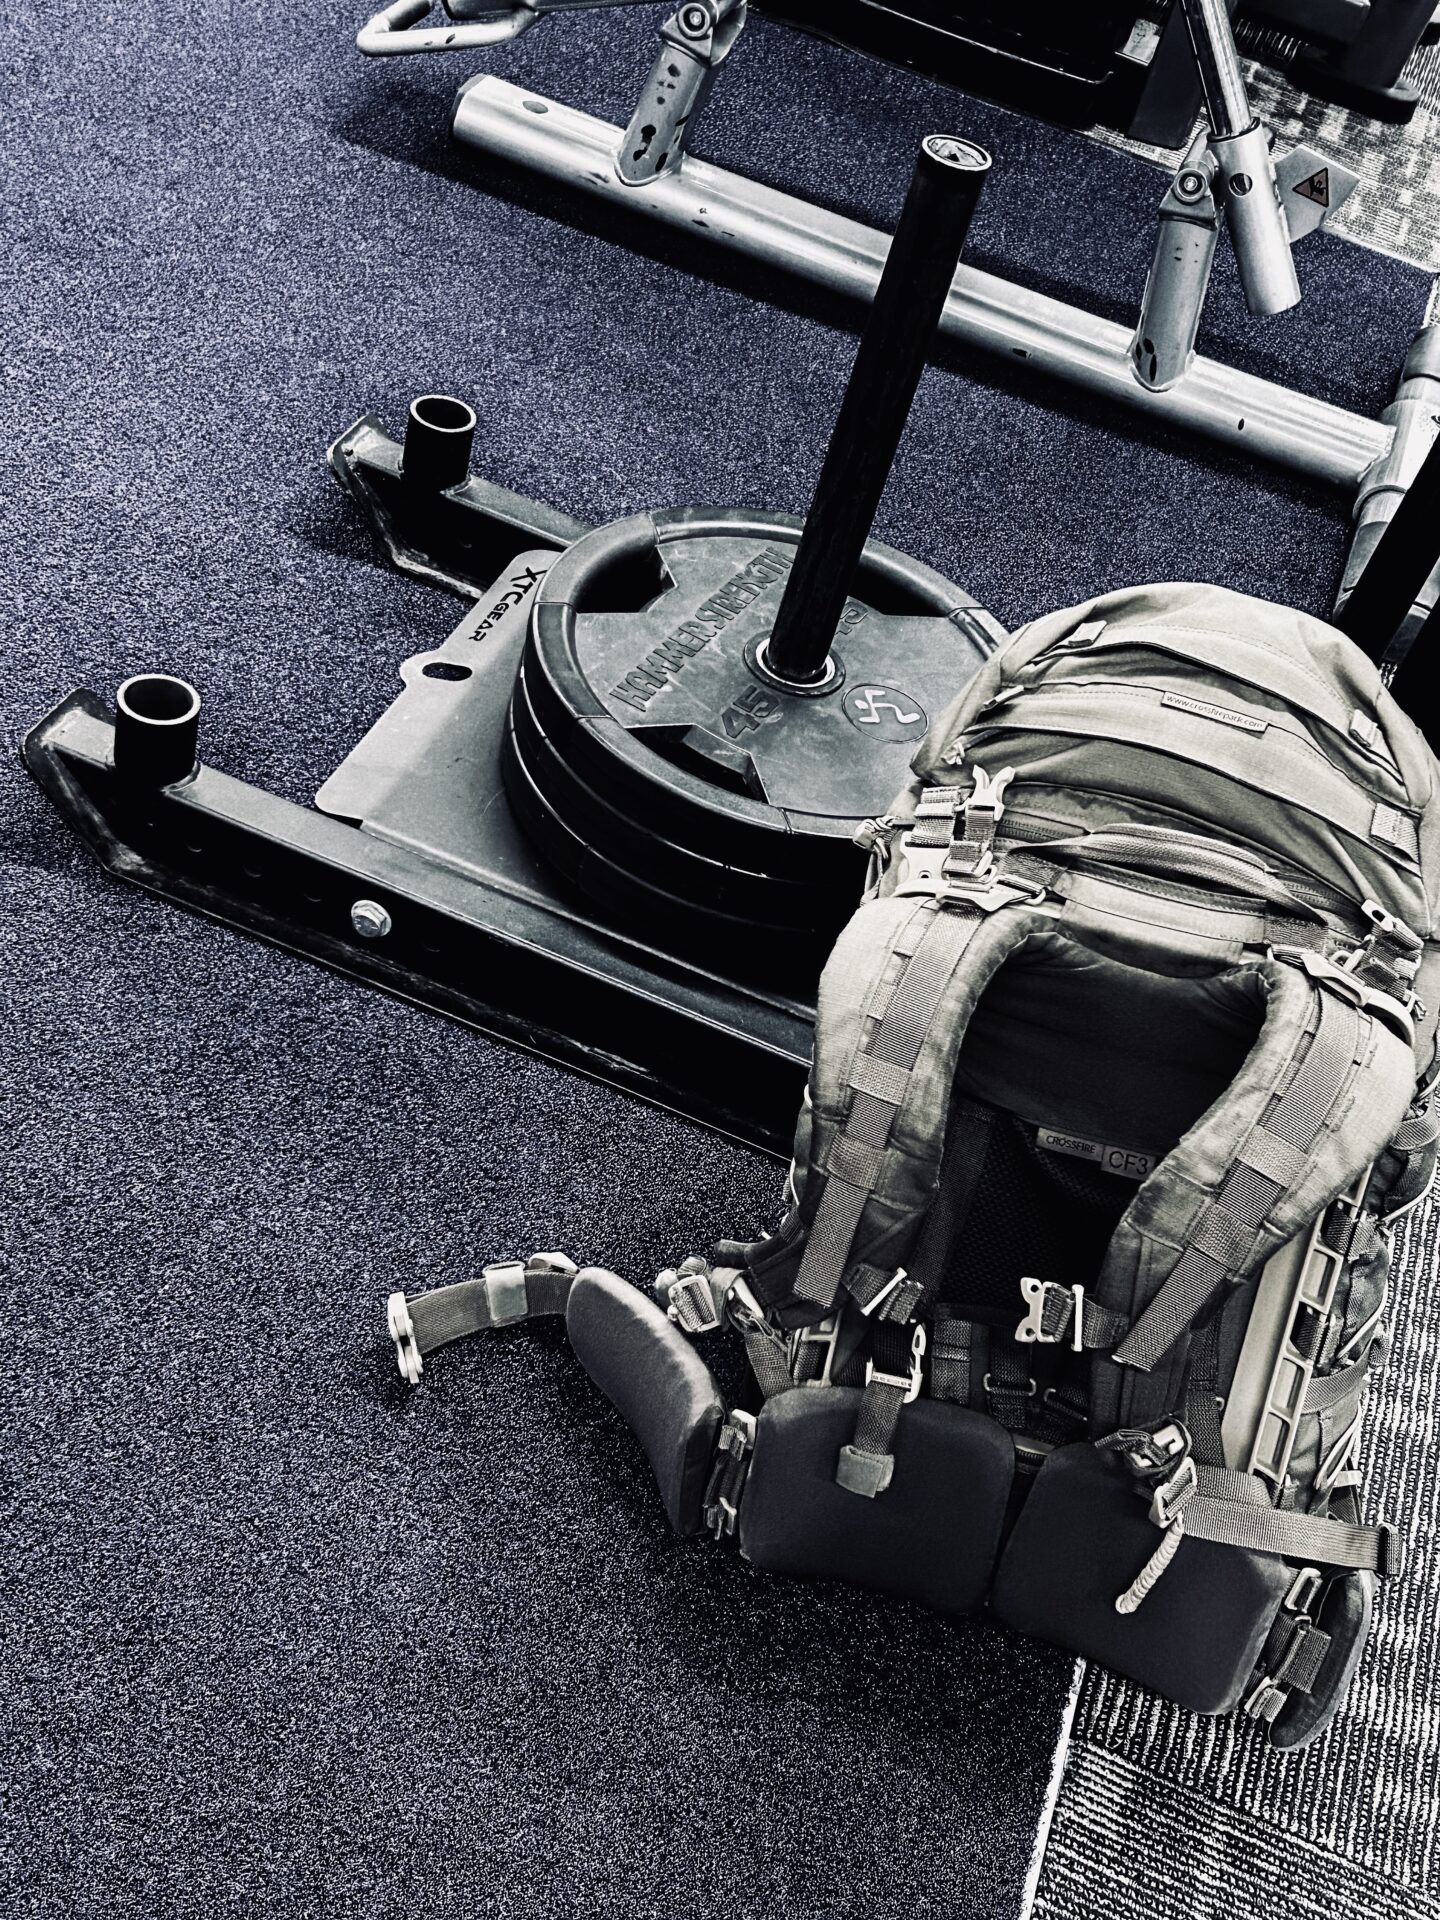
Sleds are a definitely a tasty morsel of punishment, if you are a glutton for it. If you have access to a sled at your gym, take advantage of it. I have added sled pushes while wearing my ruck; this does attract strange looks from the new members, who cares, it’s a real punisher and worth its weight in gold. I will typically set up 15 minutes of sled drives and drags after getting off of the stairs in incremental sets of either distances or time. Make sure you incorporate rests in-between each set. This is more to simulate performing extremely difficult tasks while maintaining wearing a ruck to exhaustion. Psychologically it will build confidence and comfort, it is undoubtedly an excellent form of High Intensity Interval Training (HIIT).
If you are a soldier and rucking to improve functionality while wearing kit. Training in your kit is hugely beneficial for the brain to improve its “muscle memory”. When feasible, wearing a ruck with full kit (plates, webbing, helmet and rifle) is the best way to prepare yourself for doing that exact thing.
Do you remember the first time you shot a rifle while wearing plates, pretty different right? Practicing squats, lunges, kneeling, rising and ready-up drills while lunging with a ruck, will all improve your ability to feel comfortable wearing your kit. Remember the golden rule, micro-progress.
—Finally on a side note, if you have been skipping leg day, just don’t—
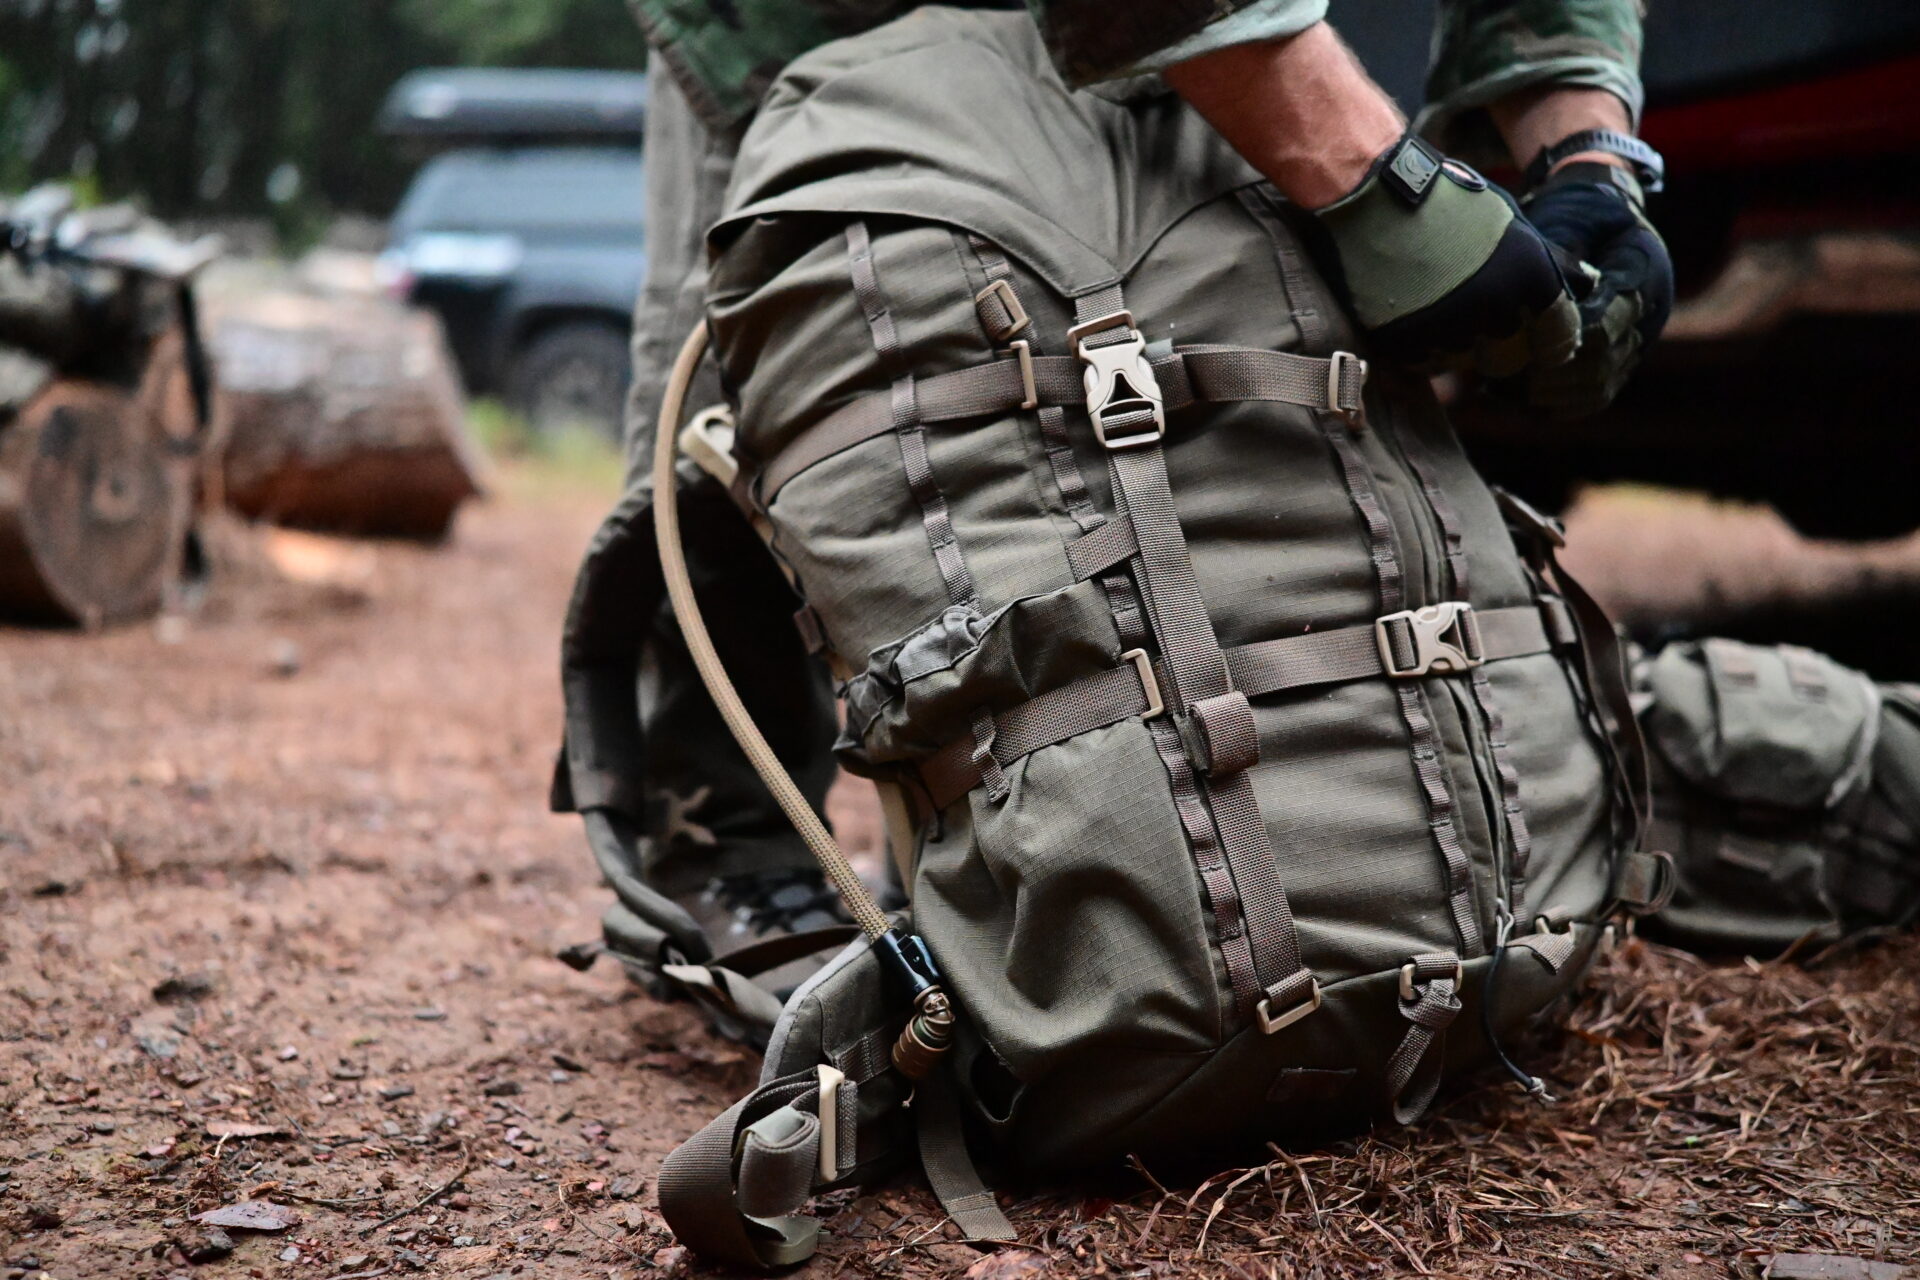
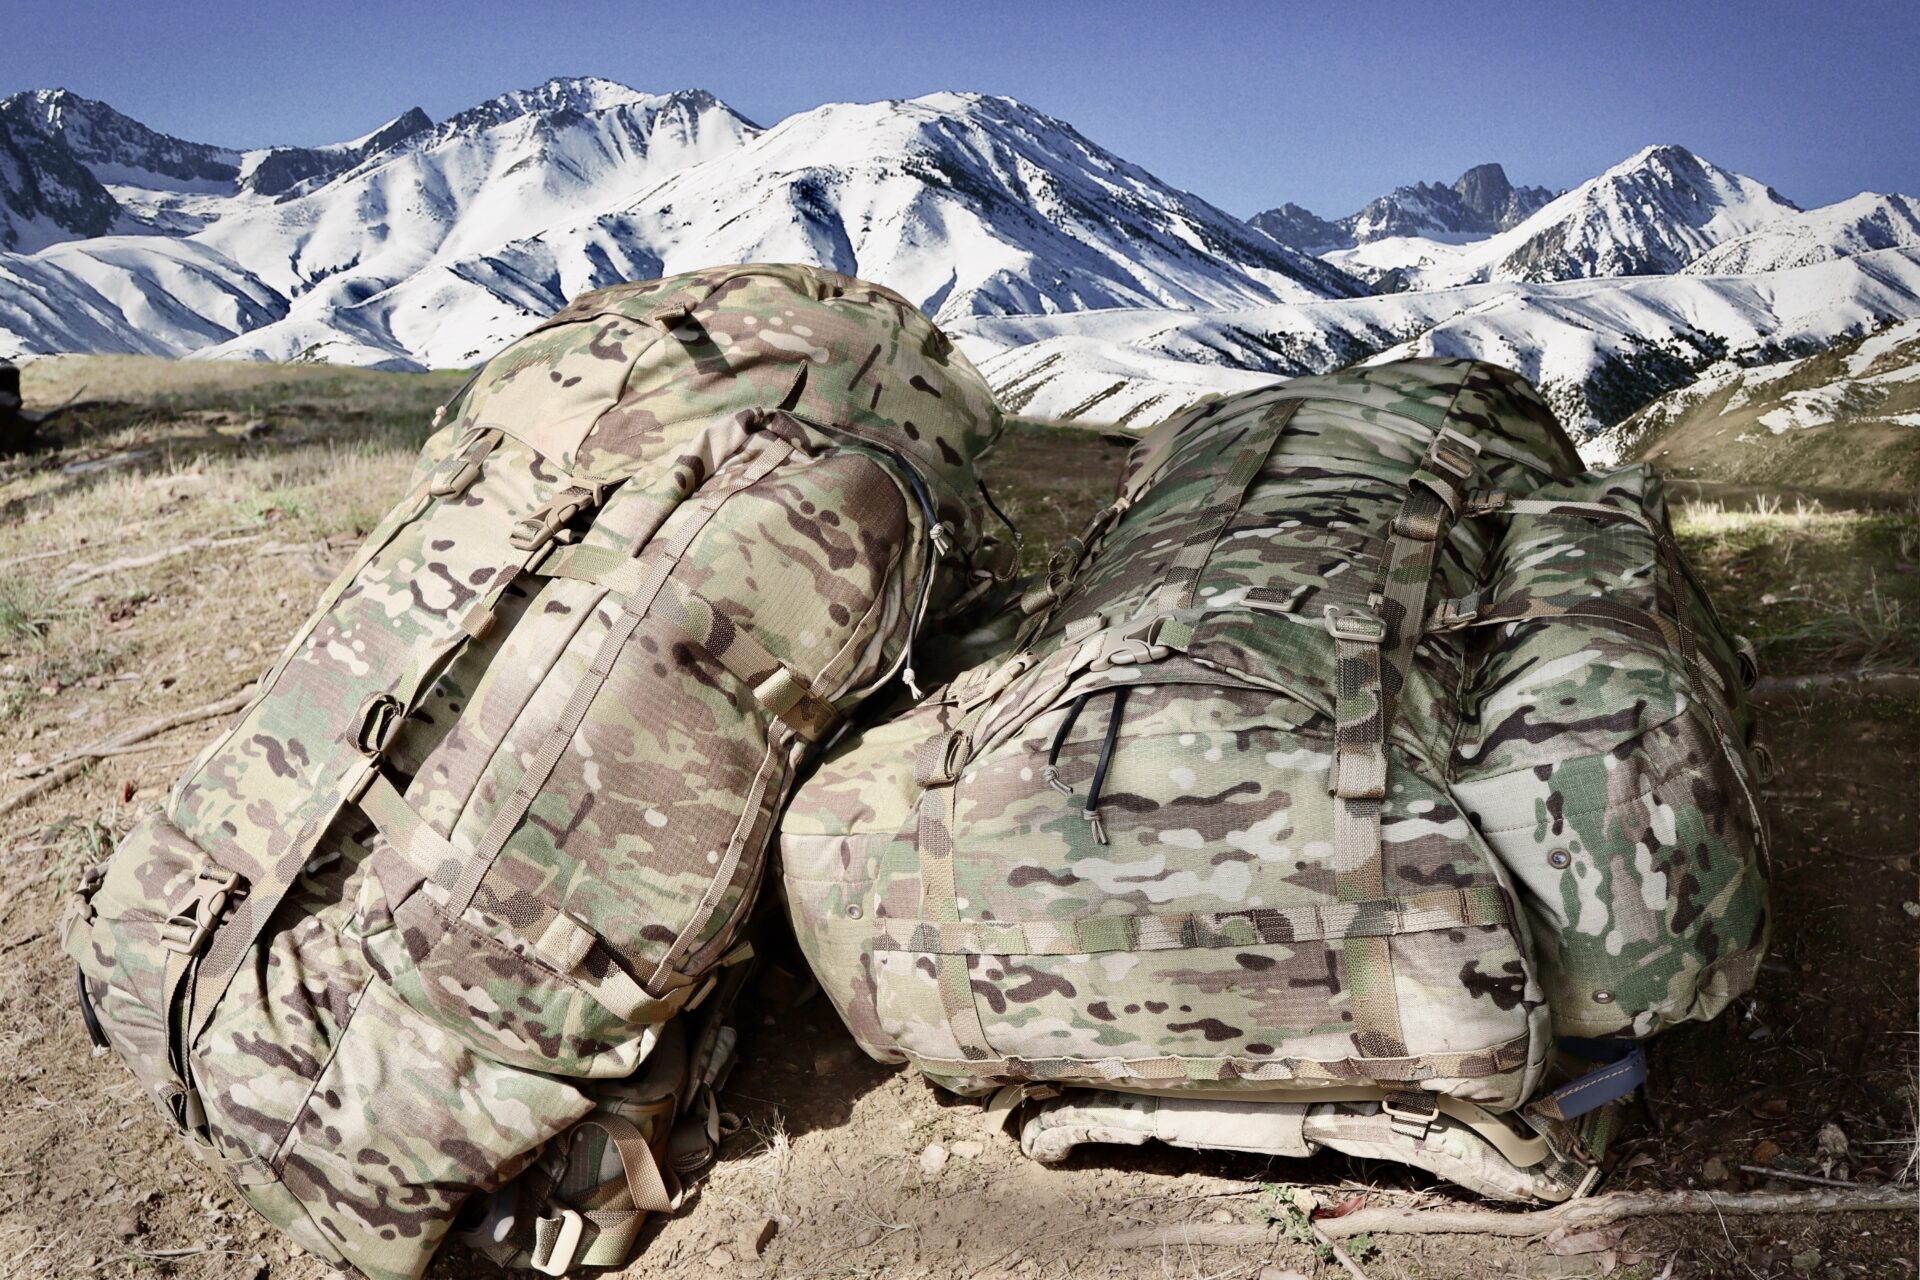
Pack Loading
Every time you throw that pack on your back, whether it’s for an alpine adventure or an infill behind enemy lines, the items packed can vary greatly. Time of year, duration, climate, terrain and objective all determine contents. This can make things quite confusing leaving one to guess how to organize these items inside the pack.
To help organize in a way to make sense, I recommend ranking them into 3 criteria.
- Mass/Density
- Frequency of use
- Speed of access
When utilizing a system relying on these items you will be able to determine the most appropriate location for them.
- Items with a heavy mass have the ability to drastically change your center of gravity. Placing these items far away from your spine is a recipe for an exhausted low back.
- Items which need to be accessed multiple times a day, probably shouldn’t be at the bottom of your pack either
- It goes without saying, there are certain items that when you need them—you need them now—medical, mags and of course toilette paper!
Keep it simple, rank each item in your pack with a factor of 1-3. 1 being low priority and 3 being high for the three categories of Mass, Frequency, Speed. The higher the score, the higher priority and influence it may have for its location.
For example:

—Keep in mind, this is a general guide which should be flexible depending on the situation—
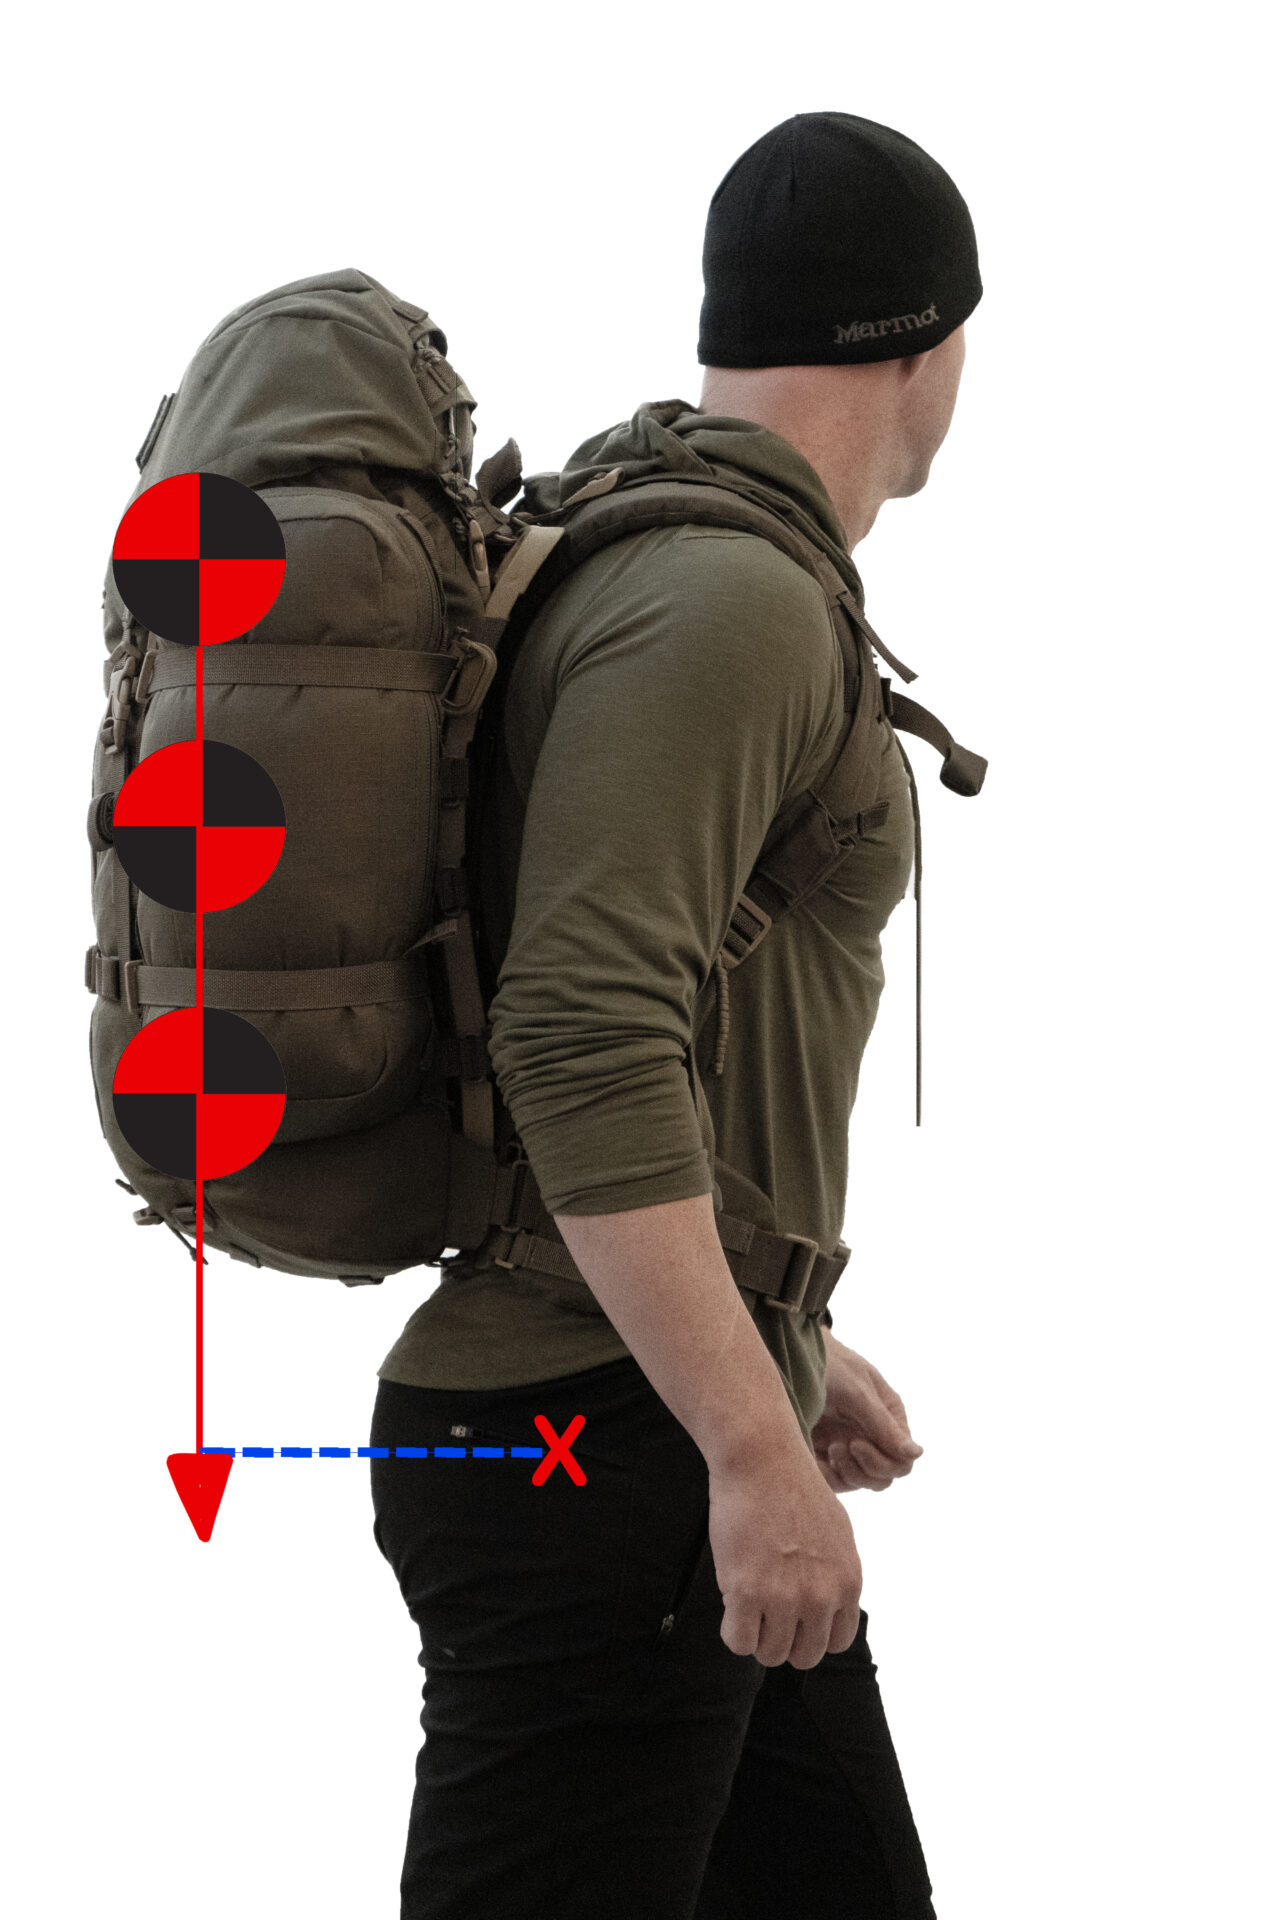
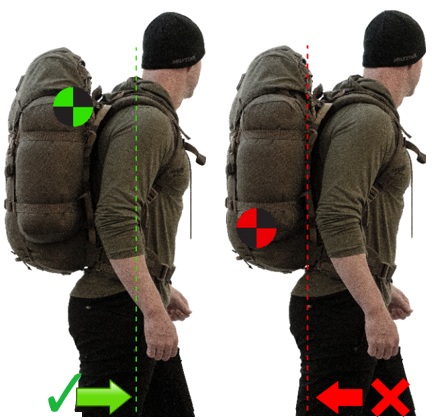
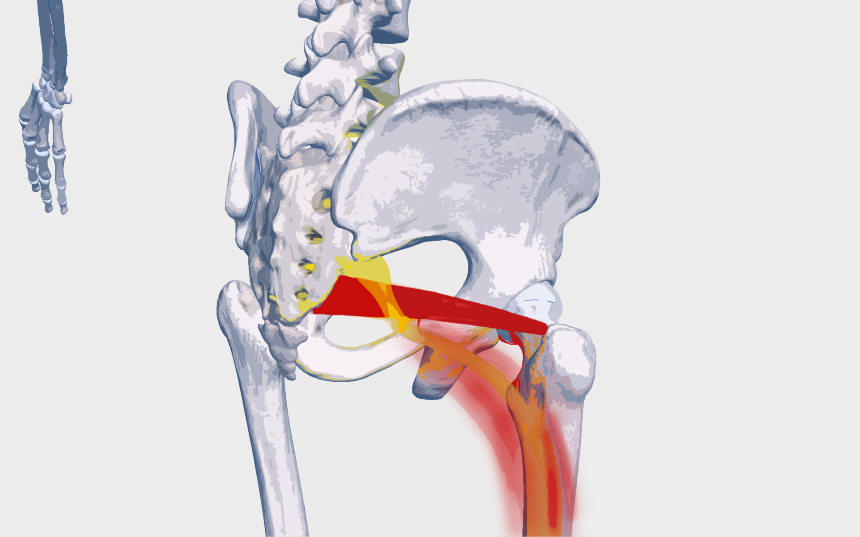
Center of gravity– One, if not the most important factor when loading a rucksack is the location of the its center of mass (CM) not to be confused with center of gravity (CG). Center of mass relates to where the mass is concentrated, while center of gravity relates to the object orientation in relation to gravity. When rucking there are two objects with different CG’s and CM’s, the rucksack and the human. The CM is the average location of an object’s mass. The CG factors in the orientation of the human body and the rucksack, then combines these masses to find an orientation for balance.
Having a wide assortment of items on the floor and determining where one packs them can be difficult. If you are solely looking for the most biomechanically efficient loading system, having a rucksack with very high and forward CM is going be optimal. When the CM is high and forward it will prevent you from having to lean forward to maintain a neutral overall CG. This will decrease the torque and effort required by the lumbar musculature to maintain posture.
In physics there is a term called a moment arm (MA). By definition this is the shortest distance between the axis (X) and the line of force. Whenever you take an object with a given mass (gravity) or a vector (directional force) and move it further away from its axis, the torque acting on the axis will increase. In order to maintain stability around an axis, an equal amount of torque in the opposite direction is needed to keep equilibrium (think of a see saw). Torque is calculated by (Force x Moment Arm) and denoted in inch-pounds or newton-meters—depending on your freedom level geographically.
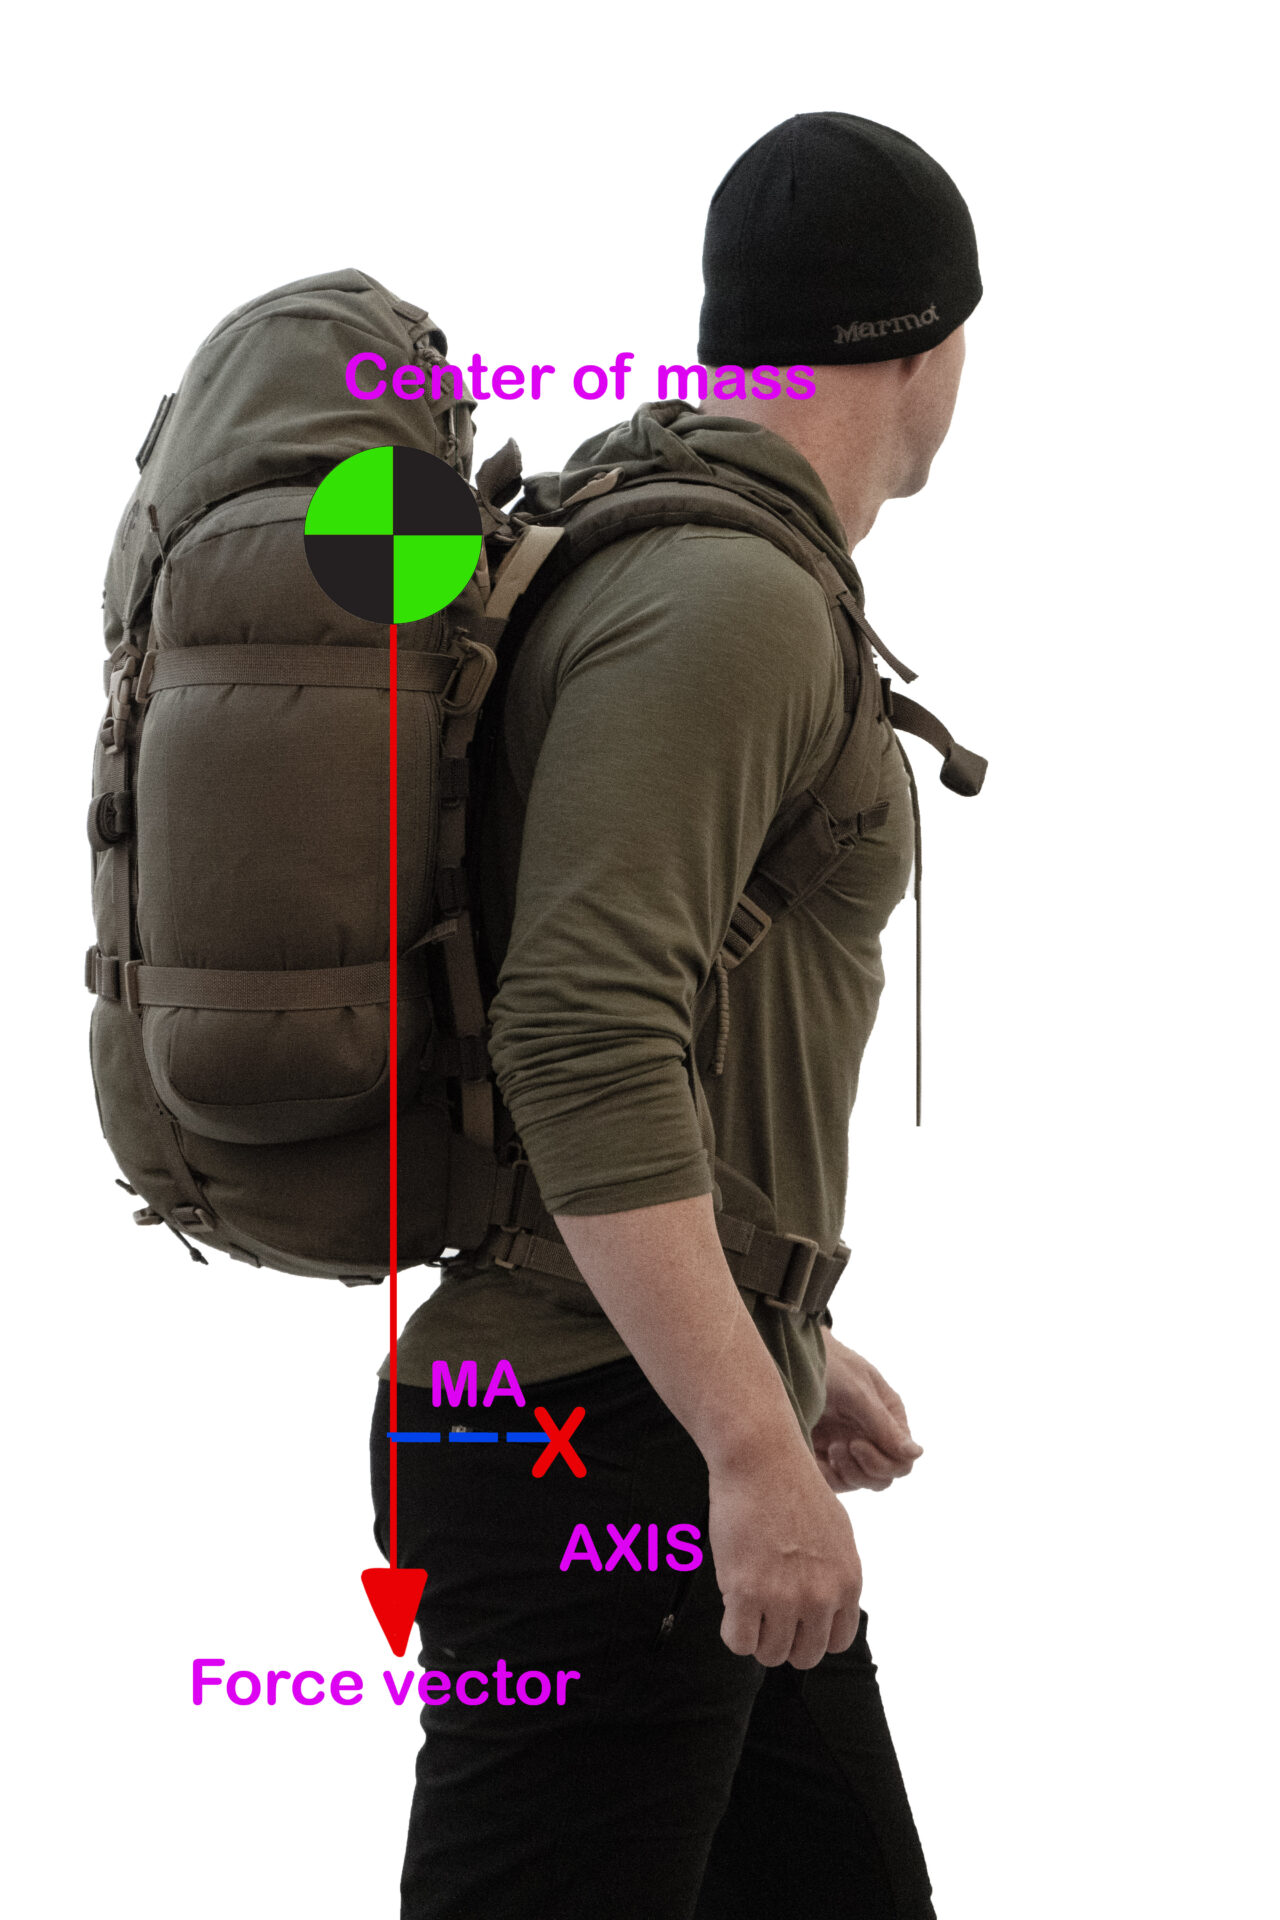
Figure 1
When looking at a rucksack on a human (figure 1) gravity is acting on the pack creating a vertical line of force drawn from its center of mass to the ground. The axis would be approximately in the pelvis where the hips are, not the lumbar spine. Flexing though the lumbar spine while loaded is a recipe for degenerative disks, don’t round out the lower back. The dashed blue line is the perpendicular distance between the axis and the line of force, this is the moment arm. In figure 1, the rucksacks’ center of mass is far forward, thus keeping a very short moment arm.
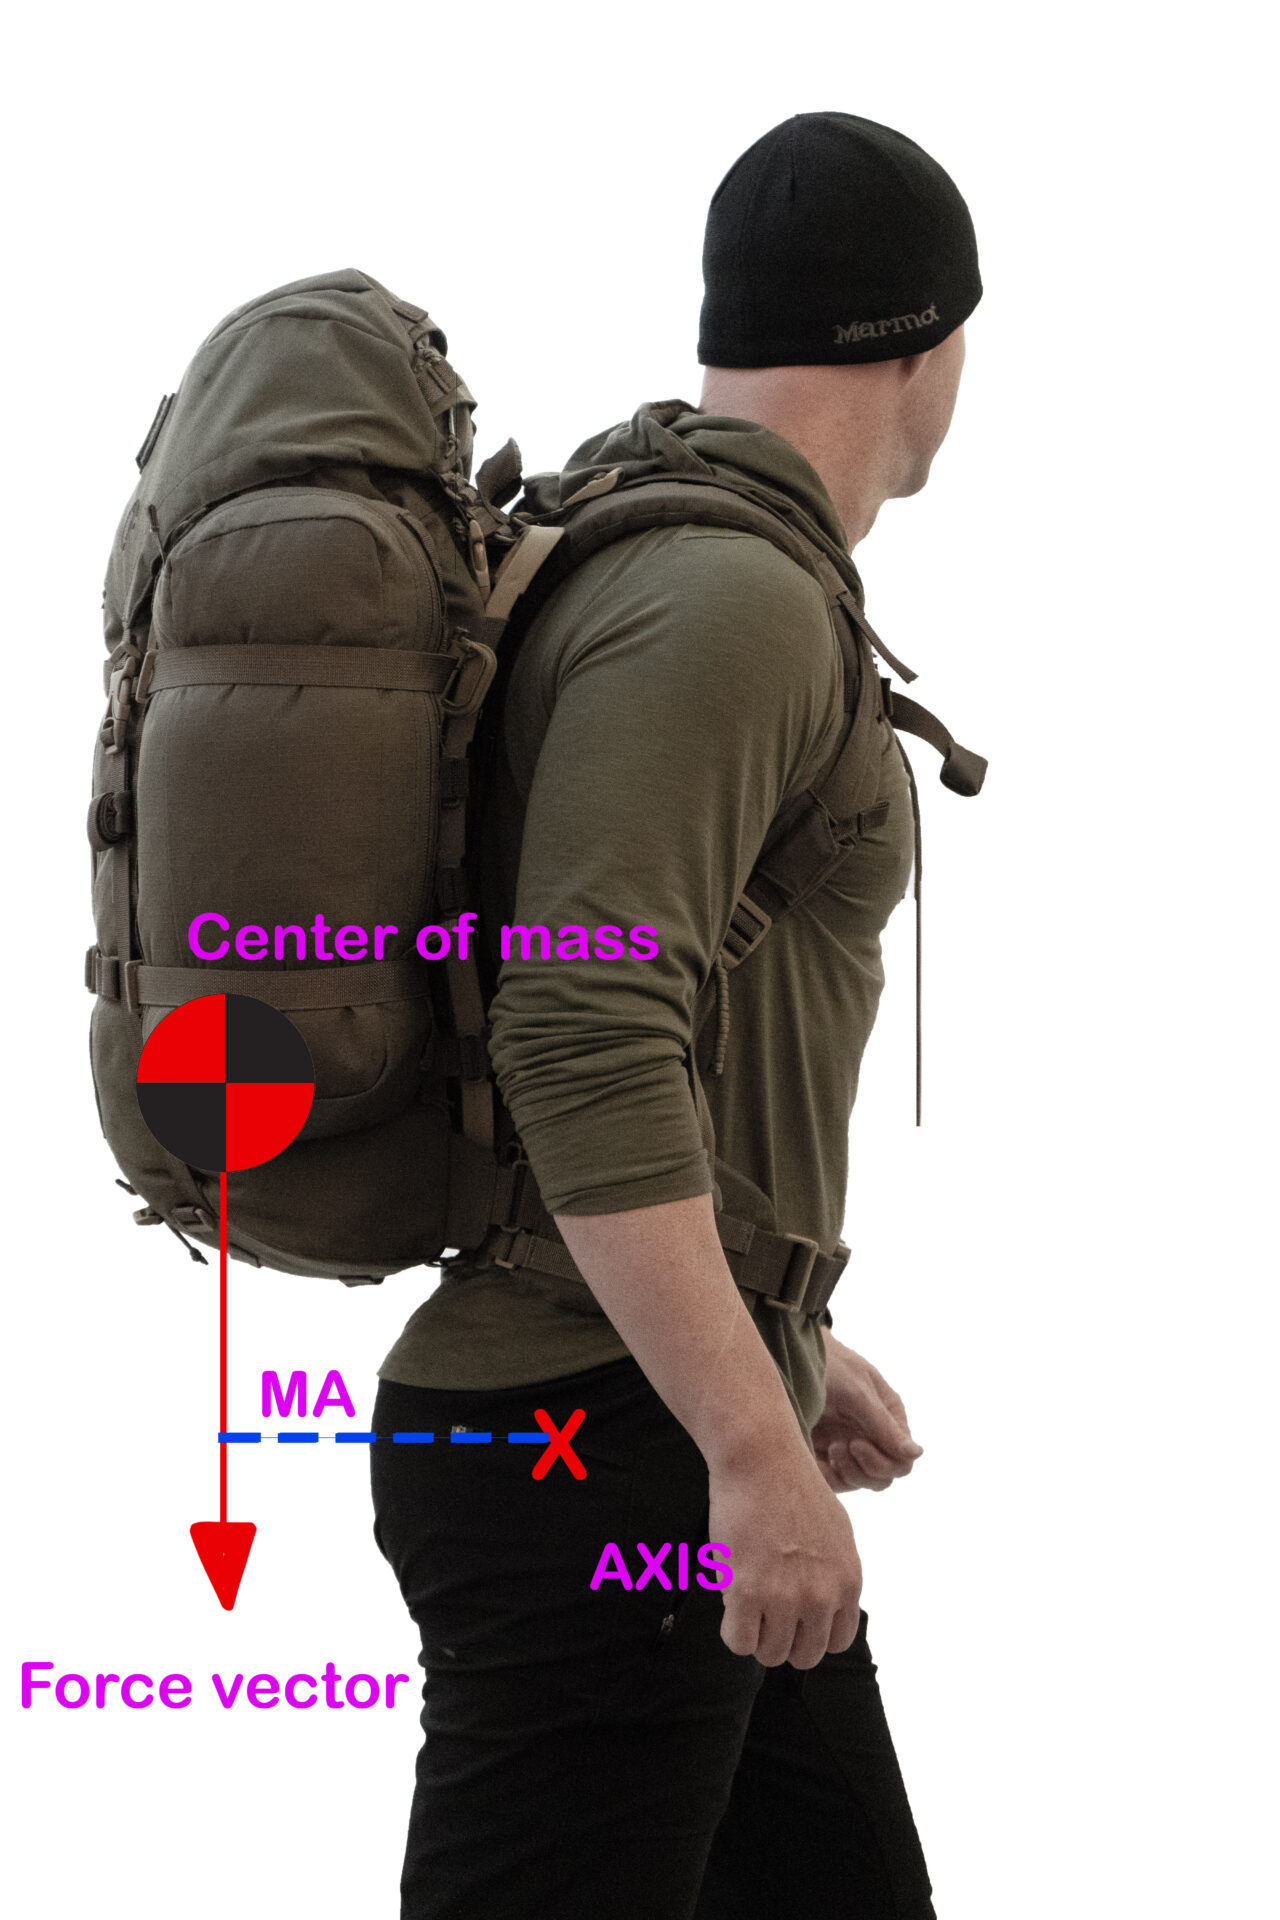
Figure 2
In figure 2, the rucksack has been loaded poorly where the center of mass is rearward. This doubles its moment arm, therefor doubling the torque on the axis through leverage. When wearing a rucksack, the human body will naturally handle this rearward “pulling back” force on the shoulders by leaning forward to compensate. The more we are required to lean forward; the faster your back and glutes will fatigue.
Our aim for successfully loading a rucksack is to optimize two factors:
- Have the packs’ center of mass acting with the shortest moment arm possible.
- Decrease the amount one has to lean forward to maintain equilibrium.
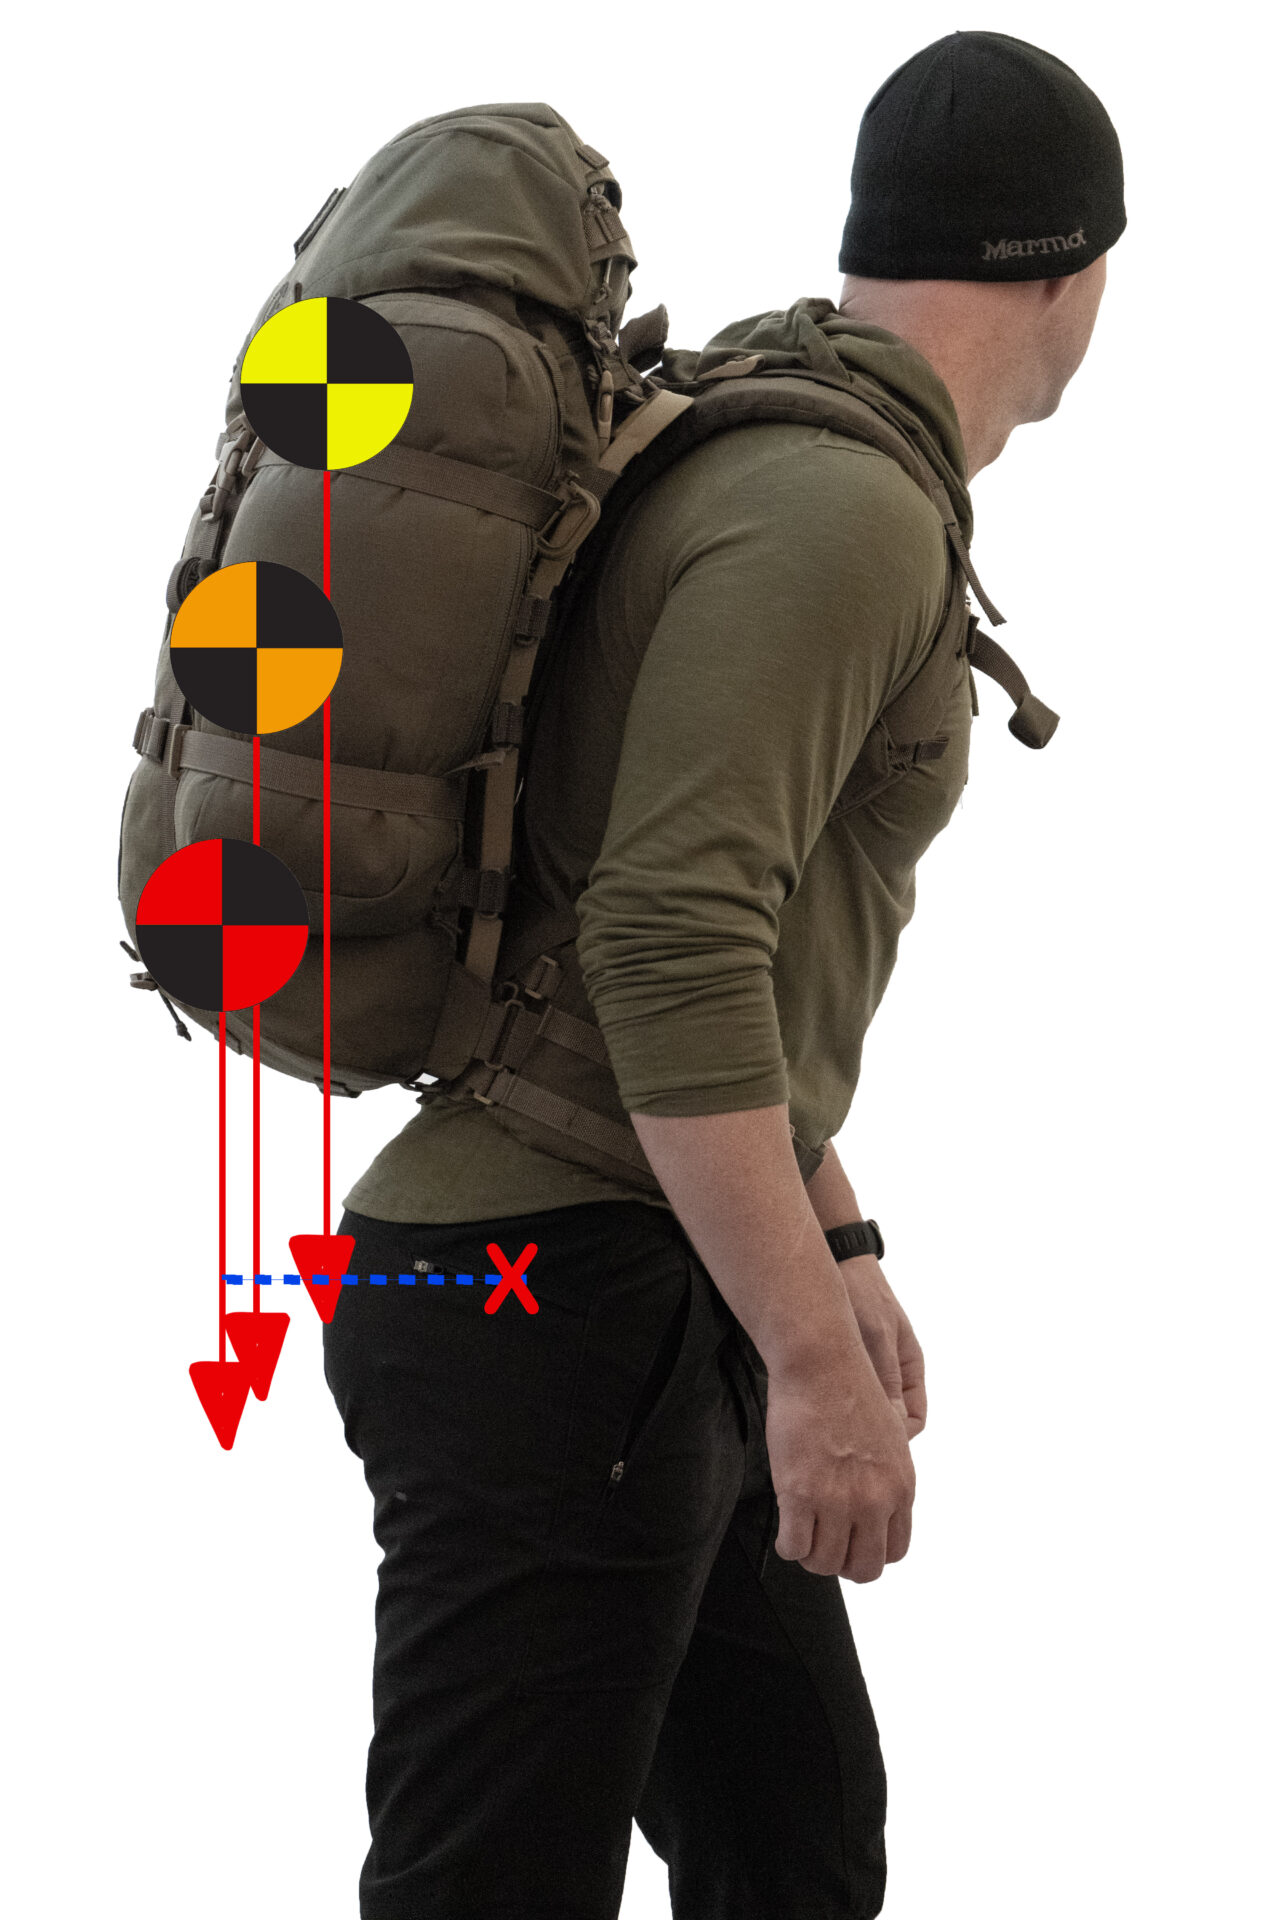
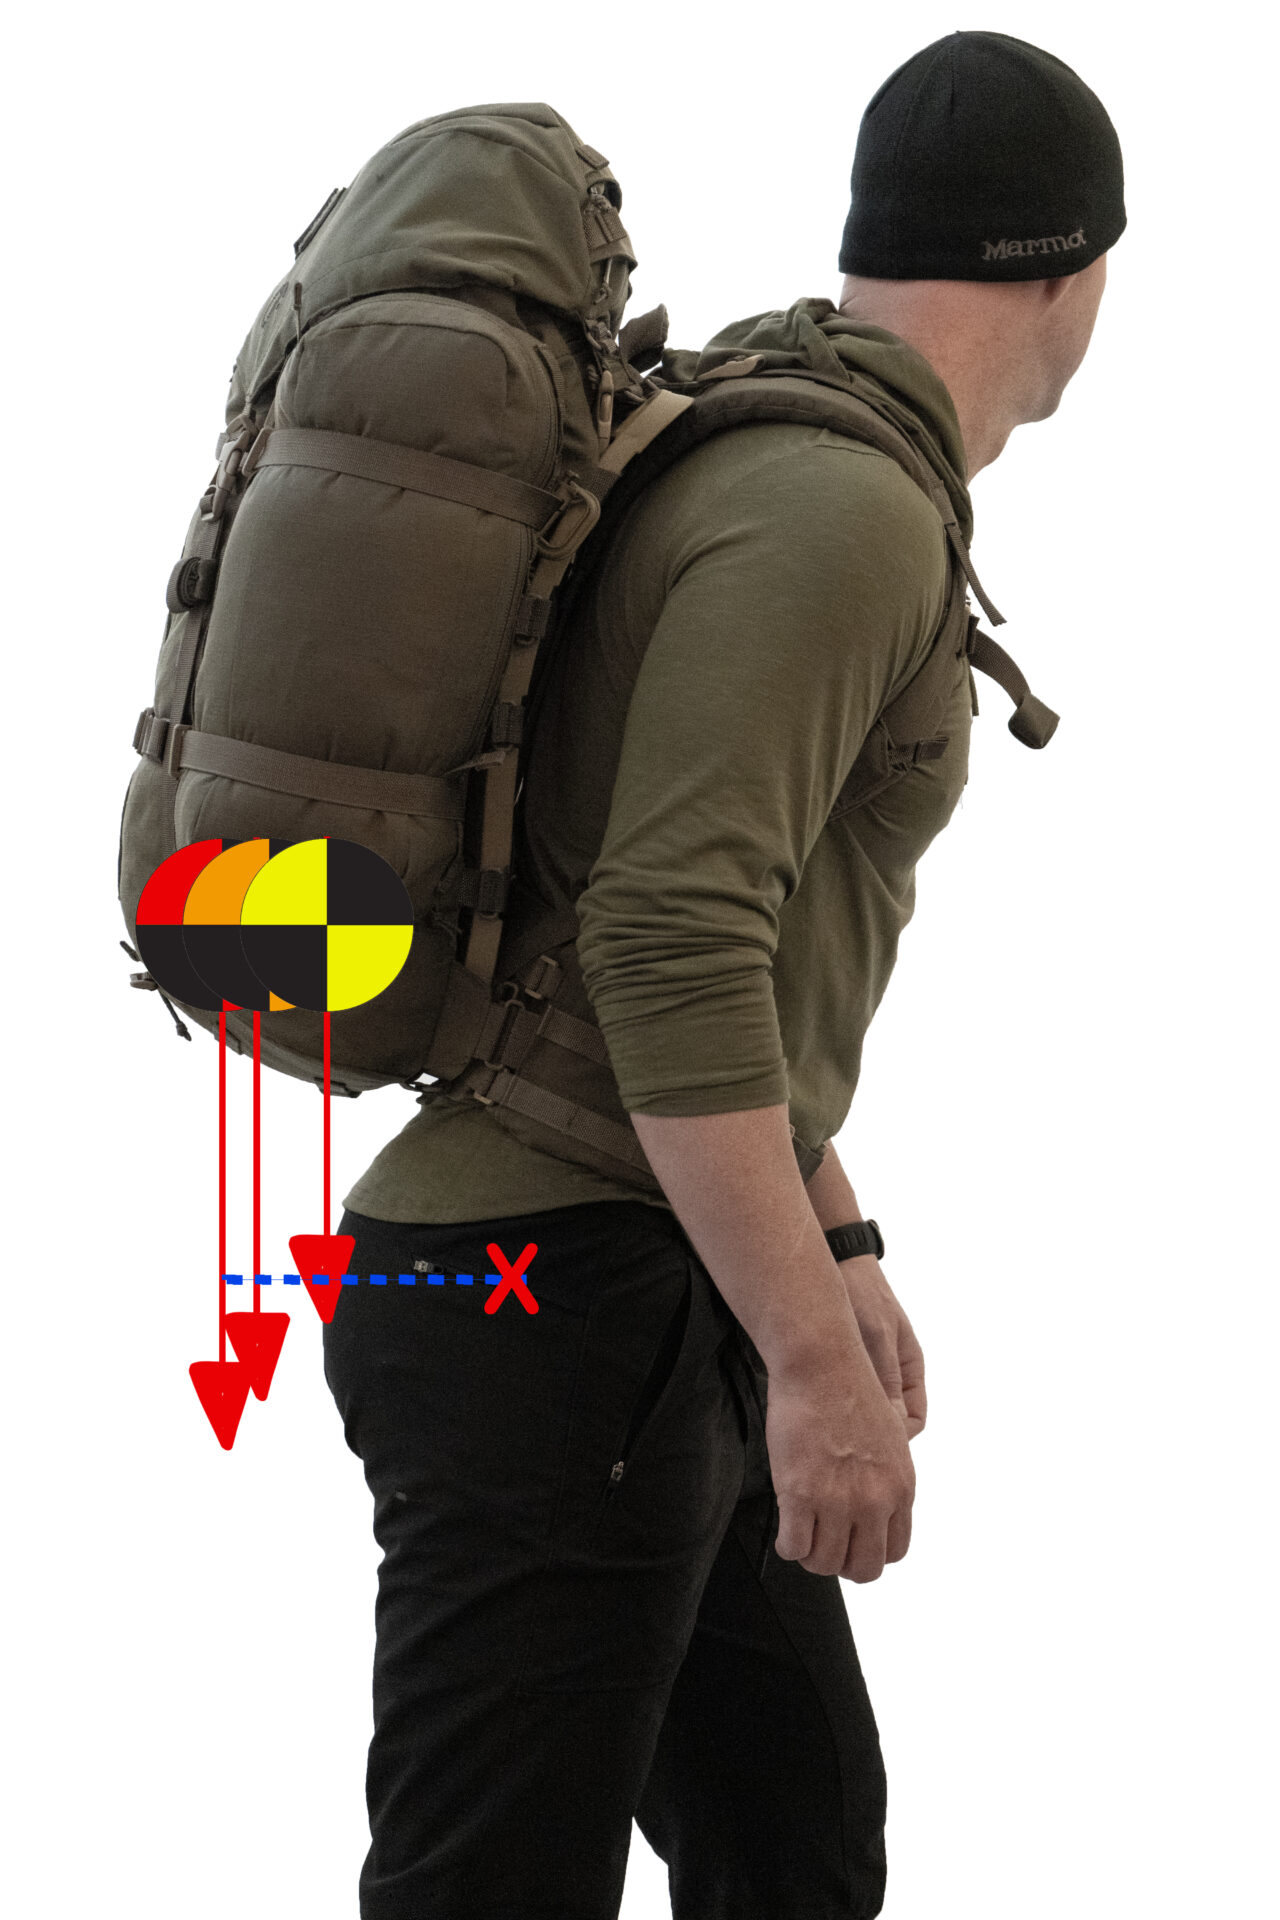
As you can see from the four figures above, to adjust center of mass effectively we must not only think about shifting mass forward, but also vertically. If we were to only shift mass forward or vertically, it simply does not have the same effect when it comes to decreasing the moment arm. As you can see the moment arm does decrease as you begin to lean forward. The higher the CM rides inside the rucksack, the less degrees your back is required to lean.
Whenever donning a rucksack there is no escaping, it will shift your center of gravity rearwards through leverage. The body will lean forward to compensate; our goal is to decrease this amount of forward lean as much as possible. We want to have mechanical advantage over our rucksack, not the other way around.
When the pack is correctly loaded with the packs’ CM as far forward and high as reasonably possible, minimal forward posture is needed for the body to maintain a healthy center of gravity. With the body in a more vertical posture, force is loaded efficiently through the thoracic and lumbar spine. By utilizing the spines’ skeletal structure for stability in its strongest (neutral) position and upright, it is safer on the vertebral discs.
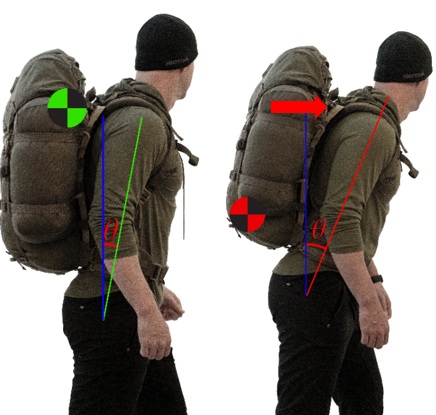
The figures above show that when the CM is high and forward the body’s natural CG moves forward (fig 1 = GOOD). When the CM is low and back, the body’s CG moves backwards. Without compensating, the body would be pulled off balance (fig 2 = BAD). The angle the body must lean forward to maintain equilibrium is drastically different depending on the pack loading (fig 3 = GOOD, 4 = BAD).
Poor loading over time will cause muscle fatigue in the lumbar spine and glutes with decreased cadence and endurance. Imagine holding a rifle with one hand at the pistol grip; would your musculature fatigue faster if you held the barrel pointed at the sky or the horizon?
Most importantly poor loading will cause the lumbar spine to lose its natural lordotic curve when fatigued, potentially causing it to flex under load which can compress the discs in an unhealthy way. Your injury is not service related…
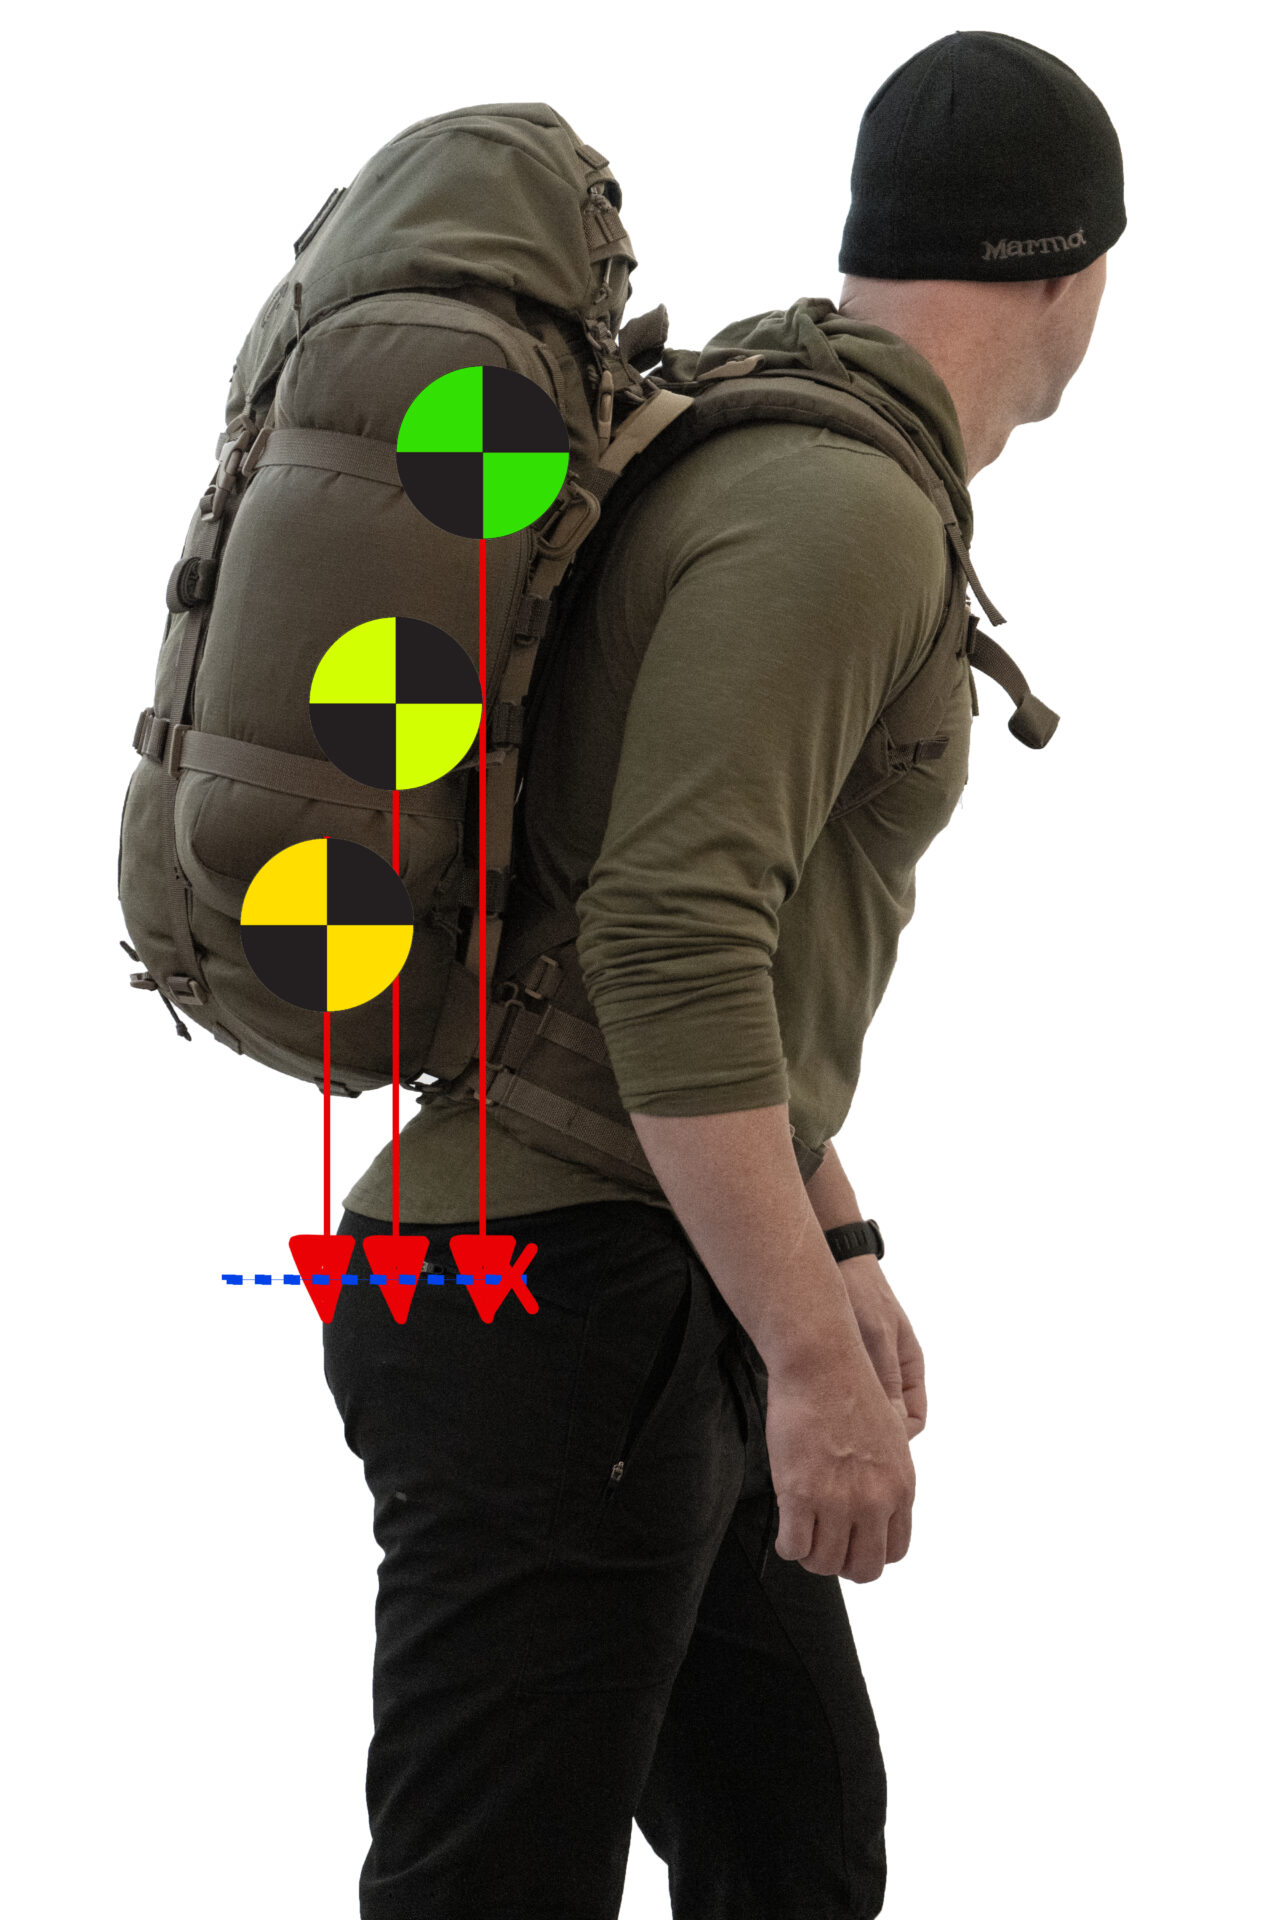
Ideally if one were to pack items with an emphasis on CG, the location of the items density and weight would be the main priority. However, depending on daily requirements, speed of access may also be an important factor which will influence location. This diagram is to educate on loading for endurance and longevity, if field expedience is not a factor.
Using these principals may aid in making a blended and informed decision on packing location where speed of access plays a role. By no means is this “the way” it is always situationally dependent. In this case (biomechanically efficient) I would recommend that you compartmentalize them based on mass.
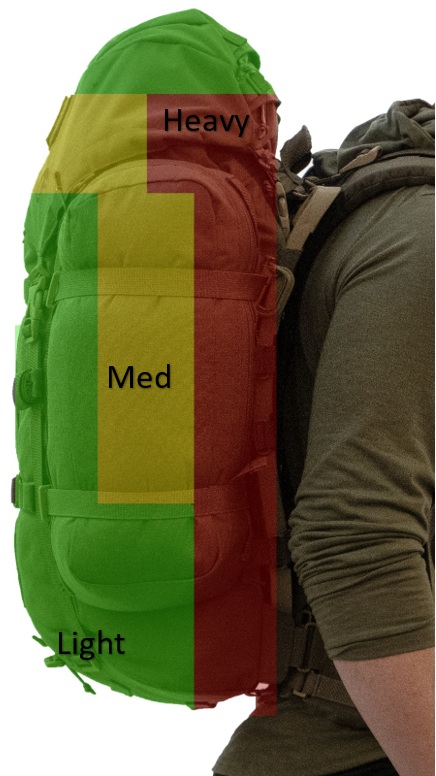
Green show’s locations for lighter items, like sleeping bags, jackets, beanies, warming layers, medical kit etc. Note, that the very top is also green, this goes against the principals of CG in the sagittal plane of the body (side view), however in the frontal plane of the body (front view), this increased height over the shoulders can cause a “lateral moment” or “teetering”, which can occur while traversing off-camber terrain. This is a great location for gloves, beanie, medical, headlamp etc. to prevent being thrown off balance on taller packs.
Yellow indicates medium density items, like food, light tools etc.
Red is for the heaviest and dense items you are carrying. Hydration bladders, ammunition, large batteries, heavy tools, tripod (externally) etc.
Optimal CG vs. Accessibility
As seen from the previous diagram which focuses on CG as a priority, this can also be in direct contradiction to speed of access and frequency of use. Traditionally, a rucksack has been very basic. Essentially a potato sack with a lid and shoulder straps. This has dictated where items are placed in the pack due to its top-down accessibility. With traditional pack designs, packing order has been mostly based off of speed of access and frequency, completely ignoring the factor which saves your body, MASS/Density.
In some cases, the traditional approach has been functional. For example, a sleeping system and shelter naturally have always been situated at the bottom of the sack, this is due to the once per day need. Packing it on the top would be a hassle as it would need to be removed every time something is needed below. However, on the flipside, packing the sleep system on the bottom requires that once a day every item in the pack needs to be removed to access the sleep system. This is less than optimal.
For this reason, we have designed our rucksacks to break this mold. All of our packs have multiple points of access. Having bottom, middle and top access in our designs allows you to “have your cake and eat it too”. With our pack designs, you can actually pack with an emphasis on CG as a priority, because essentially every area is quick to access.

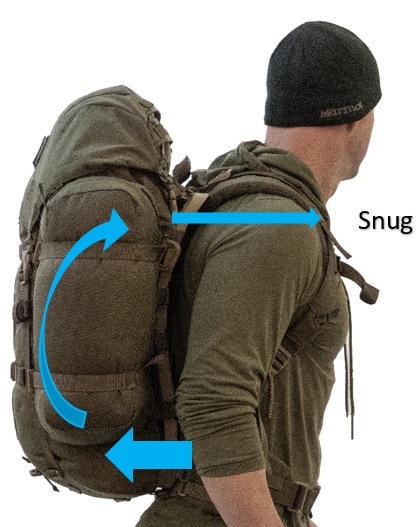
 Additionally, make sure when packing the ruck that EVERYTHING is packed tight, this will allow the fabric to build structure. All compression straps should be snug, and their tails are tidy. This will not only pull everything closer to the body, but it will prevent inertia and rocking from side to side as you move. A tight pack is a comfortable pack; a loose pack is a monkey on your back.
 On a side note, while we are on the topic of CG. Over recent years on the fitness wing of rucking, we have seen various plates and weights which are “designed for rucking”, they attach directly to the frame of the pack to simulate load. It is my opinion that this is not rucking and should not be considered to be one and the same. With the overall weight and mass this close to the spine, biomechanically it is more efficient. However, one might as well just wear a weight vest.
To ultimately get better at rucking I believe one must load their ruck with ACTUAL EQUIPMEMT to a desired weight; it not only feels much different but therefore is more functional if you are preparing the body for carrying equipment. If your equipment doesn’t provide enough weight, add more water bladders, loaded magazines or small dumbbells.
Pack Type & Fitment
There is a ton of content on the internet about boot fitment, everything from articles to videos. There is a heavy emphasis of getting proper footwear when rucking. However, I haven’t seen much on pack fitment and adjustment. I am slightly biased here, but I believe fitment and adjustability of a pack is equally as important as a proper set of boots. If a pack isn’t fitted well for your body, or is using dated technology, you may not notice problems as quickly as a poor fitting set of boots, however the problems which can arise from a “trash” pack are arguably more devastating in the long run. Degenerative discs, thoracic outlet syndrome, facet joint compressions, just to name a few. Invest in a good quality ruck, not a backpacker’s pack, a proper military grade rucksack. You will end up spending a pretty penny on a good one, but it will be worth it in the long run. What’s the point in cheeping out at the expense of quitting due to discomfort or an injury.
 Most leisure backpacks on the market are not designed to distribute weight efficiently therefore require the hikers to buy expensive ultralight items for the packs’ contents. With a properly engineered rucksack, you are able to carry heavier loads with more comfort than a hikers’ pack could even dream of. Simply put, a pair of sneakers compared to a pair boots, is like a hikers’ pack to a rucksack.
Internal v External frames– They both have their pros and cons, an internal frame allows for a slightly lighter pack while empty, however at heavier loads they become poor at weight redistribution and lose their rigidity, some can tear at the locations where the internal stays slot into the pack.
Again, I am slightly biased here so take it with a giant grain of salt, but I believe external frame packs are the clear winner for anything above 35 liters or 35lbs. The benefits of a modern good quality polymer external frame far outweigh the few pounds of increased empty weight. External polymer frames excel at weight management through the bag. For example, our packs have multiple tie-in points completely encompassing the frame. This allows for weight to be loaded evenly through the frame and therefor into the harness. As weight is increased into the pack, it doesn’t feel like a wet noodle flopping around on your back with asymmetrical forces into the body as found with internal packs, it holds it shape while allowing some flexing to occur during movement.
In past decades external frames have been given a bad reputation, previously they were made from metal, did not flex, the rivets would pop and they kind felt like a filing cabinet bouncing around on your back.
In more recent years, with the advent of polymers, there has been several frames out there which were notorious for cracking under cold climates and incorrectly packed under heavy loads. This would naturally give them a bad reputation. As polymer injection molding and the molecular chemistry has improved greatly since then, polymer frames are making a huge comeback in a very meaningful way. They provide excellent structure and flex to absorb shock.
That being said, using a pack for what it is designed for is important to maintain its life expectancy. Contrary to what some might think, flipping your pack frame down on the ground against its concave curve and using it as a bench will cause a break. Throwing it off of a truck bed or jamming hard objects up against it while cinching it tight, also isn’t the smartest. Like any piece of equipment, use it for what it was designed for.
—Take care of your equipment and it will take care of you—
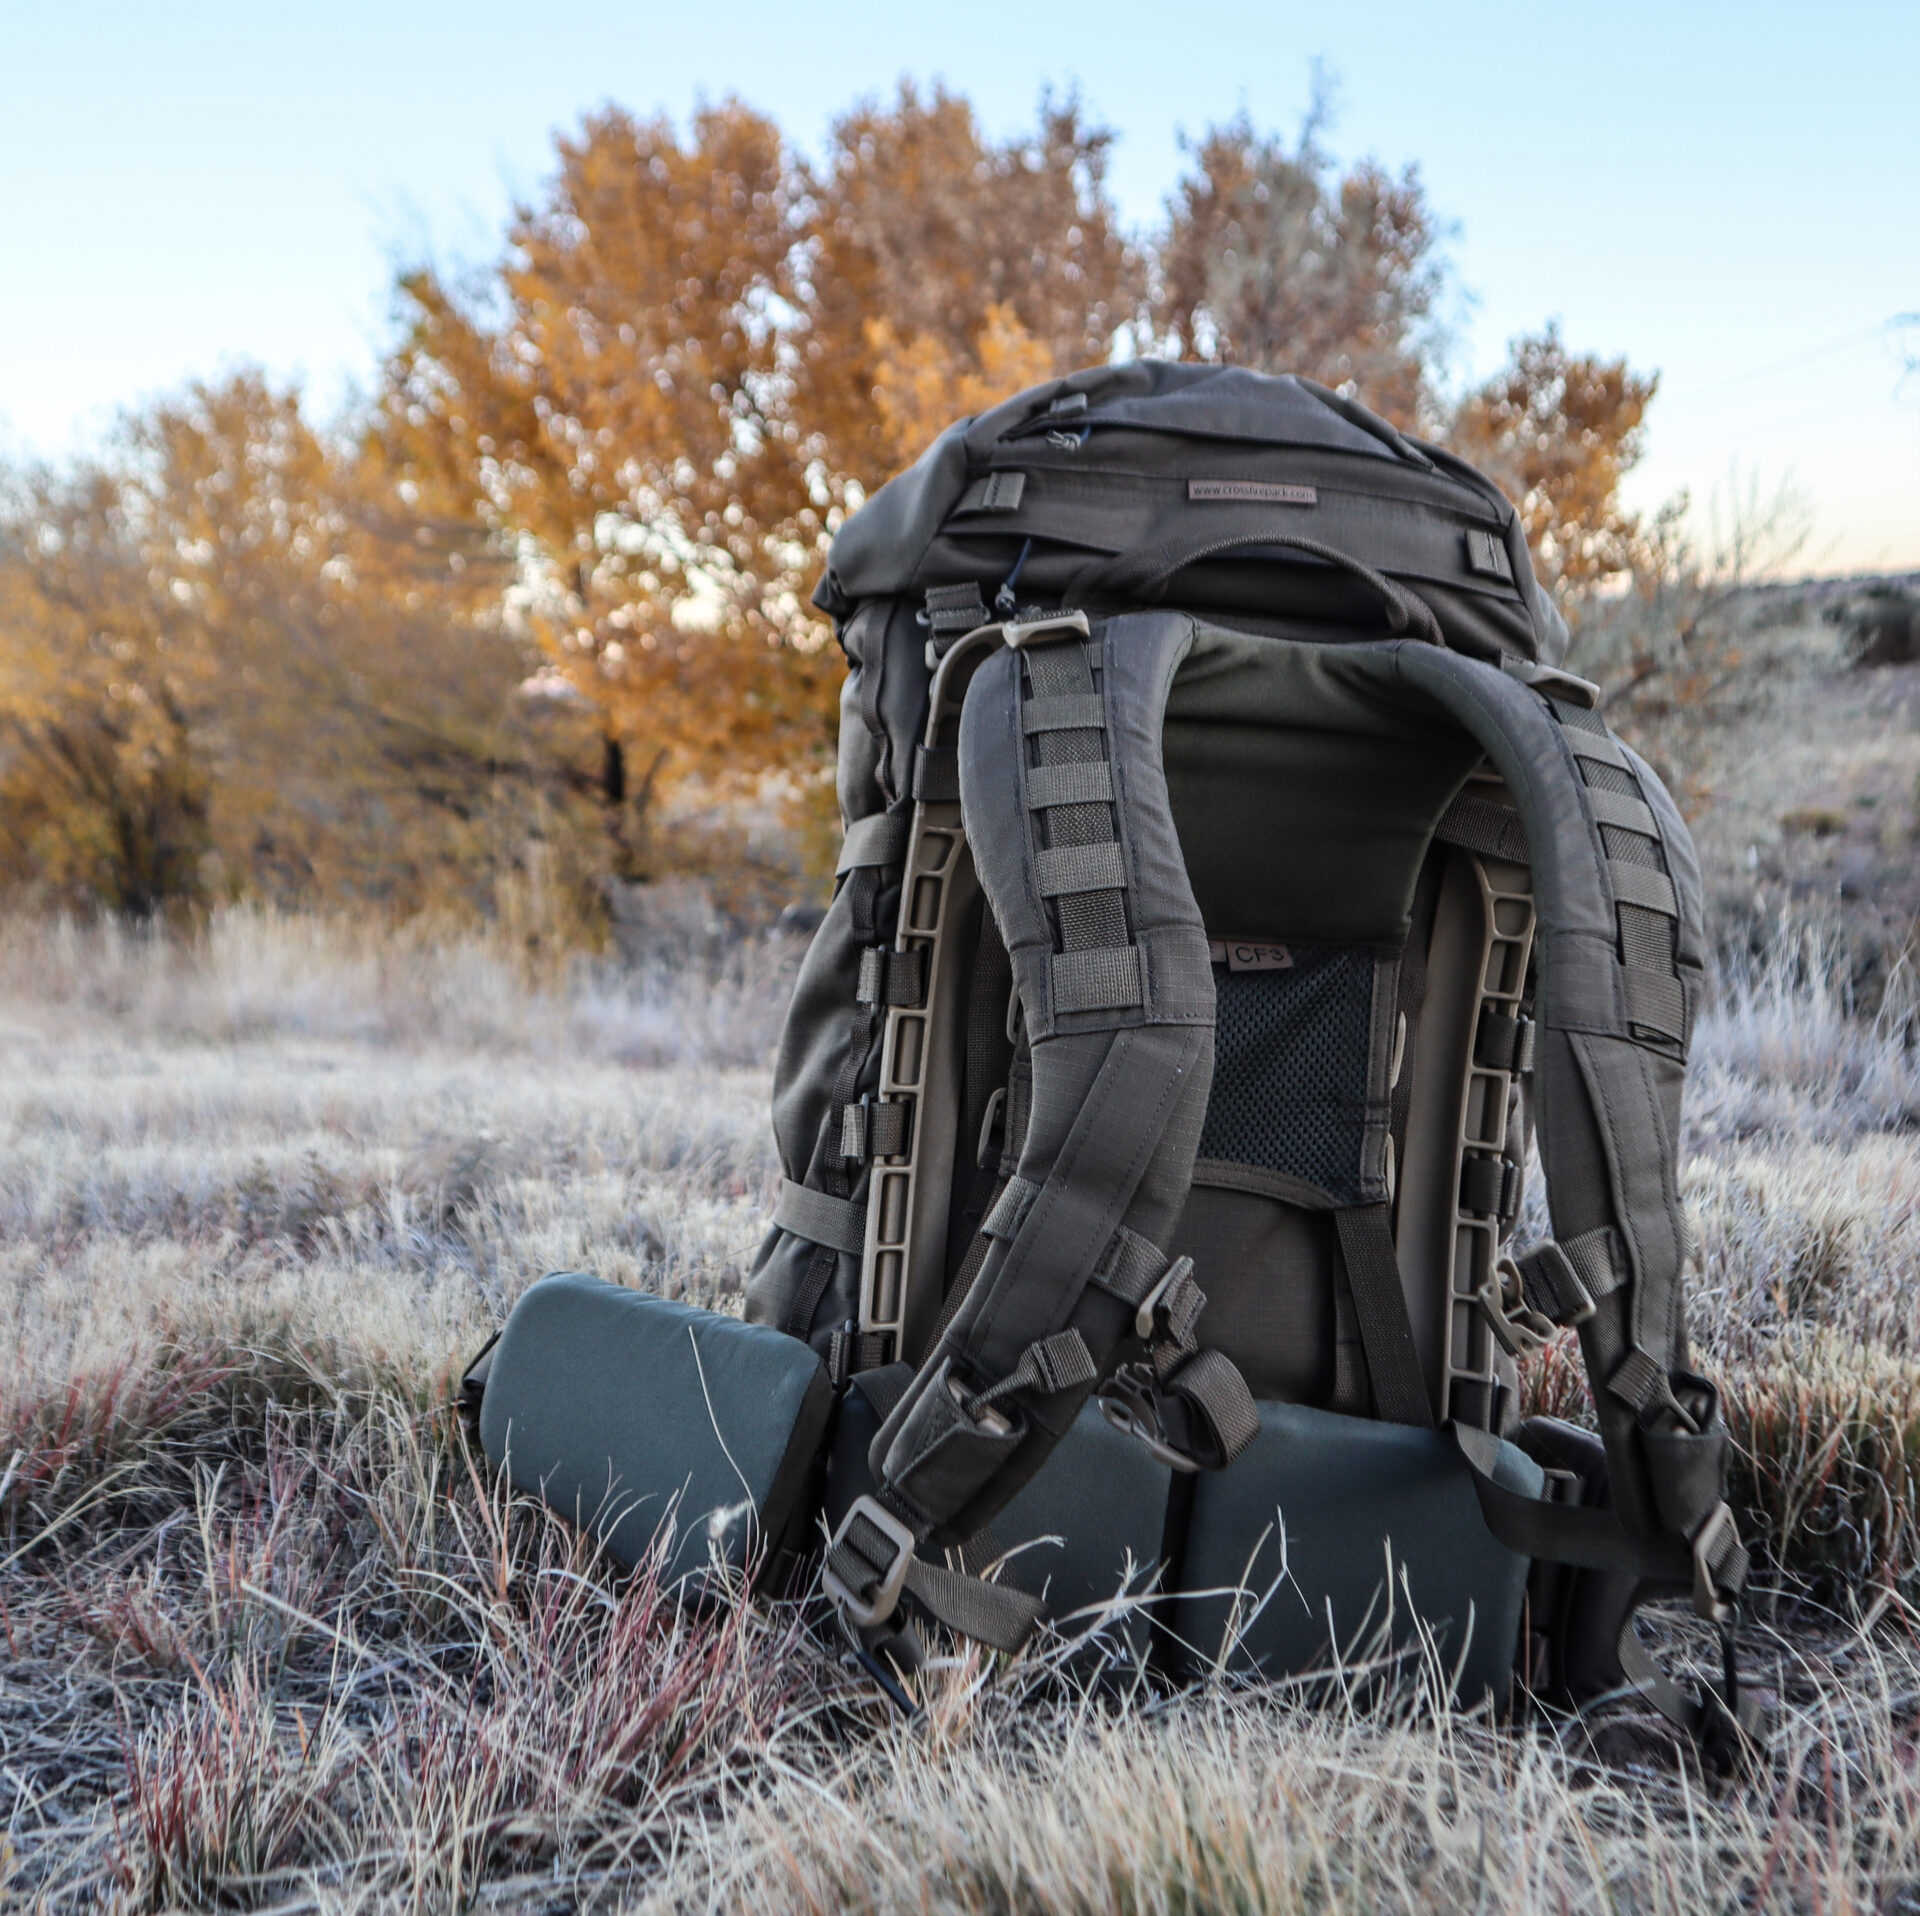
Fitment
In order to get a pack fitted right, it will vary heavily on the design, size and type of pack. It would be impossible to incorporate a guide for all packs, so instead here is a fitment guide for our packs. Use this as a starting point to get a general idea of what to look for in proper fitment.
Step 1 – Adjust the shoulder straps to a very tight setting. This will raise the top edge of the frame to upper shoulder height.

Pro tip- Add adjustment handles with paracord on the buckles for easy adjustment with gloves or at night. Adjust the length of the pull-down straps to the maximum length needed to remove the pack, from that length roll up and tape the ends so that the straps are as short as possible. I can’t tell you how bad it looks when people have their shoulder straps dangling down to their legs.
Step 2 – Buckle hip belt and tighten snugly around waist
Depending on pack design, the hip may ride high or low on the iliac crest of the pelvis. It is important to note that the lumbar pad is an integral part for providing support to the spine and should be used when feasible.
There are several unit doctrines which believe removing the hip belt entirely is the way to go; believing that a hip belt is not needed. This couldn’t be further from the truth; it is a major contributor for why many have ruined backs today. For extended duration a hip belt not only provides vertical support of the load by redirecting the force away from the lumbar discs and into the pelvis. It also provides intra-abdominal pressure; this increased pressure provides additional stability for the lumbar spine similarly to bracing a sprain.
My recommendation for soldiers is to use the lumbar pad and belt as much as possible. You should train your muscle memory to adjust the belt as the conditions change. Get comfortable with ALL the adjustment locations so you can do it easily in the dark or under stress, keep it consistent to build muscle memory. The same way you practice dryfire and mag changes.
Remember, using the belt is situational dependent. When on a 10-mile infill in rough terrain, click in the belt, you will save your back and your energy. When on patrol with a high likelihood of contact, unclick it. This is no different to manipulating your rifle sling when the situation dictates. If you are rucking for PT, there is no reason to not use it, unless navigating over and under obstacles.
Step 3 – Use included keepers to tidy away loose end on dominant side
Keeping the waistline as clean as possible prevents snagging on other gear. I recommend tidying away the dominant side with either Velcro keepers or tape. This allows the wearer to still adjust tensions with their support hand while maintaining control on their rifle with their fire control hand. Orientate buckle for ease of two finger release with the support or fire hand, whichever you feel is faster. This is needed for rapid doffing of the pack. Adjust the waistbelt snugly around the hips and waist. Don’t overtighten where it restricts breathing, but keep it snug enough to feel the support.
Step 4 – Tuck away non dominant side tail inside pad slot
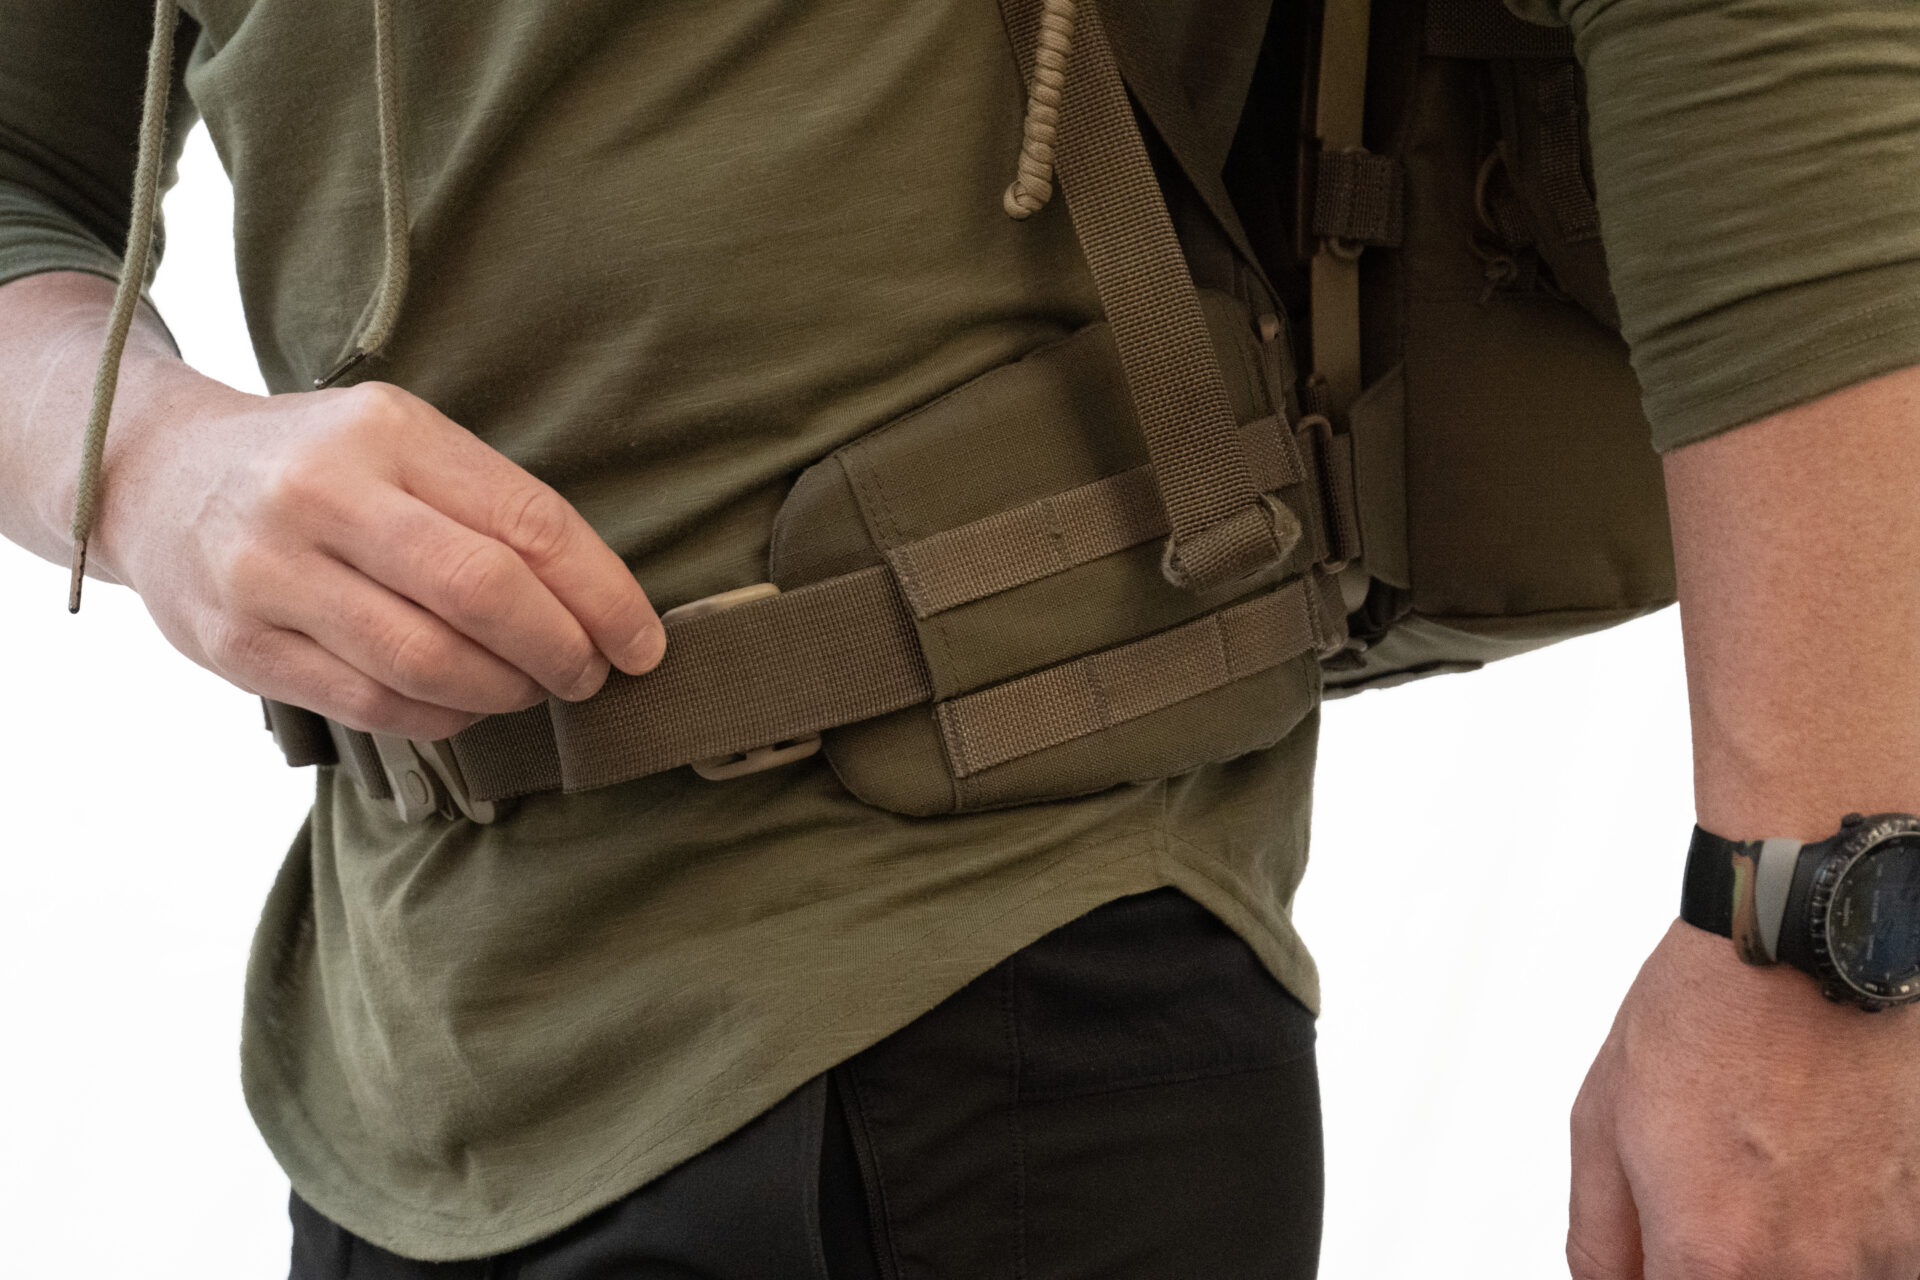
Not all packs have this as a feature, keeping the waistline clear from interference is especially important if magazine pouches are resting below on a separate beltline. I cut all of my adjustment straps to the length I need. It’s all personal preference. I add a few extra inches for cold weather layers, this keeps things tidy and slick. There are many like it, but this one is mine.
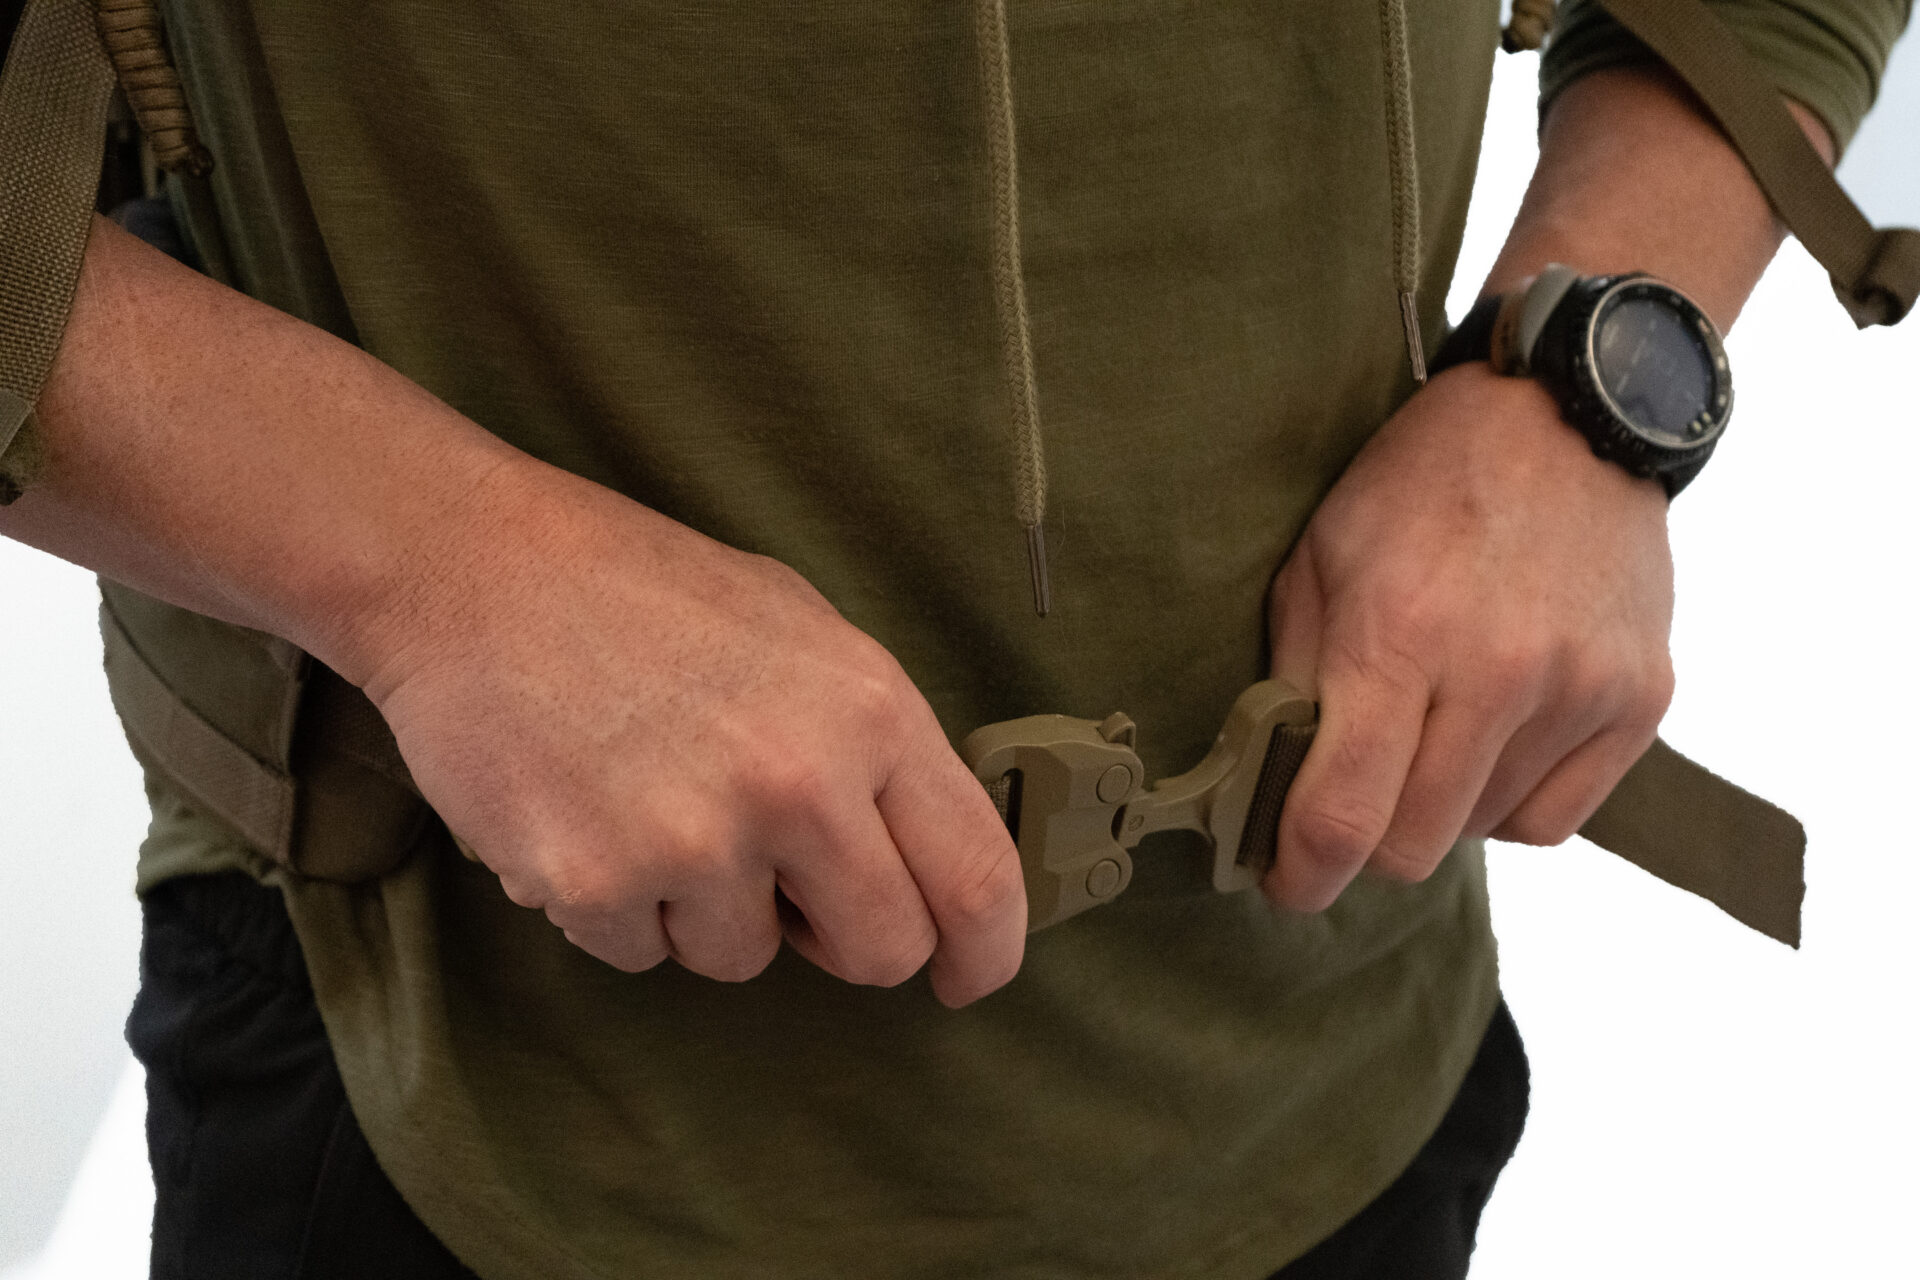
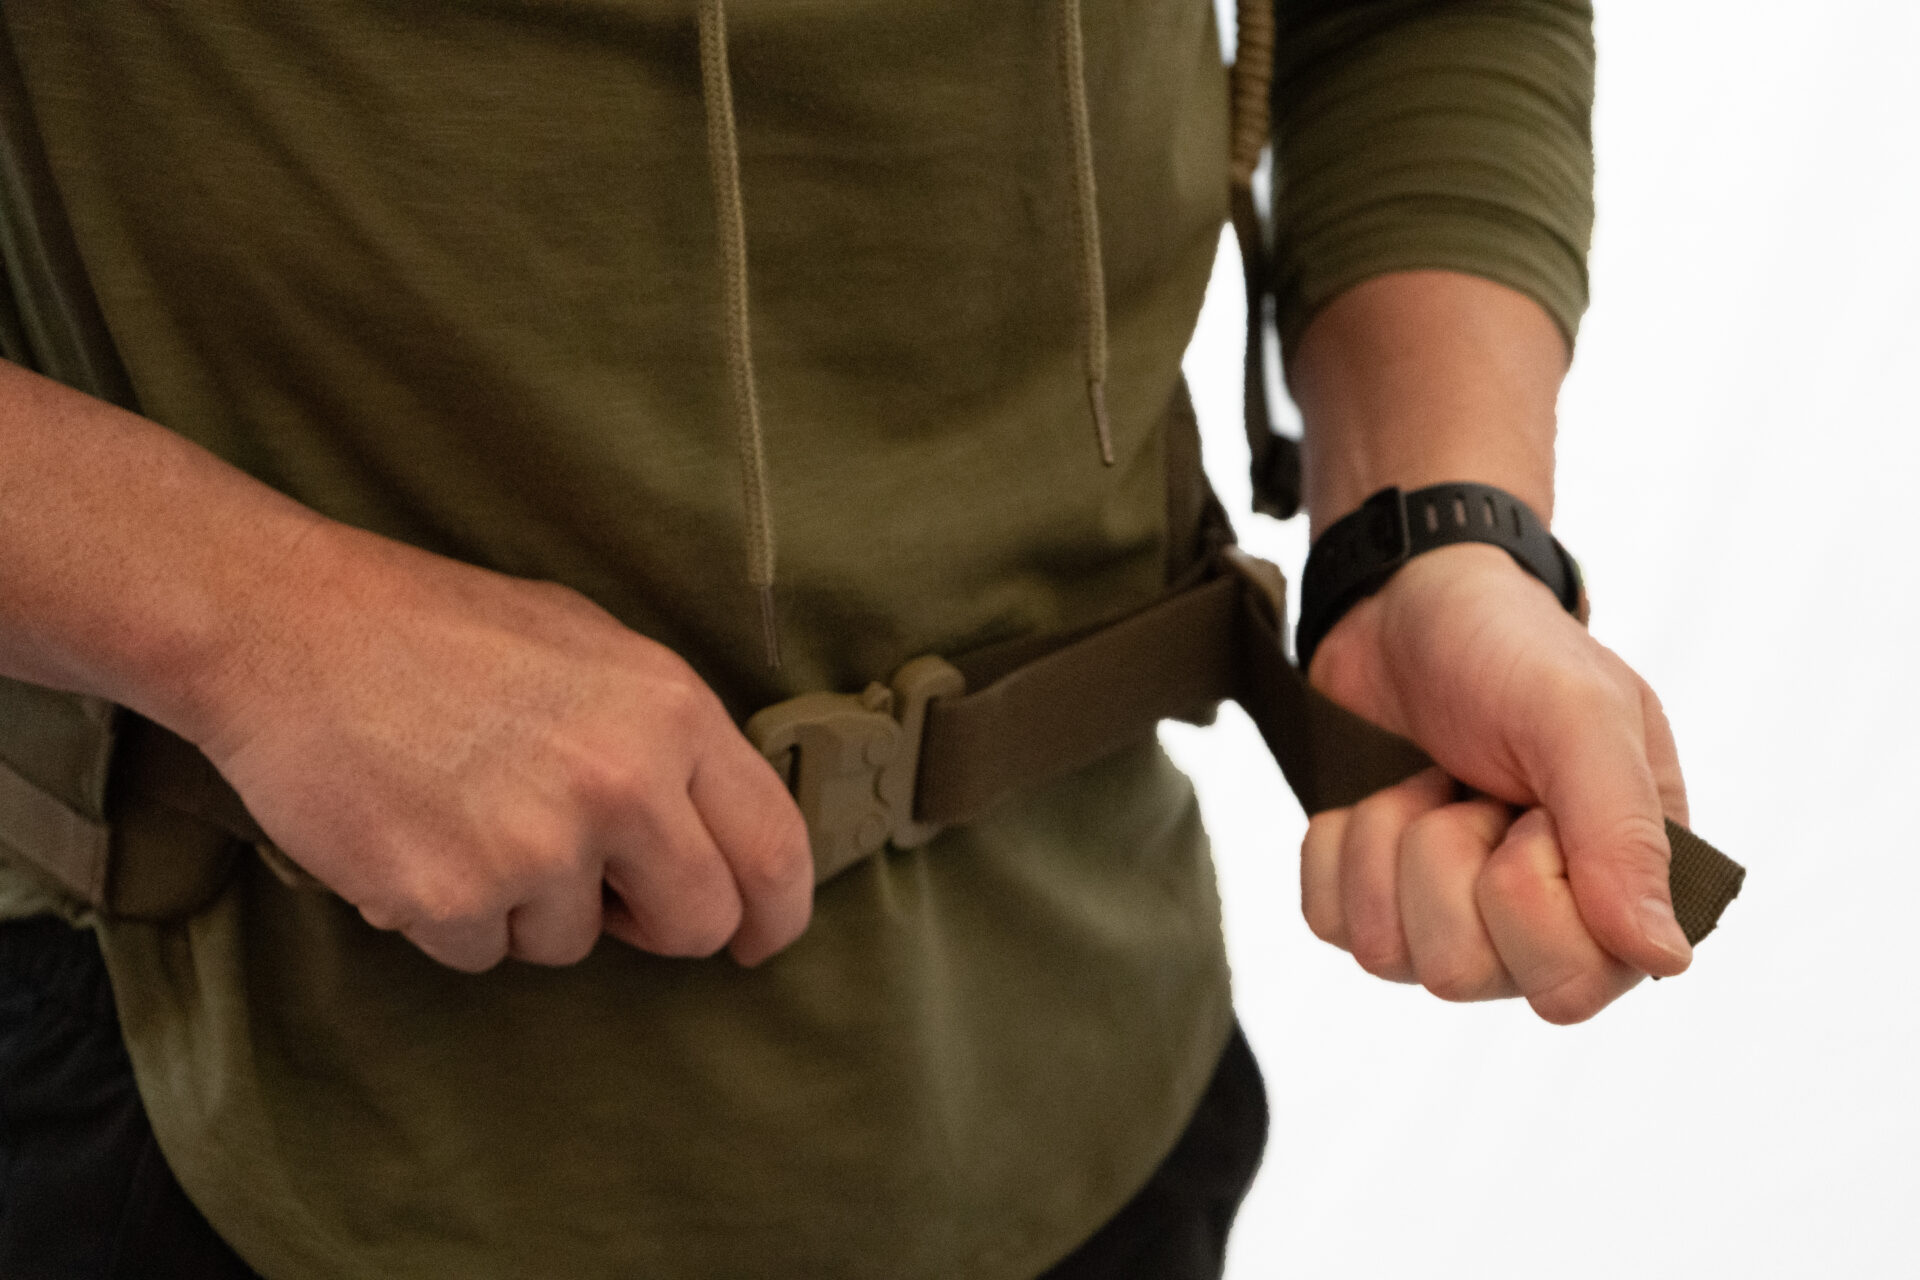
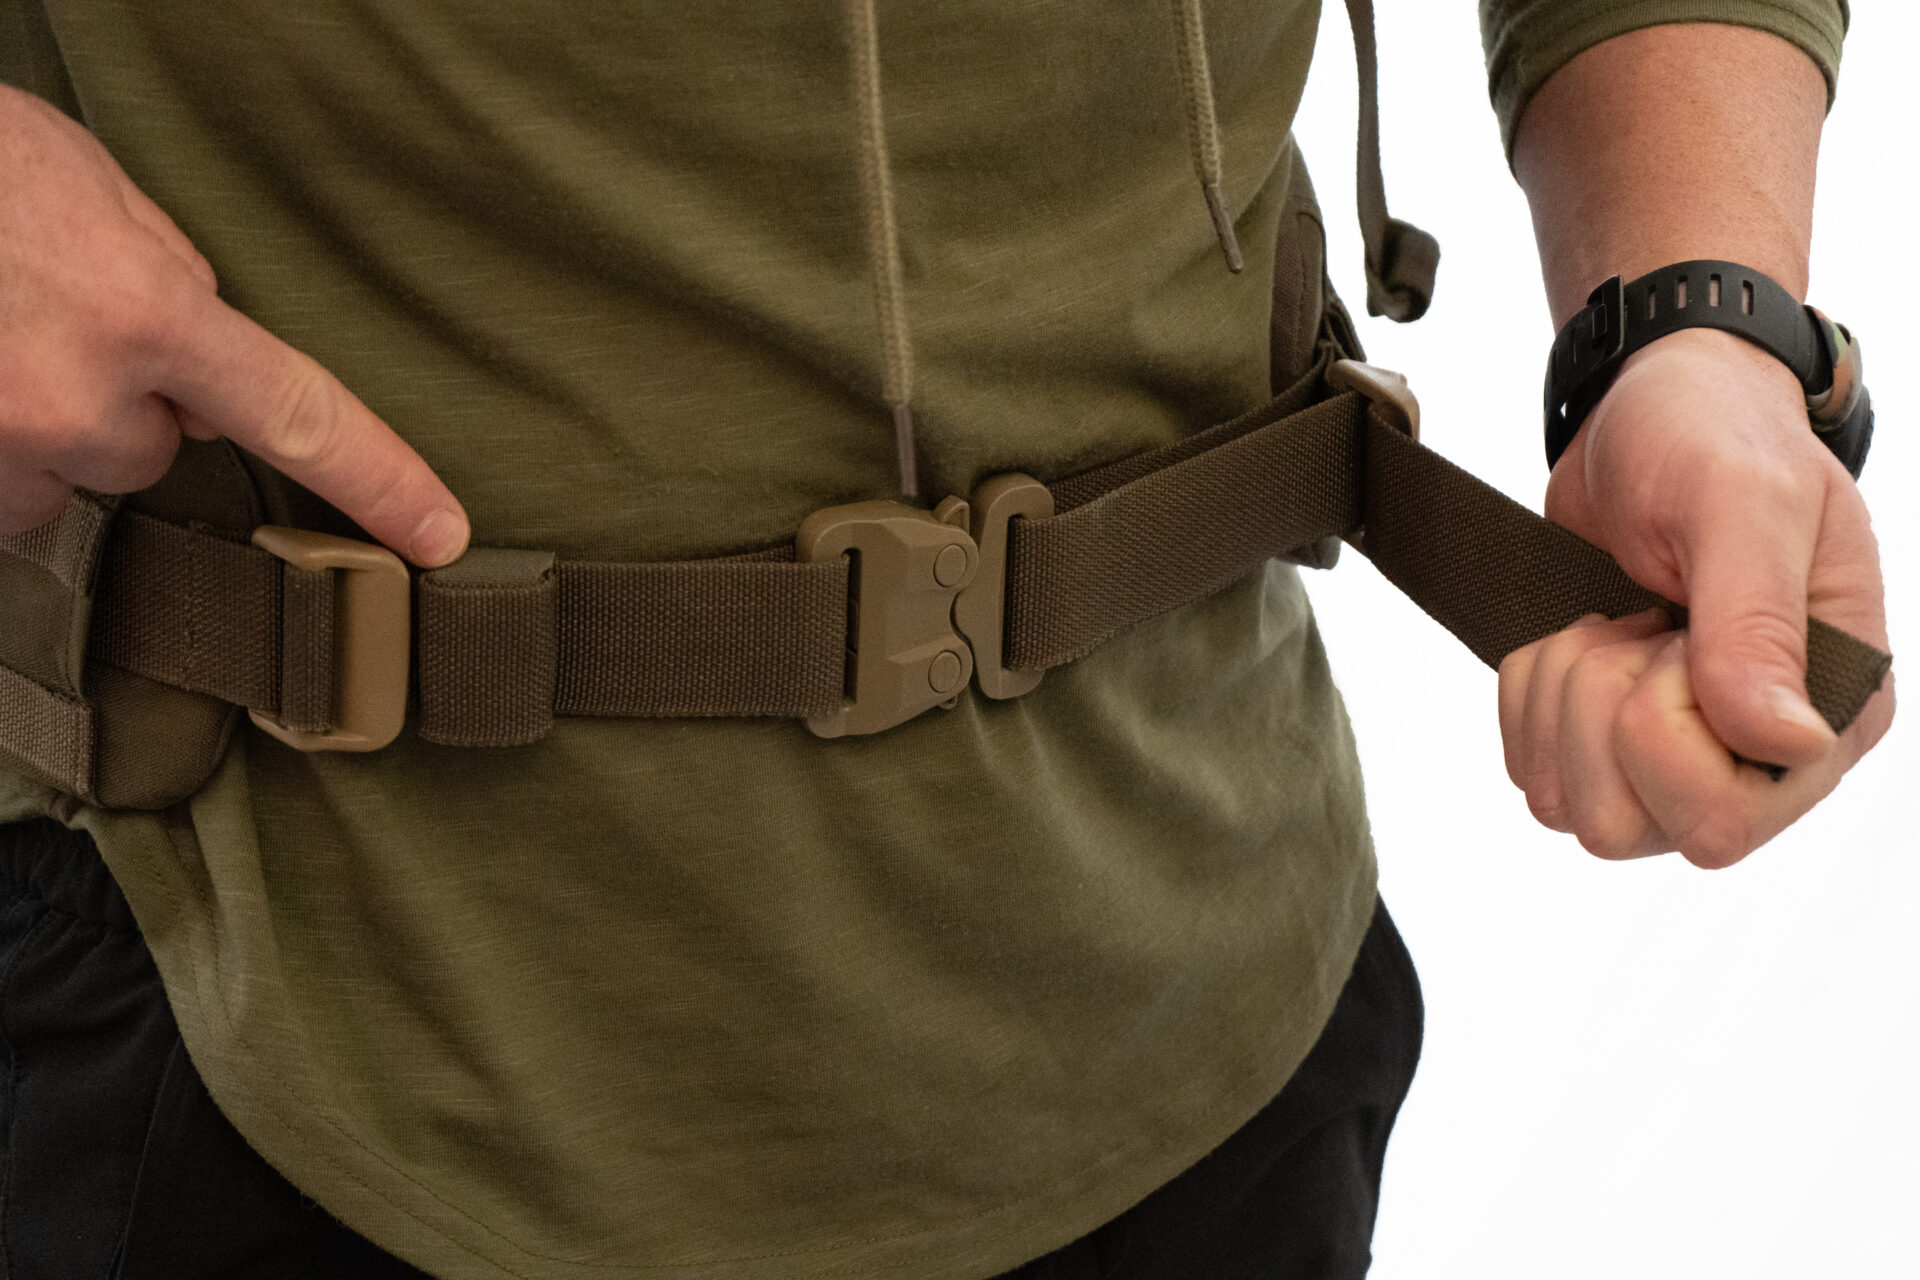
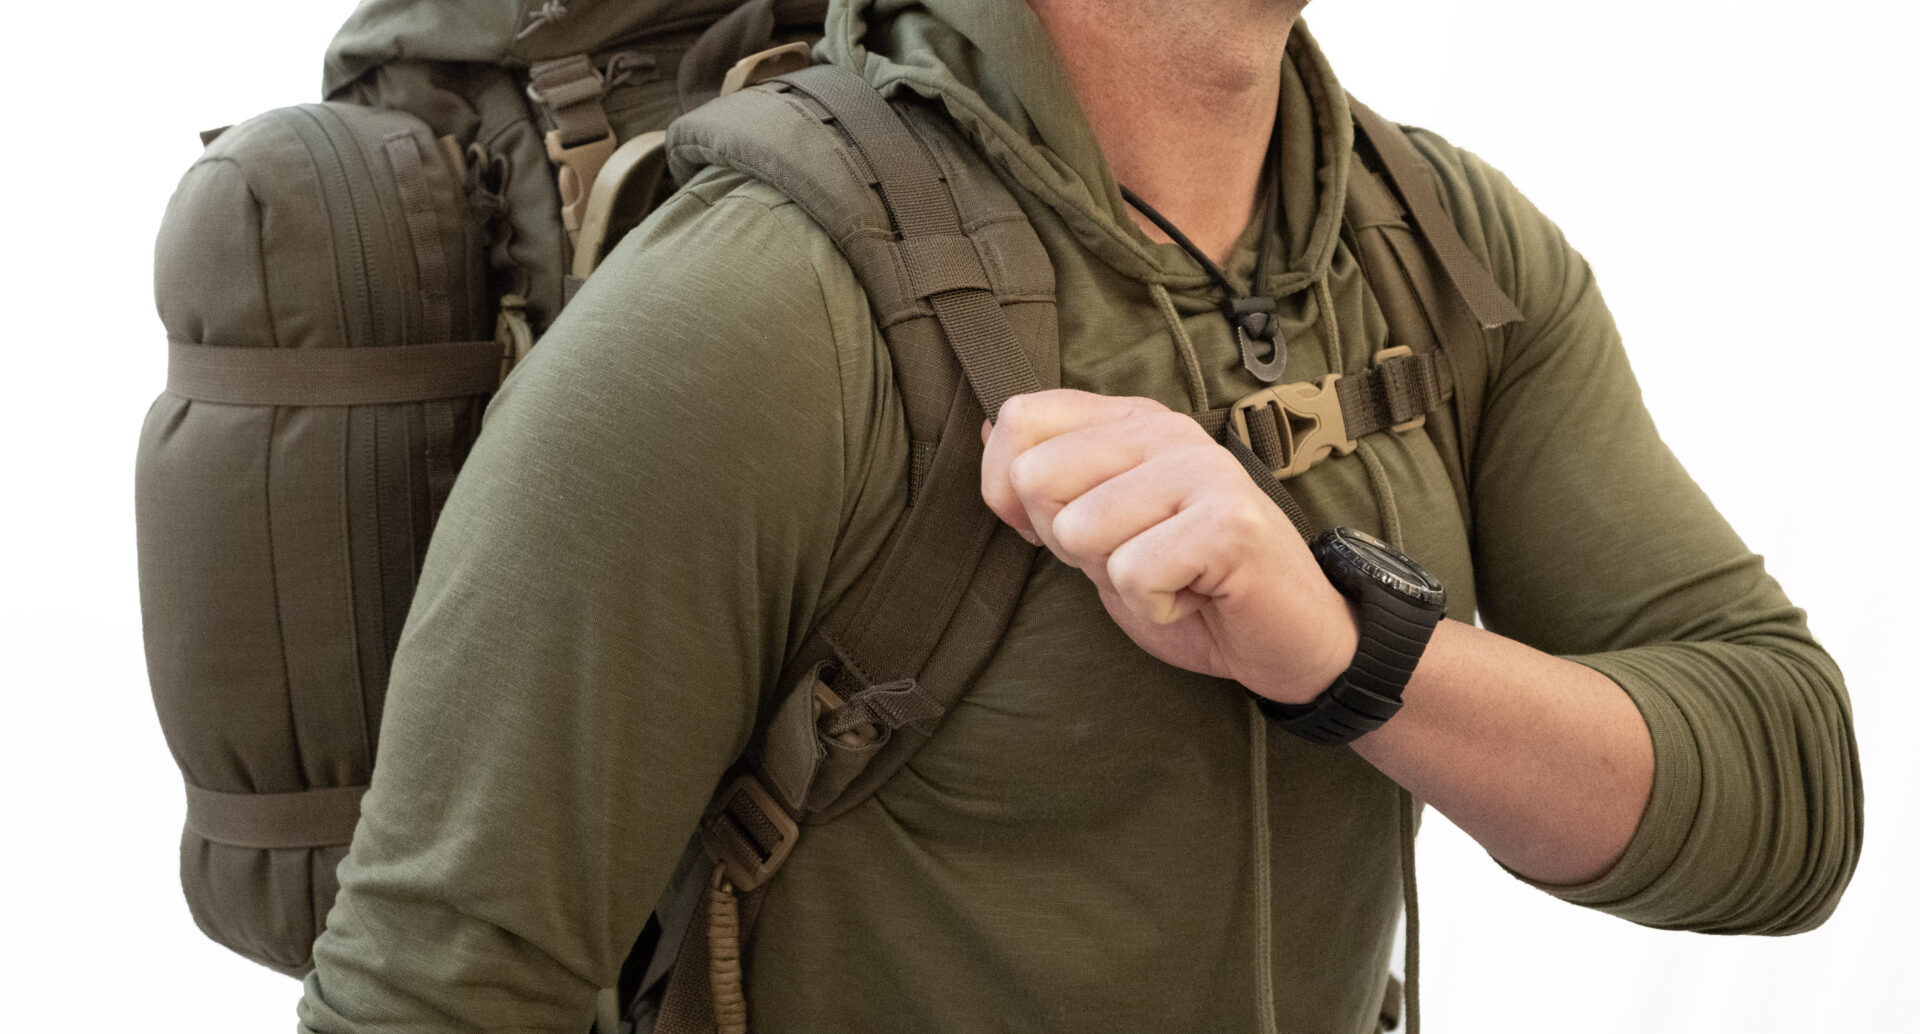
Step 5 – Connect sternum strap
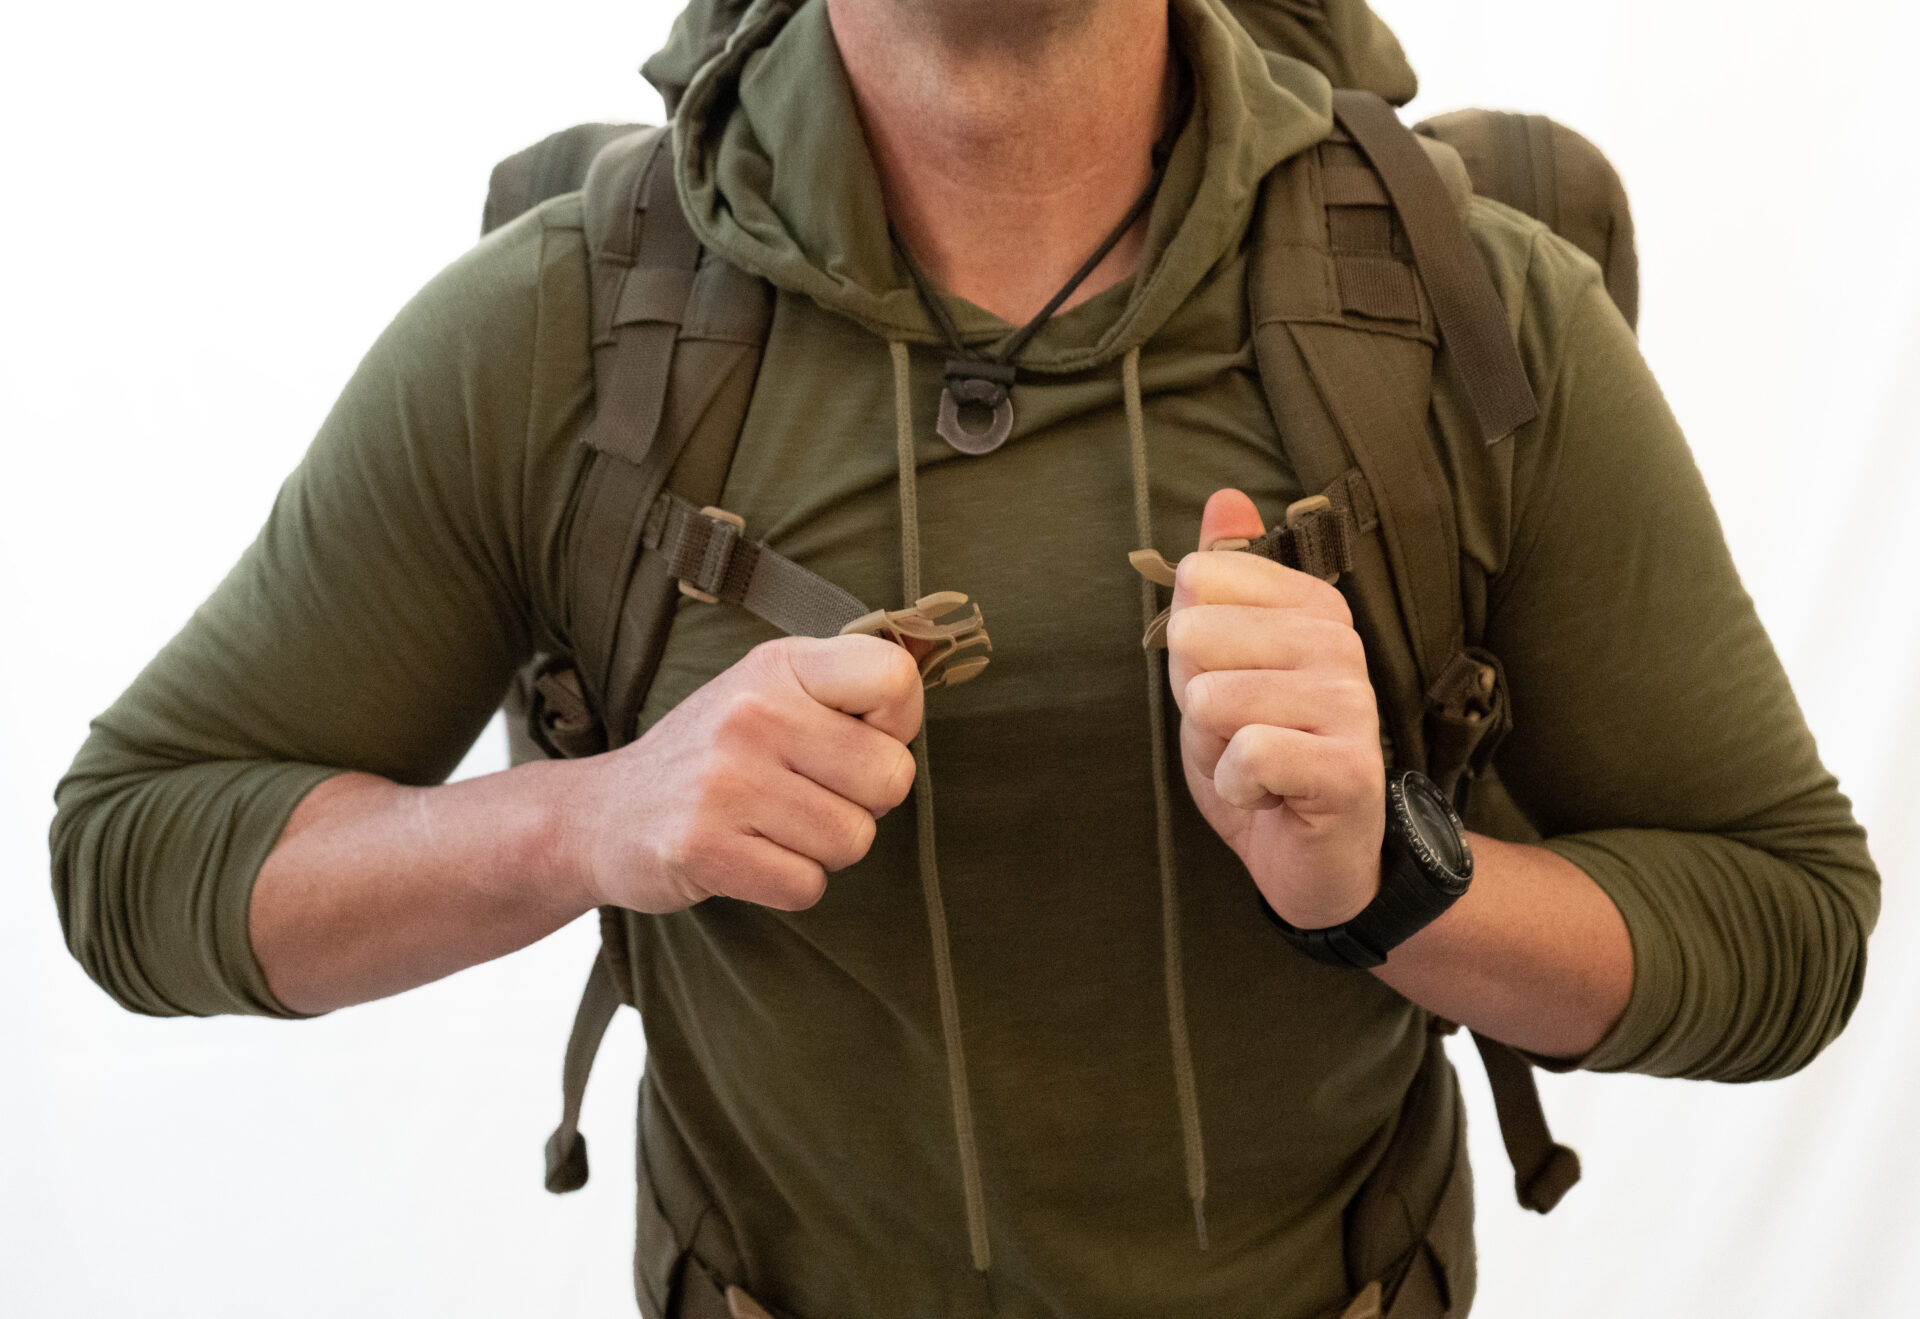
The sternum strap is another important topic to touch on. Correct sternum strap height and tension is vastly overlooked. The incorrect placement of this strap will make your life miserable without even realizing it. The sternum strap is needed in a correct setting for three main reasons, when cinched down it pulls the shoulder straps inwards onto the pecks and upper traps, this decreases the leverage it has on your shoulders. The further lateral the shoulder straps go, the longer moment-arm the pack has to compressing your shoulder. This can lead to shoulder girdle compression which can increase the risk of thoracic outlet syndrome. As you connect the sternum strap, give the shoulder straps a good pull inward closer to your pecs than the shoulders.
Step 6 – Tighten the sternum strap far enough that shoulder straps are not resting on lateral shoulders
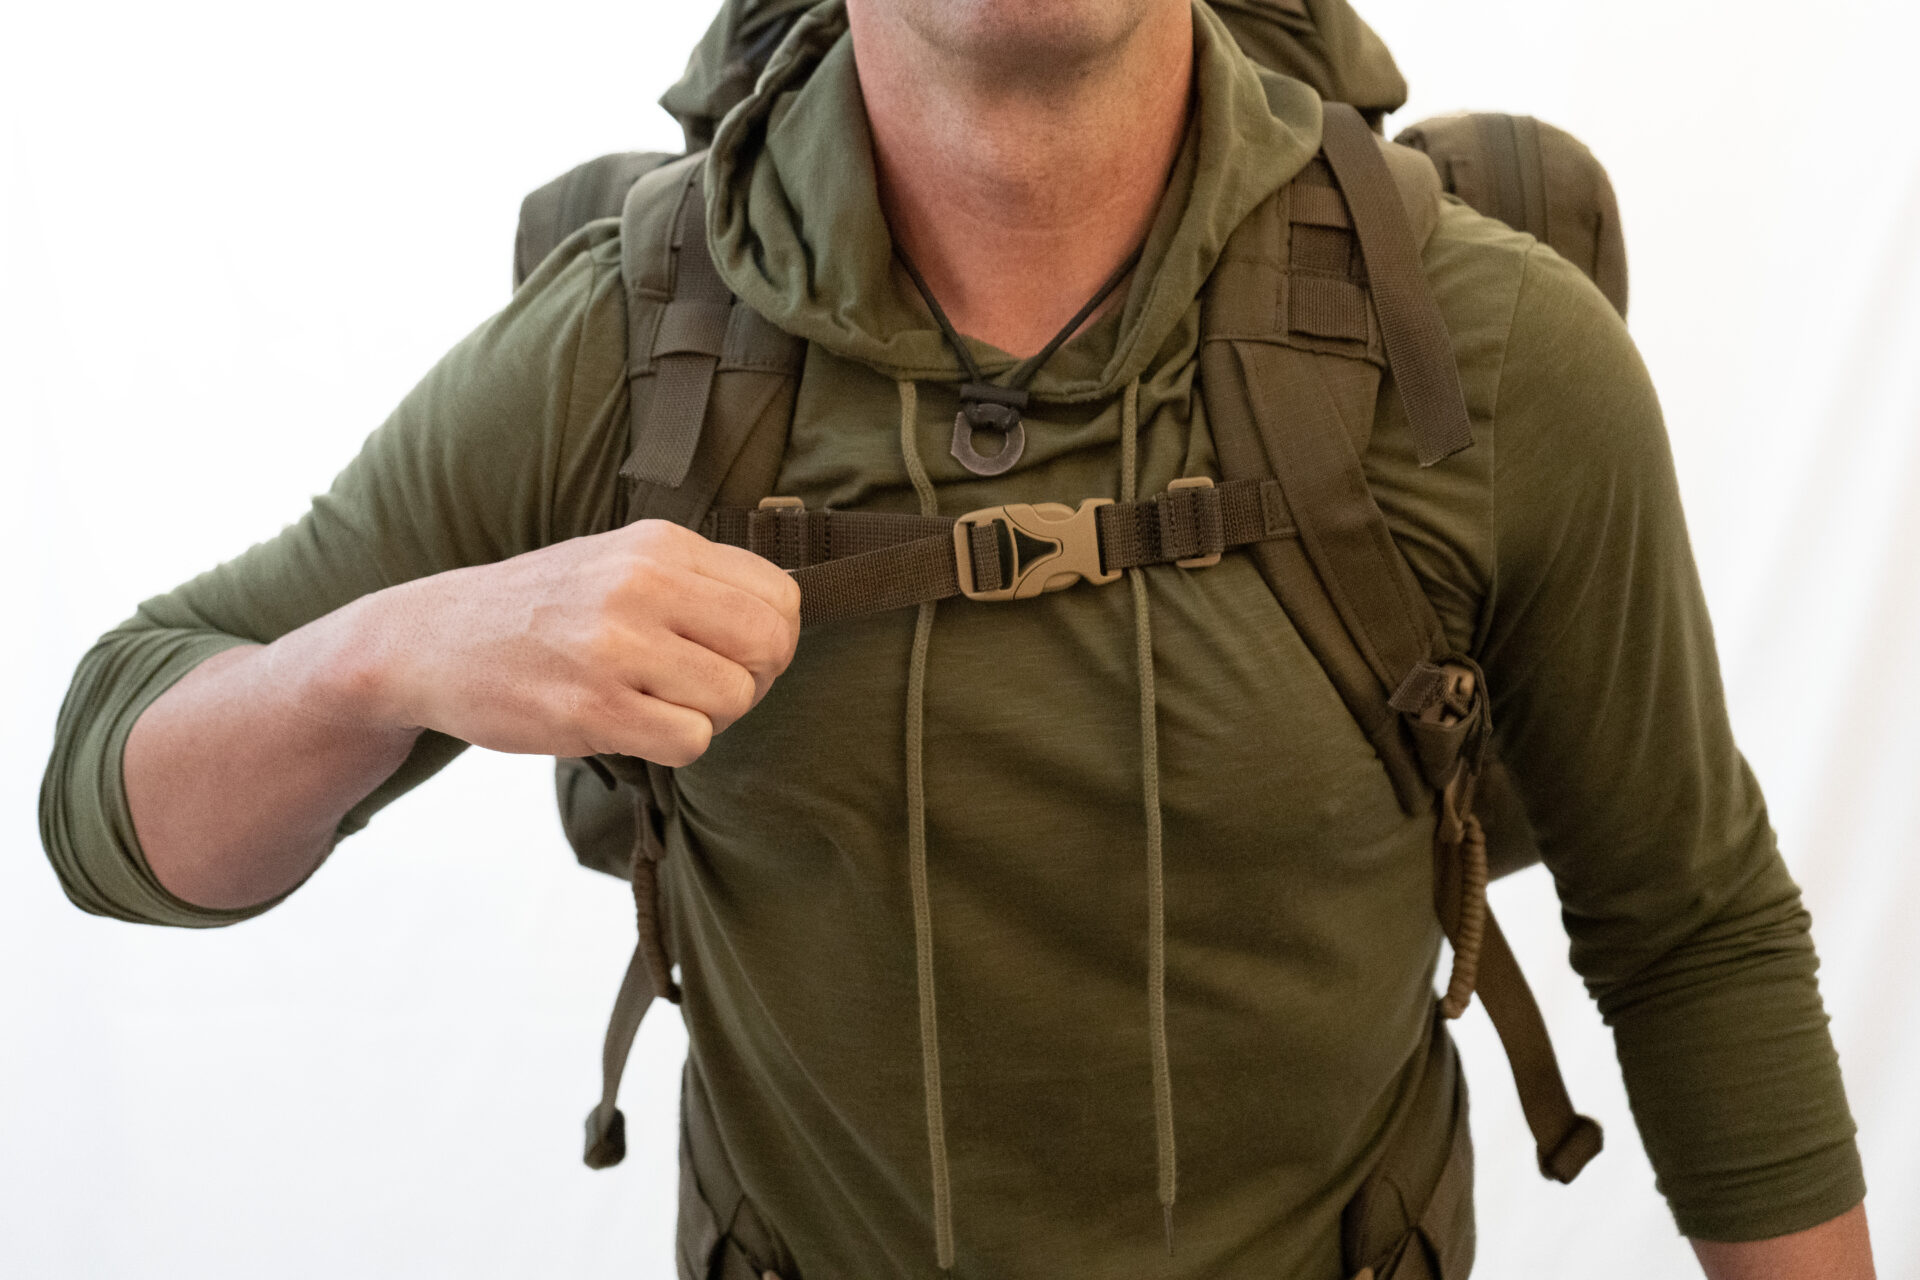
The second important overlooked adjustment for the sternum strap is its height. If your pack doesn’t have an adjustable sternum strap height, get a new pack. Adjusting your sternum strap higher than normal is required for optimal breathing. Strap location should be much higher than people might think. It should approximately be 1-2” below the sternal notch.
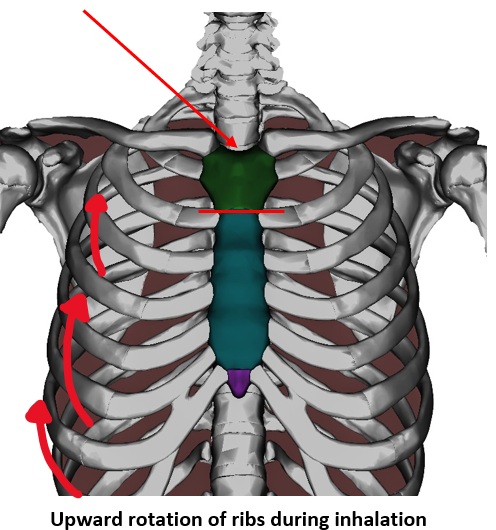
As you breathe in, two main actions are occurring in your thorax 1) Your diaphragm is pushing down allowing for air to fill the lungs, this pushes the lower abdomen out. Remember…While wearing a waist belt also cinched down you won’t have complete expansion occurring. 2) During inhalation your ribs also expand via upward and outward rotation, this further creates the vacuum in the thorax pulling air into the lungs.
It’s simple, the lower your sternum strap is on the ribcage, the less expansion can occur, thus making it harder to inhale. Set the sternum strap just below the sternal notch, this will allow the maximum potential for breathing while wearing a sternum strap and hip belt.
Finally, the sternum strap helps adjust the force angle of the pack on the body. If the sternum strap is too loose you will notice added pressure into the lumbar pads, this means the pack is angled backwards and incorrectly adjusted. This will lead to hot spots, chaffing and lumbar pain.

Too loose can cause backward rotation and pressure into the lumbar spine
Propper tension will keep the force from pressing into the lumbar spine
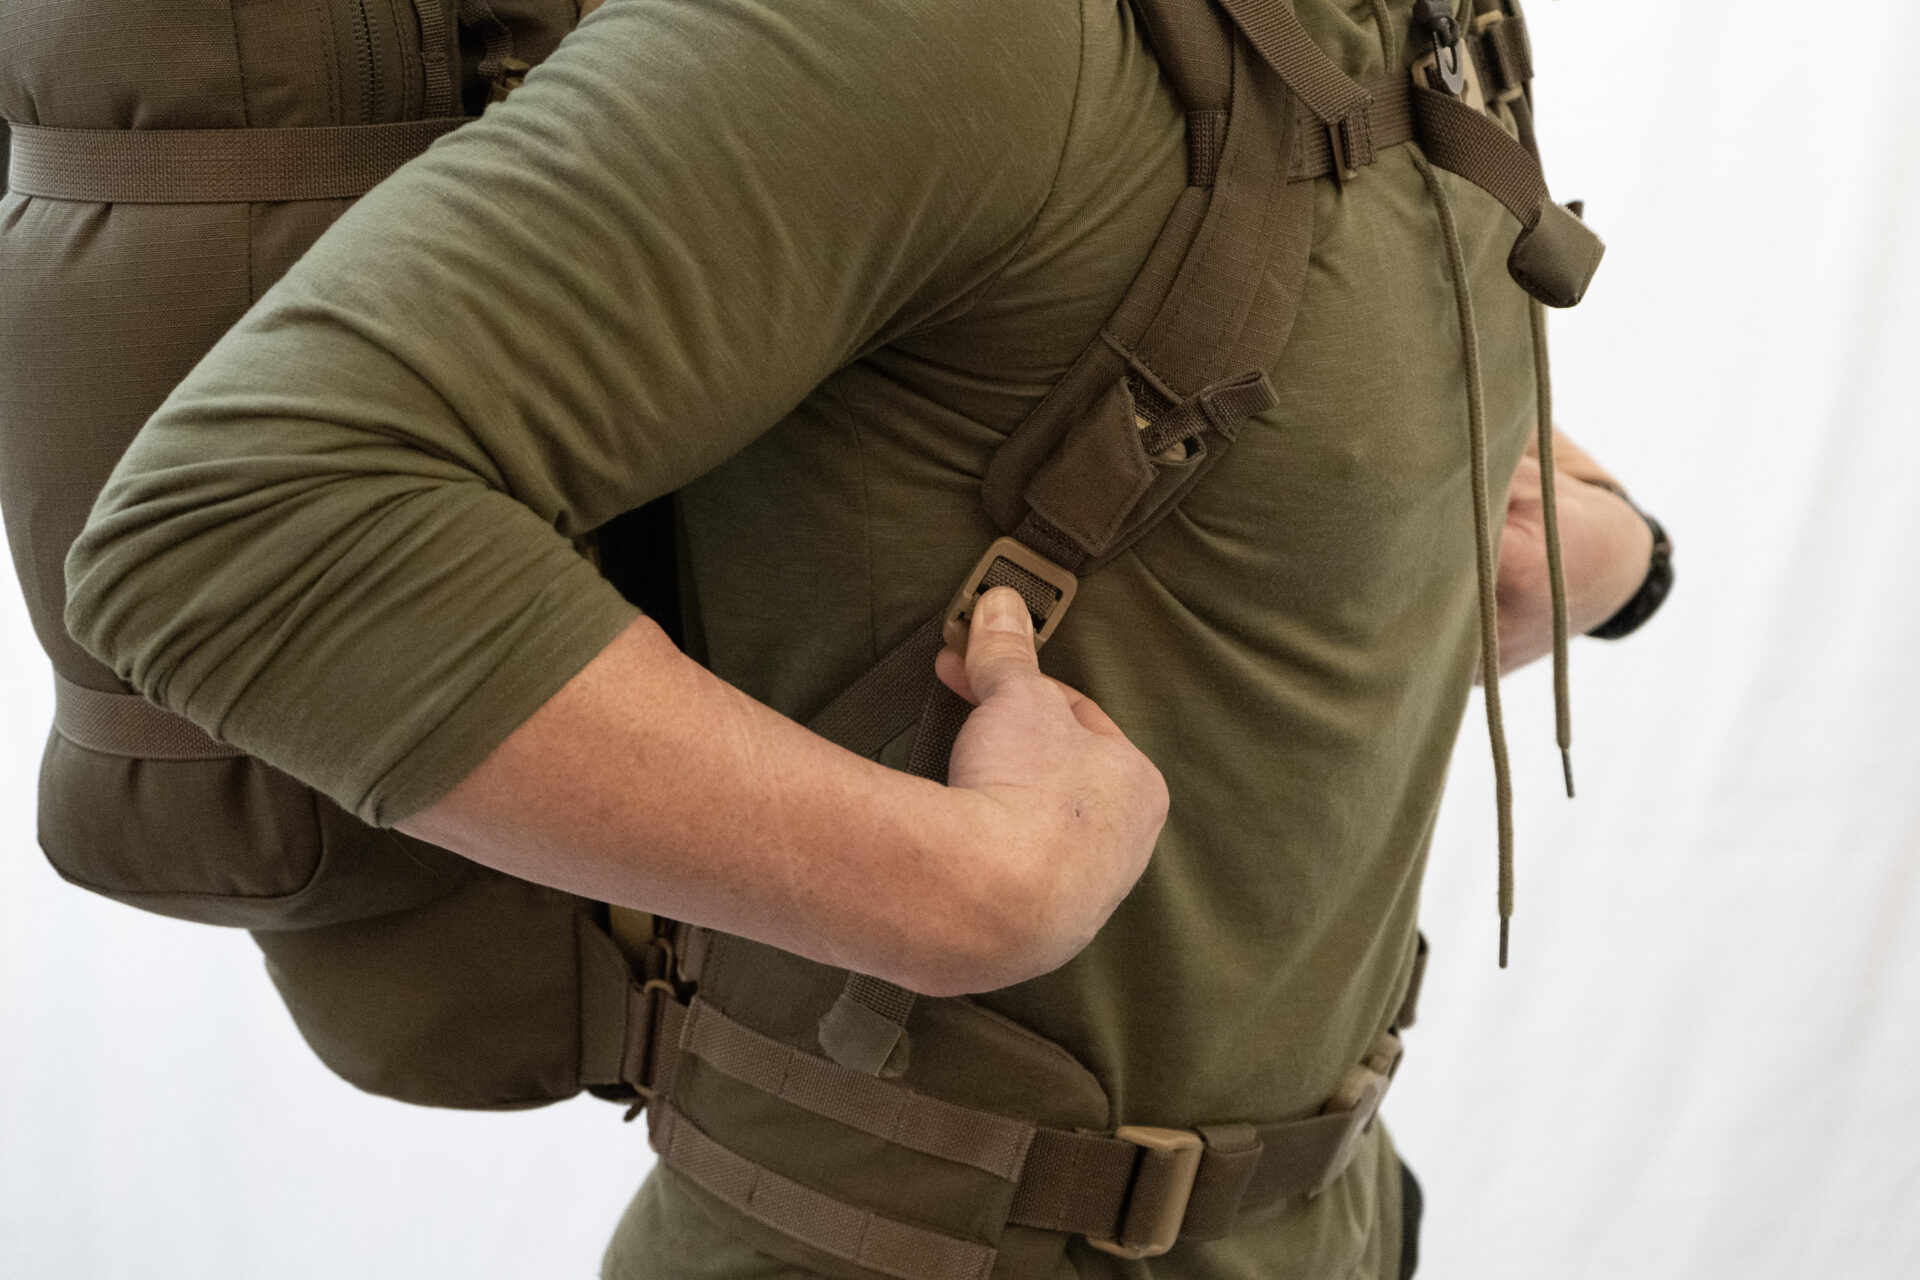
Step 7 – Tighten upper stabilizer straps so that the frame and pack are pulled very snugly against the frame. This will move your CG as far forward as possible and will prevent bouncing

Step 8 – Use keeper slot for upper stabilizer strap when not in use
Step 9 – Finally decrease tension on shoulders by releasing tension on main shoulder strap buckles. This will redistribute tension away from the shoulders and into the lumbar pad and upper pecs via the sternum strap
Long-back compared to short-back rucks
When deciding on a military pack for rucking there are two styles of pack length, shortback and longback. They are both designed to have advantages over each other. Short back rucks are excellent for having the ability to be paired perfectly with military webbing (LBE, PLCE, Belt kit).
Due to the shorter nature of these packs, they ride slightly above the pelvis allowing for the belt and harness of the webbing to ride nicely below the pack. For long duration operations this allows the soldier to keep their chest open for ventilation if body armor is not immediately required.
Having a higher ride, they allow for more hip mobility as it doesn’t lock down the pelvis. This is a good thing however it can also be a bad thing. It simply comes down to load. Once the load gets into the higher ranges, sacrificing range of motion for more stability is recommended. This is when a long-back ruck becomes advantageous.
Long back rucks run longer in length and reach the pelvis. Due to the anchoring location, they are able to redirect force away from the lumbar spine. However, and this is another big however, if the user omits from using the hip belt, they defeat the entire benefits of a long-back ruck which is to provide lumbar stability. If one is using a 120L pack and loading down with a lot of weight without lumbar support, this is a recipe for an injury. It’s like rucking in flipflops compared to boots. Your back also needs stability.
Gait
There are more than 600 muscles in the body. These muscles, shorten, lengthen and can maintain a static tension at any given moment during movement. Their function is to stabilize joints and provide controlled motion needed for moving bones. They act more like steel cables which can shorten and lengthen opposed to a stretchable rubber band which some have been incorrectly led to believe.
At any given time during movement these muscles are being controlled subconsciously by the nervous system. When you stand up to make a coffee, did you tell your “extensor digitorum longus” muscle to shorten at the precise time to prevent tripping over your big toe? Of course not, you decided on a task and your body figured it out. Pretty incredible right? So now with that in mind let’s talk about gait.
When cueing up a movement for either an exercise or in this case rucking. There are some general rules to consider to help. However, and this is a big however. Remember, your central nervous system is much smarter about calculating movement than you are. It’s an absolute miracle with the thousands of calculations it makes in a split second to move and manage an orchestration of hundreds of muscles. So, whether one person says, you need a heel strike, a midfoot strike, large arm movements, high and tight arm movements. Be aware that this may not be the way your body prefers to move. For example, if my body has a long femur in relation to my tibia and yours is the opposite, we may have a very different gait, and that’s completely normal. Keep this in mind and allowing wiggle room for CNS and anatomical variances, lets boil down some basic rules to follow while rucking.
Keep vertical inertia of the body and pack to a minimum– With the added weight of a ruck there is already a higher longitudinal force on the body. This force adds compression to the articulating surfaces of the hips, knees and ankles. Along with increased compression of the vertebral discs. Therefore, a normal walking or jogging gate can handle a more aggressive impact with the ground. However, while wearing a ruck you need to consider manipulating your stride into a gentler strike when your foot hits the ground, this looks more like a glide than a stomp.
Stride– It is common for stride length to adapt as load or terrain changes. Depending on hip mobility this is potentially a way the body is naturally protecting the low back. As one leg goes forward and the other goes back, if the person has limited hip mobility the body would naturally try to accomplish the extra motion through a pelvic tilt and rotation. This tilt paired with rotation will change the angle between L5 and the sacrum. This angle under normal circumstances wouldn’t be an issue for the body, however with the increased load of pack it may be problematic for the person. My recommendation is not forcing a wider stride distance beyond what feels natural to you. By doing so you may be contradicting something the nervous system has already figured out for you.
Increase arm movement more than a normal jog or walk– While walking or running unloaded, your body has pelvic rotation on the thorax, (one shoulder comes forward while the other moves back simultaneously) this movement allows you to generate adequate force through the hips and vice versa as your foot pushes off the ground. When wearing a pack your upper body rotation will naturally decrease, as it should. With increased leverage of a pack, maintaining normal rotation would exhaust you much earlier compared to normal non-loaded rotation. The further your spine goes into rotation from center; the less structurally stable it becomes with any increased degree of flexion or extension. Loading the spine with a pack only further exacerbates this issue. To help generate upper body force for movement I recommend a slightly exaggerated arm swing where necessary to help counter the forces of hip movement, while compensating for decreased spinal movement.
Speed Variations–
 In rucking there is an inverse reaction between speed and control. The faster you go the increased forces which can be used against you. Imagine a Porche 911 speeding downhill on a mountain road. Because it’s light, low and has an excellent weight to braking ratio, it makes for a perfect high-speed machine. Its steering column tires and brakes are similar to the muscles of the body due to the Porches’ increased control it can safely navigate smoothly downhill around hairpin turns. Compare this now to a tractor trailer carrying a heavy load. Its center of gravity is high, it has a poor braking to weight ratio and decreased traction on turns. Its steering column tires and brakes are also similar to the muscles of the body, however in this scenario the muscles are heavily loaded. Due to its poor control compared to the Porche, it must go slower to decrease the inertia and potential energy on hairpin turns. If too much lateral force occurs on the corners and exceeds its traction component. The truck will slide into the guardrails. The guard rails in the human body are the ligaments. If the truck inflicts too much force into the guardrails it might bust through the barriers and careen off the cliff. This is exactly how forces are absorbed via the ligaments. Most ligaments have a purpose as a backup plan like guardrails to help stabilize joints. Too much force, and there goes one of your ligaments. The moral of the story is to recognize that you have a decreased control and braking mechanism while carry a heavy load. Be aware of the risks involved with increased speed and manage them accordingly to prevent careening off of a cliff.
Uphill v downhill–
Anyone who’s done enough rucking knows this. Similarly to above, uphill and flats provide far greater control compared to downhill. Uphill challenges the cardiovascular and muscular system incredibly well, is very controlled and is softer on the joints. Where downhill can pound the knees and hips while managing deceleration forces. Be cognizant of this when selecting terrain for your workout that day. Whether it’s a “loop” or an “out and back”, can be the difference between thrashing your joints or getting an intense workout. For example, if you’re doing a loop and it has a smooth surface uphill, but has a rocky, root laden downhill which comprises the majority of distance. You may want to find a reverse of that ratio by simply doing the loop in the opposite direction. Try up on the root side and down on the pavement, to get the best of both worlds. Remember that rucking is a form of exercise, toughening yourself up by punishing the joints is a recipe for being on the injured list. Playing the long game will give you the best shot for health into your latter years. Think about this, if you are smart in your younger years and are able to continue rucking into your 70’s; you’re not only an animal next to your peers, but kicking some major ass along the way.
When the body breaks down
If you have been training long enough you have probably had some set-backs. They can range from illnesses which take longer than expected to recover, or tendonitis which takes “forever and a year” to heal. Any form of exercise has its potential for risk, you should ALWAYS consult with a physician prior to beginning a new exercise program to ensure your body can handle it. Adding rucking to your regiment is no different. Let’s talk about several injuries which can occur from rucking. This is not a substitute for visiting your doctor if you have an injury, this is to talk about the potential injuries. We can classify injuries into two categories:
Acute – Acute injuries are ones which occur suddenly, for example an ACL tear or a hard fall and fractured tibia. They are incredibly painful; in some cases, they can cause pain goes from zero to 100 in seconds. They usually require immediate medical attention and possibly surgery or non-surgical intervention.
- Tendon tears (strains)
- Ligament tears (sprains)
- Dislocations
- Bone fractures
- Cartilage tears (meniscus, labrum etc.)
If you suspect your injury is severe, head straight for the emergency department. The following symptoms may be a good guide to follow when deciding if your injury requires immediate professional care:
- Severe swelling and pain
- Visible deformities, such as large lumps or limbs bent at strange angles
- Popping or crunching sounds when you move the injured area
- Inability to support any weight with the injured area
- Instability in a joint
- Numbness, tingling or burning sensations
Chronic – Chronic injuries are mostly driven by improper forces and overuse of an activity. They appear slowly with their onset and are easily ignored. They are very common and are more likely to occur than acute injuries, but because these injuries are not instantly disabling, they attract less medical attention than those that cause a sudden and obvious loss of function. This makes chronic injuries very deceptive; their symptoms can fluctuate throughout the week and even throughout the day. They can get better after a few days of rest, and come right back after a workout. Due to their elusive behavior, they can be hard to diagnose or even result in a delay in diagnosis and treatment; delays can lead to a prolonged healing process and in cases more serious dysfunctions. When in doubt, get checked out.
You should contact your doctor if the injury seems minor but doesn’t improve with home treatment. Any condition that affects training or performance but has not been diagnosed or treated should also be the green light to consult your doctor. Once you get a recce on the situation and know what’s going on, you will have a roadmap and direct road to recovery. How does one fight the enemy if one doesn’t know where they are, or their numbers?
Dysfunctions which can arise from rucking
Shoulders and neck
Thoracic outlet syndrome (TOS) – The nerves that leave the neck and continue down the arm can become compressed. After leaving the cervical spine, they pass between the collar bone and the upper rib. Anatomically on certain people this space can be reduced due to congenital circumstances and also physical activities or trauma. When these nerves are compressed, they can create sensations from the neck down the arm of pain, tingling, numbness, coldness and weakness. If you experience any of these symptoms, go get checked out early, as these symptoms can be very similar to nerve compressions which originate at the neck due to spinal defects.

When rucking the added load on the shoulders from the shoulder straps can add downward compression of the shoulder girdle onto the brachial nerves resulting in thoracic outlet syndrome. My recommendation regardless of whether one is prone to this dysfunction, is to adjust the sternum strap high and snug as mentioned previously which brings the shoulder straps inwards. This will decrease the packs’ leverage on the shoulders, thus preventing early fatigue on the upper traps of the shoulders and decreasing the chances of nerve compression.
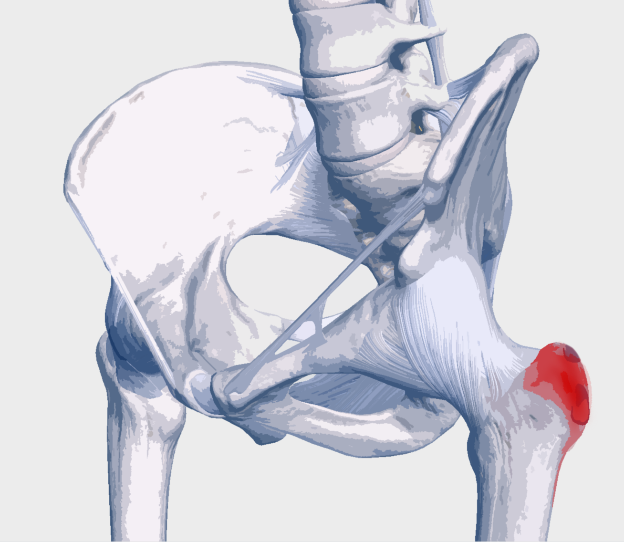
Hips
Piriformis syndrome – There is a small triangular muscle in your butt called the piriformis. It is one of the hip rotators and provides rotational stability in the hip. The sciatic nerve passes directly under the piriformis as it makes its way down the leg. When the piriformis contracts during a spasm or is chronically tight, this can cause pressure and compression on the sciatic nerve. While uncommon on some individuals, during development in their mother the sciatic nerve can split and grow through the piriformis making them more prone to developing this syndrome.
If one is suffering from this syndrome they may have symptoms of numbness, tingling or tightness in the glute, which may run further down the leg and into the low back or sacrum. It’s literally a real pain in the ass. Same as before, if you experience any of these symptoms, get an evaluation from your doctor; they can be very similar to nerve compressions which originate in the lumbar spine.
If you are diagnosed with piriformis syndrome, follow the treatment prescribed to you by your specialist. From a rucking perspective, if you developed piriformis syndrome and believe it was due to the rucking, pay attention to your footwear. Do you remember earlier I had mentioned the close biomechanical relationship between the hip and the foot? If the foot is locked tight in a boot, it will cause the hips to overwork. This can cause the piriformis to become overly tight and sore. After therapy and adequate rest, consider adjusting or changing your footwear by increasing its mobility. This may be the root cause and prevent a relapse of symptoms.
Hip bursitis – Around the hip joint there are fluid filled sacks which help cushion and lubricate the joints. During repetitive use activities like running or rucking, the bursae can become inflamed and painful to the touch. Rest and physical therapy are effective methods to recovery. Also consider that if the hip is overworking, it may be due to weakness or lack of mobility down the leg and into the foot. Commonly seen with these kinds of dysfunctions, one area is pissed off because another area isn’t doing its job efficiently. This may require you to strengthen your feet or allow the ankle more mobility inside your boots.
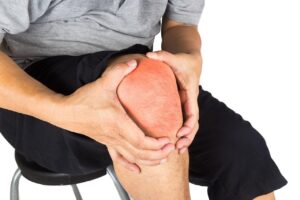
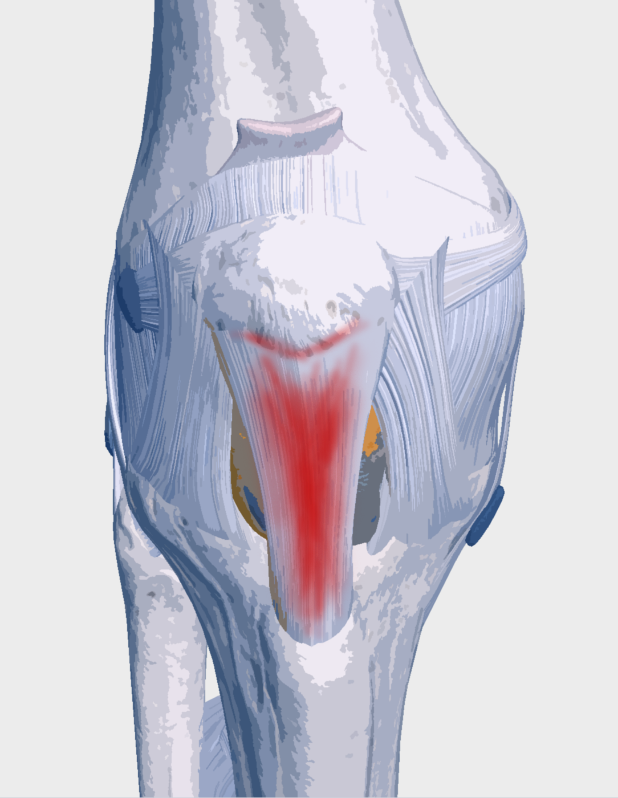
Knees
Patellar tendonitis – The patellar tendon connects the gap between the bottom of the kneecap to the most prominent part on the upper shin. This area for various reasons can become inflamed and make walking up stairs painful. Swelling and soreness can take months to fully heal. If this is suspected my recommendation is to get checked and assessed. In my experience, I have seen several instances where patellar tendonitis is driven by limitations in foot pronation or supination strength, even poorly fitted shoes with high arch insoles can be the culprit.
In relation to rucking, you are magnifying the forces through the body compared to unloaded walking. If you have any disfunction which is hiding in the lower half of your body, rucking will reveal them to you and allow them to be directly addressed.
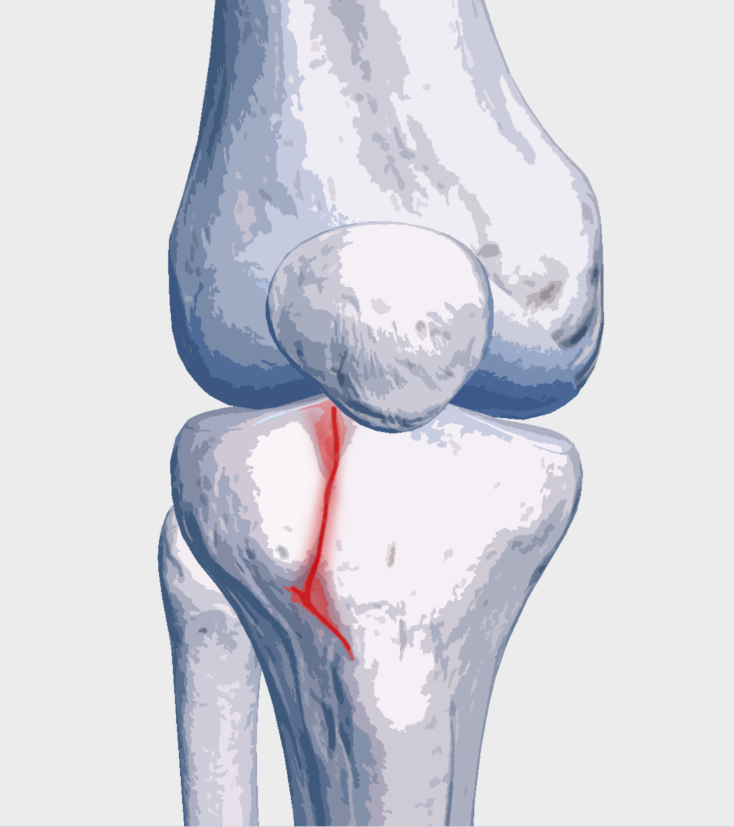
Tibial plateau stress fracture – This is essentially a small hairline crack or fracture in the upper surface of the tibia (shinbone), specifically on the tibial plateau (the weight-bearing top surface of the knee joint which your femur rests on). Repetitive stress from activities like running or jumping can cause these fractures, however, in this case rucking. Any signs of swelling or pain around the knee should get a full evaluation from your doctor. Furthermore, if a stress fracture is found it is IMPERITIVE you rest and allow it to fully heal. Without proper healing this crack will grow to a point where surgery and pinning will be required prolonging healing.
Be kind to your knees while rucking. Don’t ruck-run with heavy weight on hard uneven surfaces. This is a recipe for disaster. If you progress to ruck running, do so very carefully, the risk for injury goes way up. Keep the weight low, shorten your stride, adjust your gait to have soft cushioning impacts with the ground. Allow your muscles to absorb the impacts like shocks on a truck. Try to adjust your stride so that there is minimal vertical inertia up and down, this way the pack is not bouncing and your joints are not taking hard vertical impacts. Selecting softer terrain, beaches are an incredible and difficult workout due to the soft ground.
Lower leg and feet
Metatarsal stress fractures – These are fractures of the long bones in the foot which the toes attach to. This happened to me several years ago. I was playing “hopscotch” like an idiot. I was on my way down from a summit in Switzerland with poorly supported hiker shoes and a pack. I was rock hopping to get down before dark. All it took was one hard landing on my left foot. After the impact on the bottom of my foot, I can only remember that it felt “weird”, but definitely not painful. I was able to make it all the way down with minor discomfort. The next morning and a few days after I felt relatively fine only minor soreness. Over the next few weeks, the soreness turned into pain which prevented me from walking barefoot around the house. The pain increased over several weeks to a point where I went and had an X-ray. It showed a very faint fracture which took unbearably long (10 months) to finally heal. Arguably a full year until my foot’s strength was fully back to normal to carry a ruck.
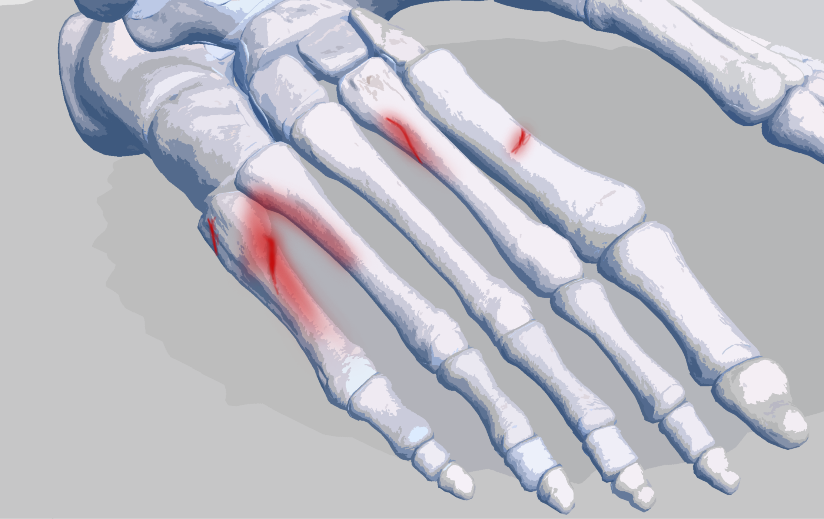
Stress fractures are nothing to play around with in the feet. If you don’t allow them to heal properly which means you MUST REST, they will potentially require a surgical intervention, usually pinning. Best case scenario, your healing process starts right back at the beginning. Worst case, you have a pin or rod in your foot and it will never be the same again.
Rucking inherently puts additional stress on the feet. You must allow time and micro-progressions for the feet to adjust and grow stronger to manage this additional load. Your boots, must match the required support for the load, higher load = higher support required.
After healing from a stress fracture, proper boot selection and listening to your body is imperative for long term success.
Shin splints – I’m sure you all know of somebody who has suffered from this particular form of inflammation. Typical of all kinds of tendonitis, it is one of the ones which go away with rest, yet come back with activity. If left untreated, it can become almost unbearable. I have treated several people with issue. In my anecdotal experience, the absolute very first place I look is the footwear. People don’t realize how incredibly resilient the body is, sometimes they can wear incorrect footwear for their foot type for many months before any sort of symptoms arise. Therefore, when they land in my office complaining of shin splints, I will usually ask them about their footwear. They immediately dismiss footwear as the possible cause as they say they’ve had those shoes or boots for many months, sometimes a year. Little do they realize that it took that long for a “death by a thousand cuts” to come to fruition.
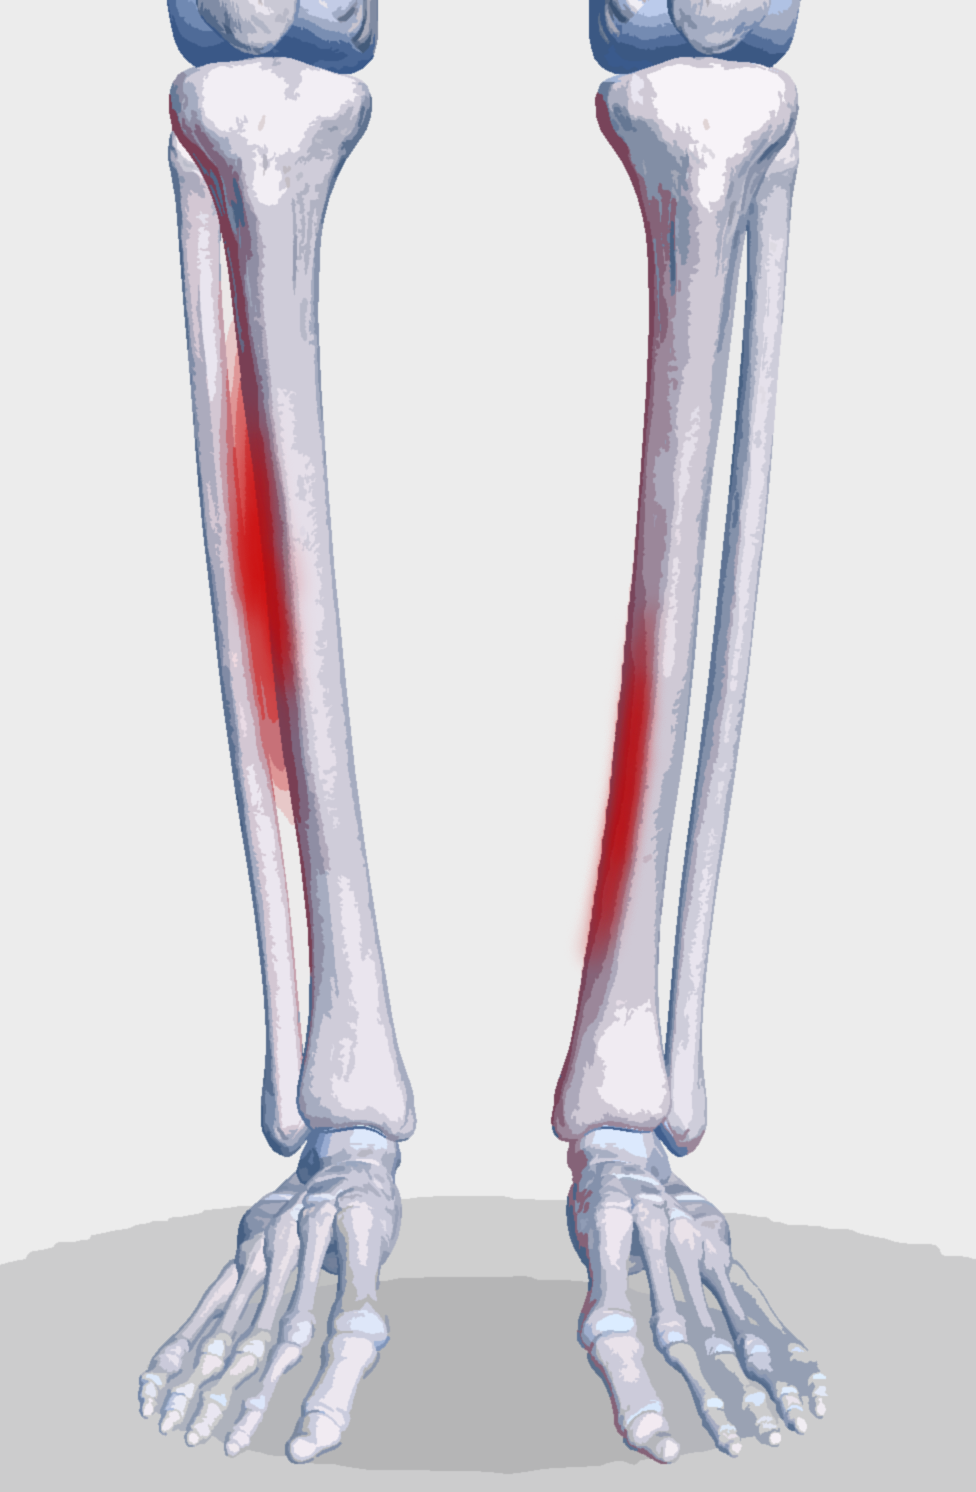
When it comes to rucking, as I have said before. Take care of your feet and pay attention to the inside shape of the boot insole. When your foot isn’t providing support for the mechanisms up the chain, it causes those nearby links in the chain to compensate and overwork. A natural hypothesis when I see shin splints, is to address the inflammation first by rest which allows the tissues to heal. Then I address the tightness’s in the lower leg and calf. Then following up with a targeted strengthening prescription where needed, typically in either the foot and hips. Finally, when returning to activity I look at addressing the potential root cause, the footwear.
If you have been diagnosed with shin splints which keep recurring, finding a good physical therapist skilled in this area with your doctor’s approval would be a good place to begin. When it comes to any kind of rehabilitation technique, you must be consistent if there is a chance for healing, it will take time and money.
Plantar fasciitis – I’m sure many of you have heard of this one, it’s common and many will experience it at least once in their life. This is when the tissues on the bottom of the foot become inflamed and in severe cases difficult to walk. Usually, symptoms are the worst in the morning and improve during movement. It is a repetitive use injury which improves with rest, but comes back with activity.
It’s hard to identify the exact mechanism which causes plantar fasciitis, but I can speculate that there is a connection with poor hip mechanics, poorly supported footwear, rigid arch supports pressing into the tissue and tight calves or weak muscles on the opposing side of the foot and lower leg.
The best course of action is to find a good Muscle Activation therapist who can test for weaknesses in the hips, lower leg and feet to identify which areas are tight and which areas need strengthening. Understand that there are certain areas of the body which take longer to heal than others, my experience is that the feet are one of the hardest areas to recover from tendonitis, as adequate rest is almost impossible to achieve.
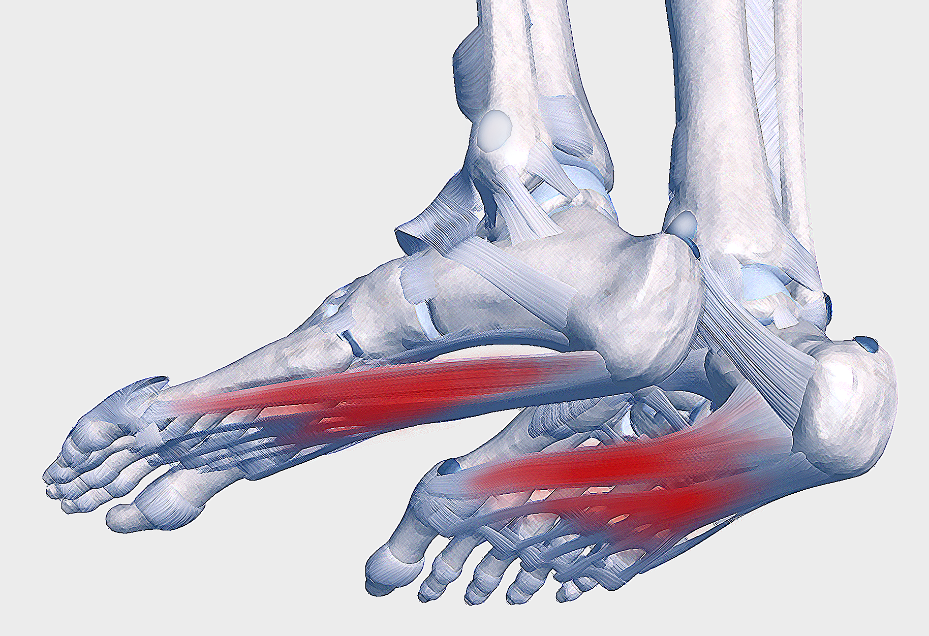
Peroneus tertius and brevis tendonitis – This is one I have had the pleasure of suffering from, and it takes a very long time to heal. When I fractured my metatarsal, during the recovery process the peroneal muscles (which run along the outside edge of the lower leg) became very tight. I speculate this was a natural protective mechanism due to the fracture. Naturally the fracture took forever to heal. As the muscles remained tight, the tendons which run to on the top and lateral edge of my foot became incredibly sore, especially in the morning and while on my feet. Rest and support (taping) are helpful at allowing these tissues to heal.If you are suffering from this dysfunction, go get checked out. They usually need a bit of help to heal.
Cuboid Syndrome – Finally a dysfunction which is good news. The cuboid is a bone in the lateral (outside) edge, of the upper dorsal (top) side of the foot. From time-to-time people who are runners and especially people who ruck, run the risk of shifting a bone slightly out of position. This is known as a subluxation. On some people the cuboid can become unstable due to prior foot injuries and weakened ligaments. One hard step on a root, rock or off camber trail has the potential to shift this bone ever so slightly. Over time the tendons around this area of the foot can become very sore and tight as a protective mechanism. If left untreated, the pain increases over time. It will start as a dull ache and increase to a point where there is a knife on the top of your foot.
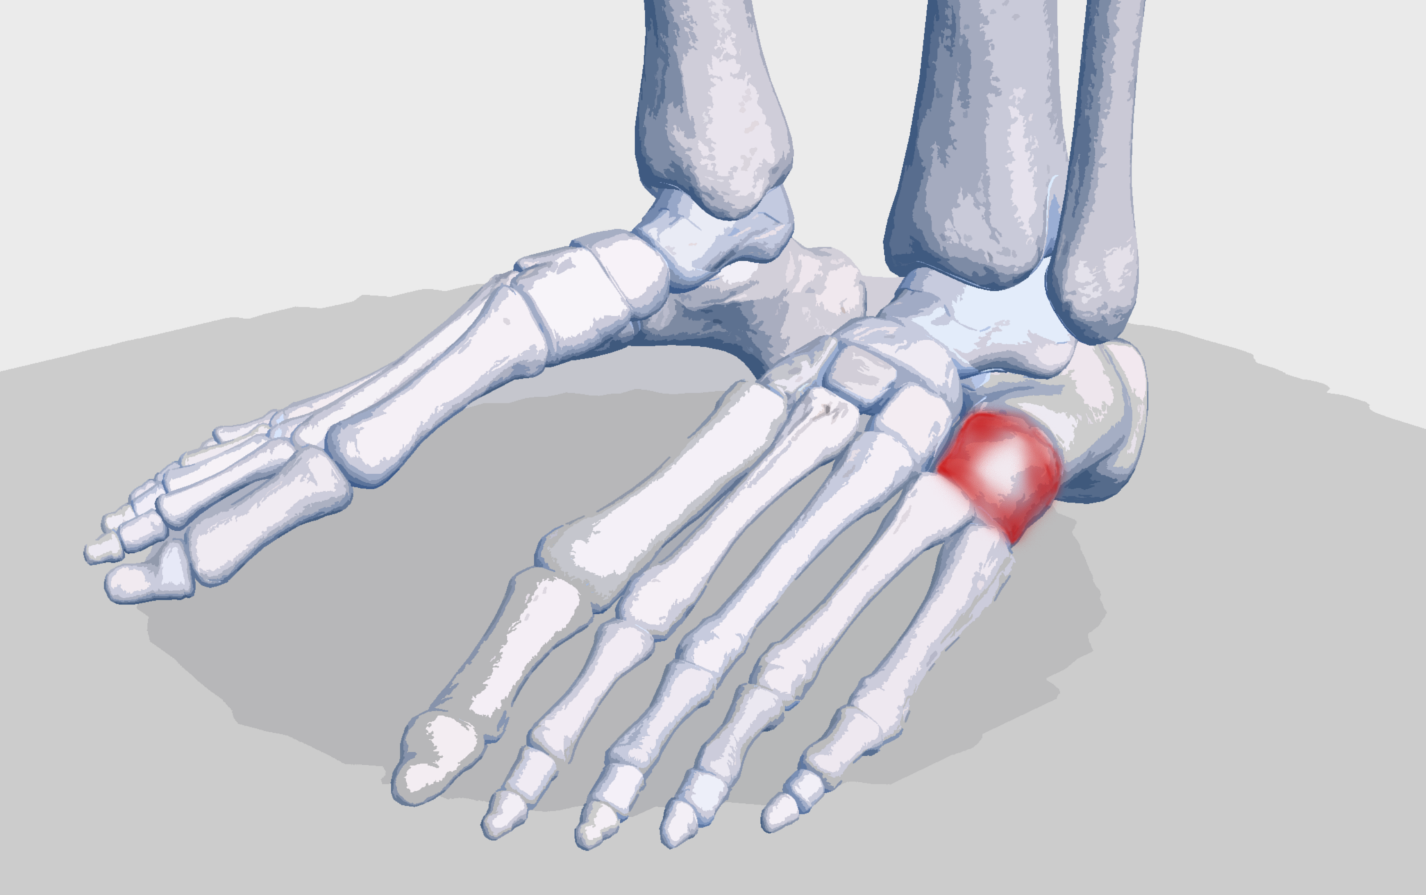
If you are suffering from cuboid syndrome, the good news is that treatment in many cases is easy. With the hands of a good clinician skilled in the foot, you could be relieved of pain within minutes after proper cuboid manipulation. Physical manipulation techniques allow realignment of the cuboid bone back to its original location while avoiding any further damage to the surrounding structures. A “cuboid whip” is a very effective technique for realignment and can allow healing in a matter of days after the adjustment.
After relocating the bone, be cognizant that this may reoccur now that the ligaments have become weakened. Paying extra attention to sole stiffness when off trail is important for preventing reoccurrence. Using KT tape and/or padding around the area of the cuboid in order to maintain its correct position and stabilize the surrounding joints can also be helpful. You should also avoid improper hard landings on uneven surfaces, or stepping on hazards such as stones because they can displace the cuboid.
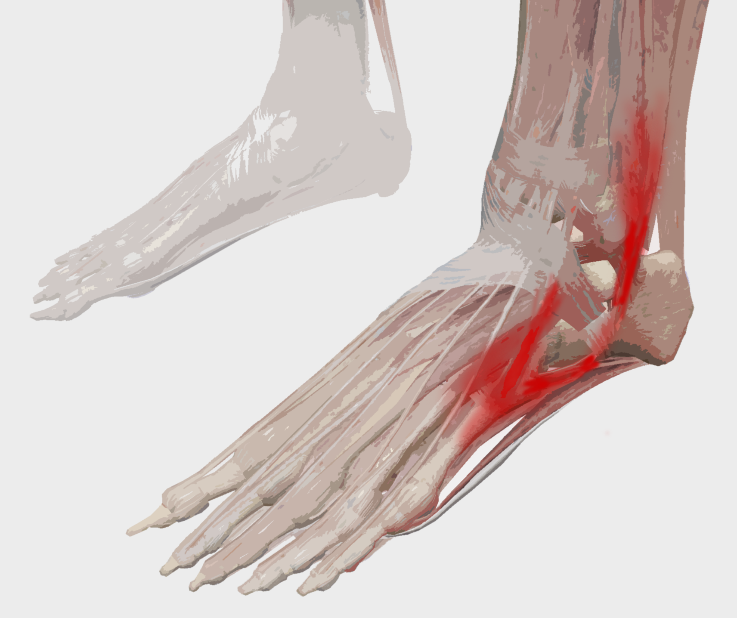
Achillies tendonitis – A very painful and debilitating lower leg tendon issue is when the Achillies tendon becomes inflamed. If you have been dealing with this kind of dysfunction which doesn’t heal, you may want to look at the possibility that there could be a tear. I have seen before what presented at achillies tendonitis was actually an achillies tendon tear found with a quality image from an MRI. If your achillies tendon is strong without a defect, this is typically due to the calves having to overwork by compensating.
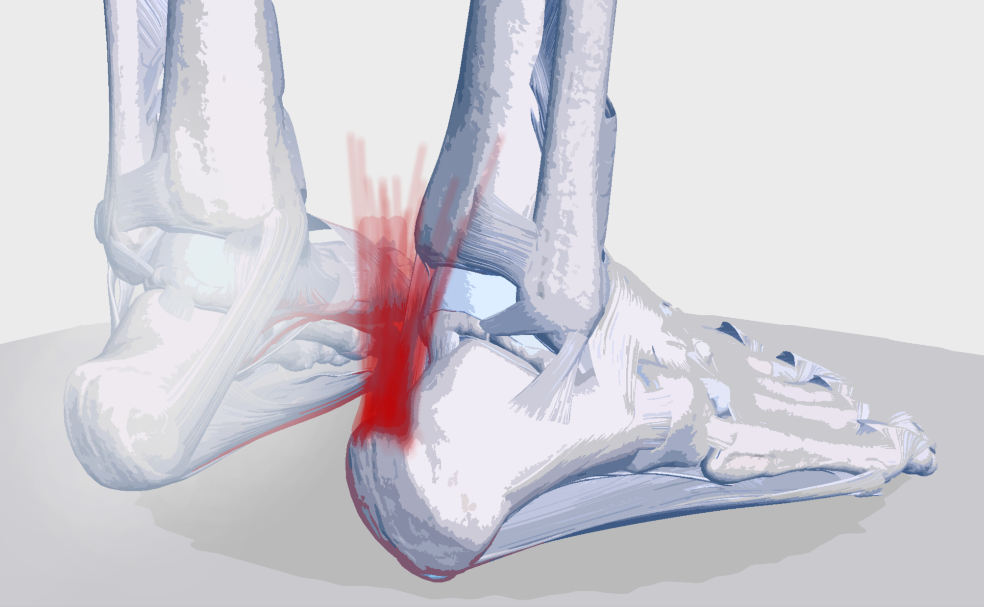
This compensation is usually from a form of instability. In a nutshell, instability can be from a structural weakness (torn or lax ligament, damaged joint surface, fracture), but can also be due to a muscular weakness. Simply put, when your nervous system tightens up a set of muscles, it doesn’t do it as a joke. It does it for a reason, finding this reason will guide you to a solution. If your calves are tight causing the Achillies tendon to become painful, simply stretching the calves will only treat a symptom and not get you closer to finding the root cause. Is it possible you increased ruck weight too quickly, do your boots not provide enough ankle support? Examining all of the factors from earlier in this guide will hopefully help find the solution.
Sesamoiditis – The bottom of the ball of the foot, directly underneath the big toe are the sesamoid bones. You have two of them underneath the big toe where it meets the first metatarsal. They act like little knee caps which allow the big toe to pivot up and down during walking and running. I’m sure by this point you have put two and two together and know that “itis” means inflammation.
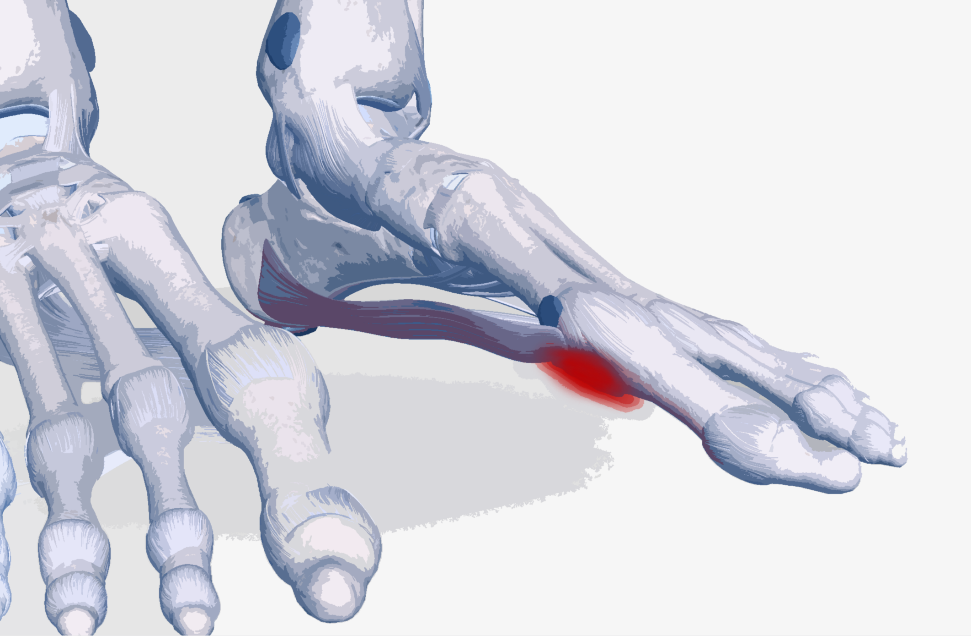
You guessed it, sesamoiditis is inflammation of those little bones and the tendons around them. I have found Podiatrists or PT’s skilled in this area to help aid the healing process. I would also pay close attention to the toe-box of your footwear. Are the soles too narrow or too flexible? Is there not enough padding in the insole, do you need more padding from your socks?
Blisters – We have all had them, they come as a surprise a day after poor foot protection. You wake up, look down at your feet and notice some fluid filled sacks hanging off your heels or toes, always where excessive friction has occurred. Blisters heal on their own if you leave them alone, they may eventually pop or be reabsorbed into the body. Don’t pick them and don’t tear them off when they are new. The fresh skin underneath needs time to heal and strengthen. Allowing bacteria inside a moist environment by popping or tearing them off is a recipe for a full-blown infection, cellulitis ain’t fun, trust me. I usually carry mole skin with me, whenever I feel any sort of blister coming on. In a pinch duct tape can work. Ultimately, figure out why the blisters occurred in the first place, address the friction and you won’t have to worry about them reoccurring.
Pushing through pain – In very controlled environments and specific situations, pushing through pain can be required when recovering from injuries and surgeries. That being said, the vast majority of time pain is the check engine light on a cars’ instrument panel. When you see the check engine light don’t race it on the track, take it to the shop.
When I hear phrases like “I’m gonna run until I piss blood.” or “pain is the weakness leaving your body” … As much as I respect that amount of badassery, it is not a virtue I can ever endorse. I would steer you away from that mentality, but instead I’d recommend focusing on playing the long game so that you can be incredibly strong and healthy into your latter years.
Stuck in a rut –
At some point in time whether you are a high-performance athlete, a member of the special operations community or preparing for the Himalayas you will find yourself with an injury which will not recover. There is a chance that your physician has sent you home with a bottle of painkillers and has cleaned his hands of you. If you find yourself in a situation like this, the first rule is to not give up. Don’t hope it eventually goes away. You will need to be your own advocate for your health, find another doctor, reach out to specialists and find a diagnosis. If what you’re dealing with does not make you a candidate for a surgical intervention, there are many other ways to treat musculoskeletal problems beyond “take these pills every four hours and rest”. Finding a good specialist in your area who deals with the musculoskeletal system can get you back on the path to recovery. Every specialist focuses on different areas, much like having a tool perfect for the job. Depending on your need in this area of the body, I would look into finding a GOOD: Physical Therapist, Chiropractor, Muscle Activation Specialist, Podiatrist. These practitioners all play a very important role in non-invasive approaches to aiding the body to heal.
Accessory Equipment
Winter Rucking– Depending on the climate and environment that you live in, the ground can be covered in several feet of snow. One might think, rucking is for the warmer months. That couldn’t be further from the truth. Some of the most enjoyable memories I have had with a pack is in the mountains during winter. Being prepared for these environments is key for enjoyment and success.

Snowshoes– One of the most valuable pieces of kit in the winter are snowshoes. There are a few things to keep in mind when using snowshoes while rucking. Snowshoes are designed to disperse force across a larger surface area allowing you to stay on top of the snow rather than ending up waist deep in it. The larger the service area the less concentrated the force and theoretically you should stay more buoyant. Modern snowshoes aren’t anything like the vintage tennis rackets from the past. They are streamlined for speed, have teeth underneath for improved grip on ice and have heel lifts for ascending steep inclines without exhausting your calves. For increased buoyancy many of them come with tails which can be clipped on in seconds if the snow becomes powdery. Tails also help will help when carrying additional weight like a pack. That being said selecting a snowshoe correctly is very important. Typically, snowshoes are fitted to your bodyweight, for example if your bodyweight is 185lbs you could select a snowshoe for that weight range, however my recommendation would be to select a snowshoe that would be beyond 185lbs and closer to your overall weight while wearing a ruck and equipment. Just remember, the bigger the snowshoe the heavier it is, which will cause you to fatigue faster. If you live in a very dry climate like Colorado boasting soft powder, you might need a bigger shoe. If you get very heavy and icy snow like in upstate New York you can get away with a smaller shoe. Just like boots, it is AO dependent.
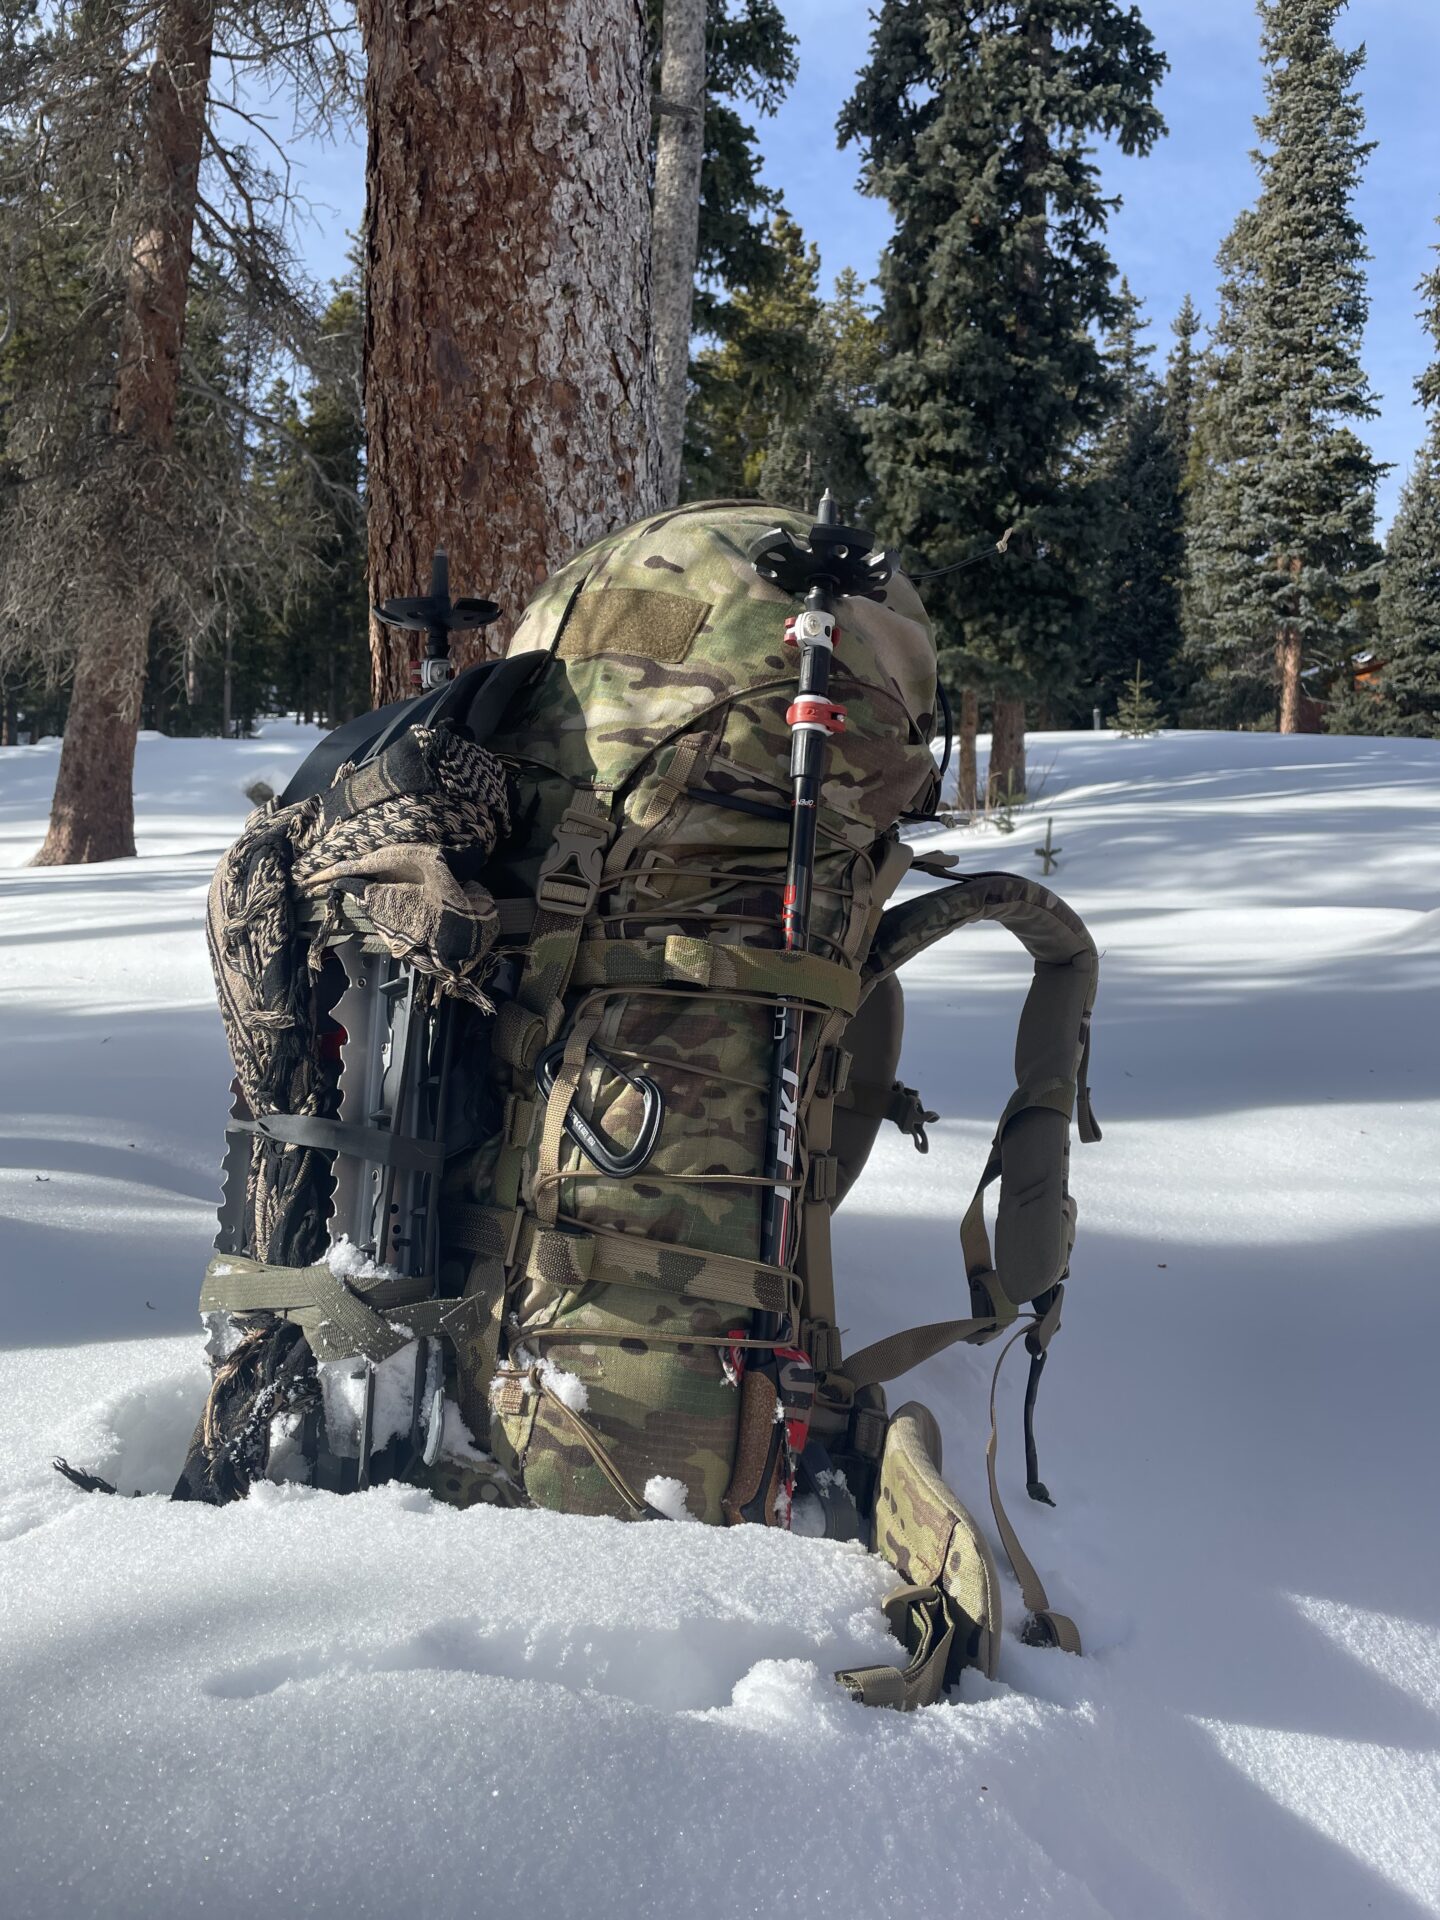
So now you have your first set of snowshoes, what’s next? There is a bit of a learning curve when getting used to them and a slightly different technique than walking or running. Keep in mind that while you are getting started there is a potential to lose your balance when stepping onto uneven surfaces underneath the snow. Try not to ascend a 14er on your first day getting while used to them, ask me how I know. Instead start with something even and flat, do some miles and let the brain build some neuroplasticity and familiarity to the technique. I could try to explain the technique, but honestly, it’s a lot easier to just get out there and let your nervous system figure it out for you. Remember, you figured out how to walk without an instructor as a baby. This is a similar concept.
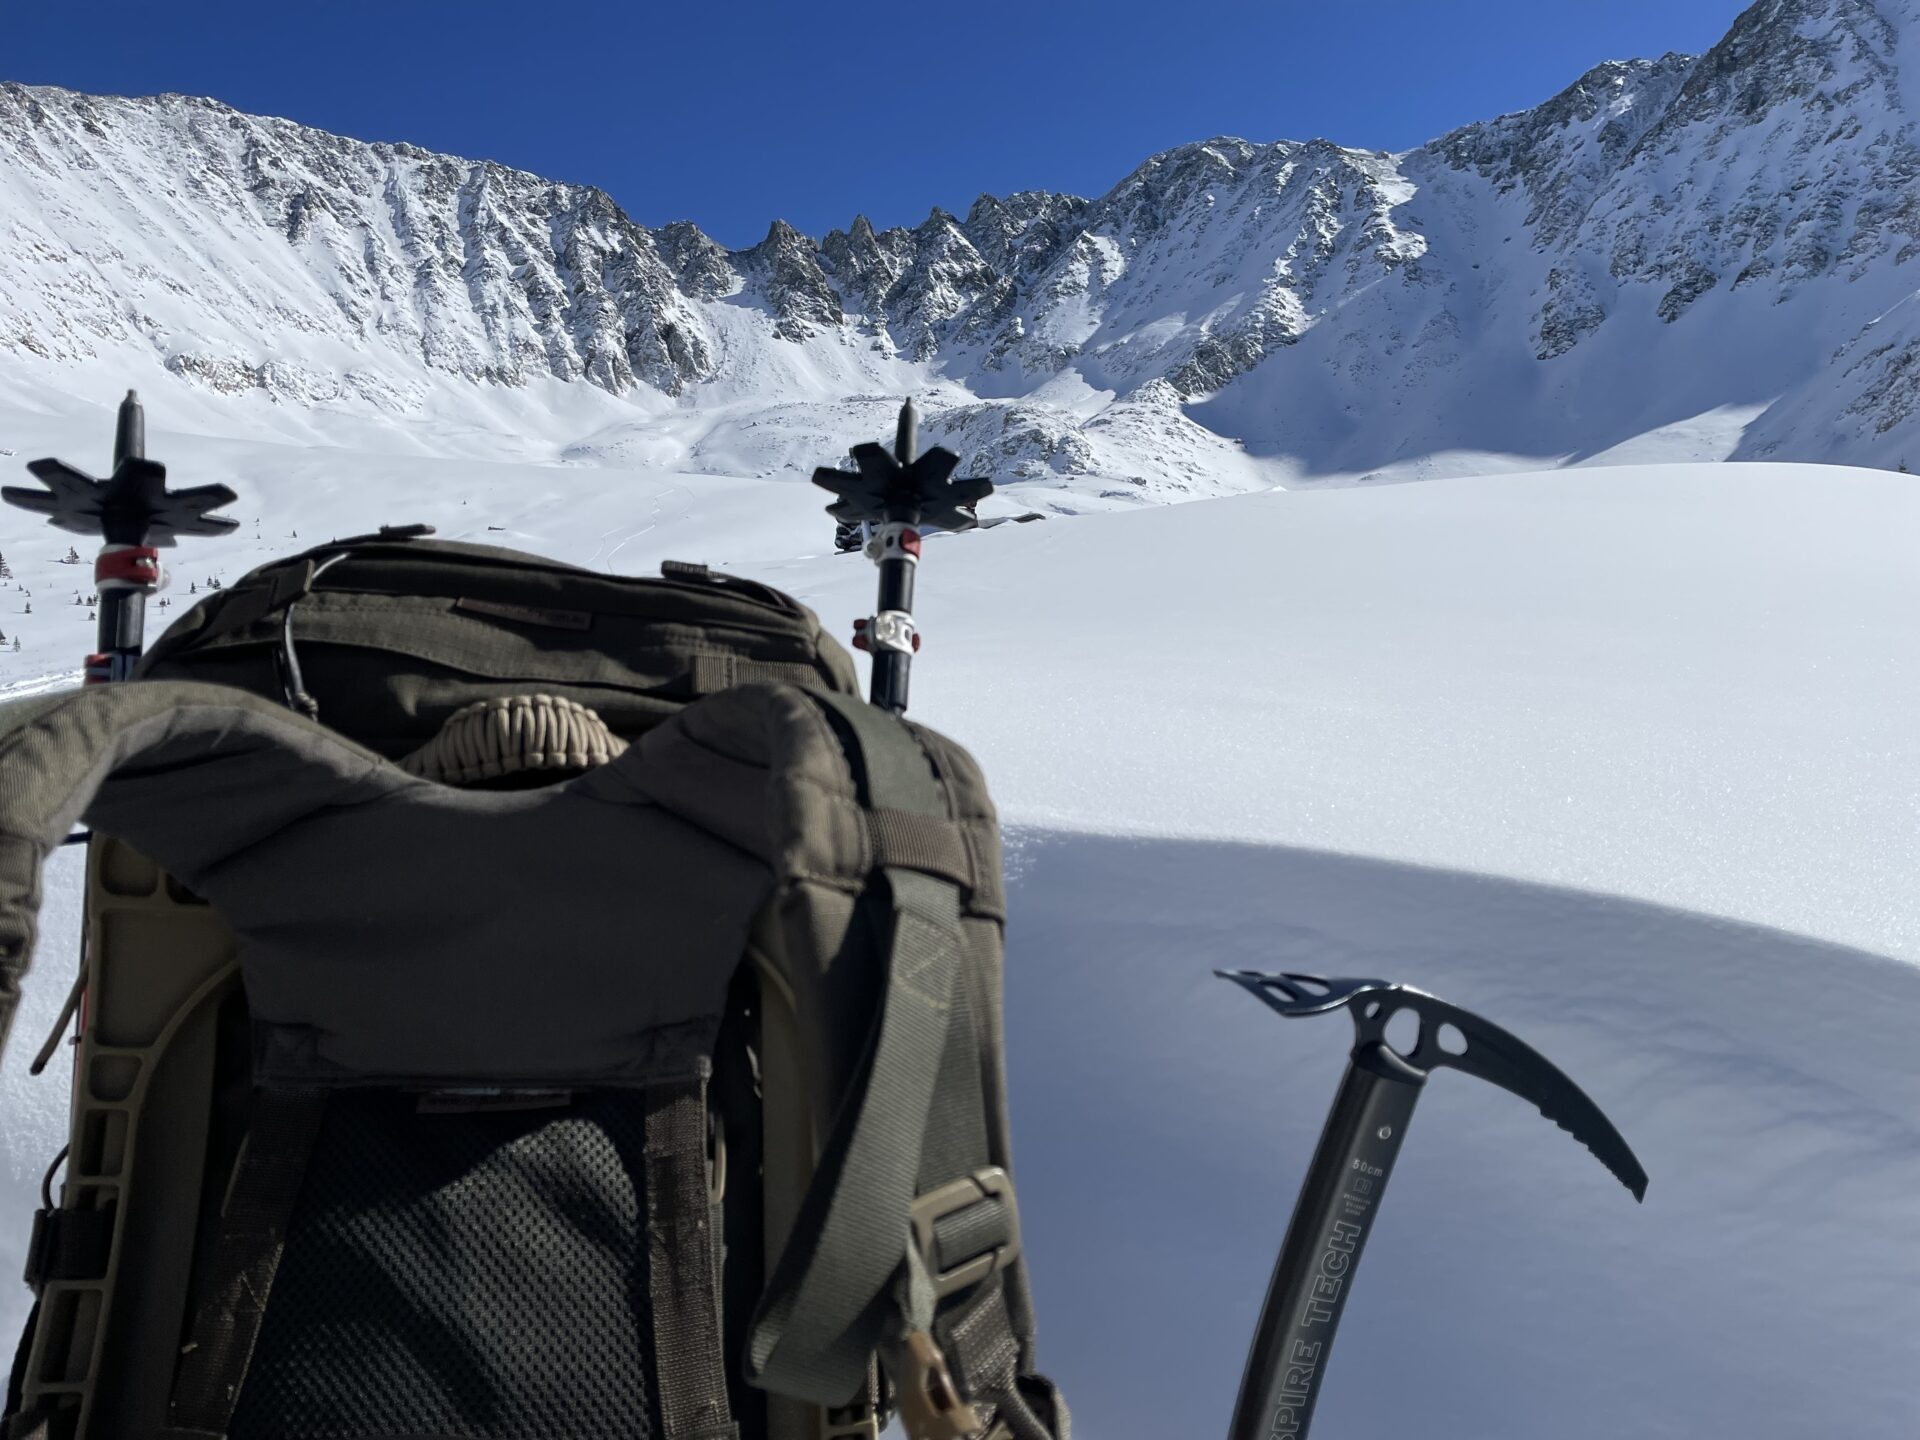
Snow firmness will greatly affect the speed and impact on the joints. The soft stuff is like walking on a cloud, the icy stuff will be tough on the knees. Snow which has a hard crust but soft underneath it can not only be a pain in the ass, but potentially dangerous if on an incline on the side of a mountain. This condition has a high potential for sliding. Be sure to take an avalanche course and know the snow report for your area if venturing into the mountains for some alpine rucking.

Just like rucking in the warmer months, your pack weight and the conditions will determine your speed. In addition to using snowshoes, one of the most underrated pieces of kit, which I know all the “tacticool” guys will rip on me for. I highly recommend having poles, at the very least strapped to the exterior of your pack to be deployed when needed. Poles have saved me countless times from a bad fall on ridgelines.
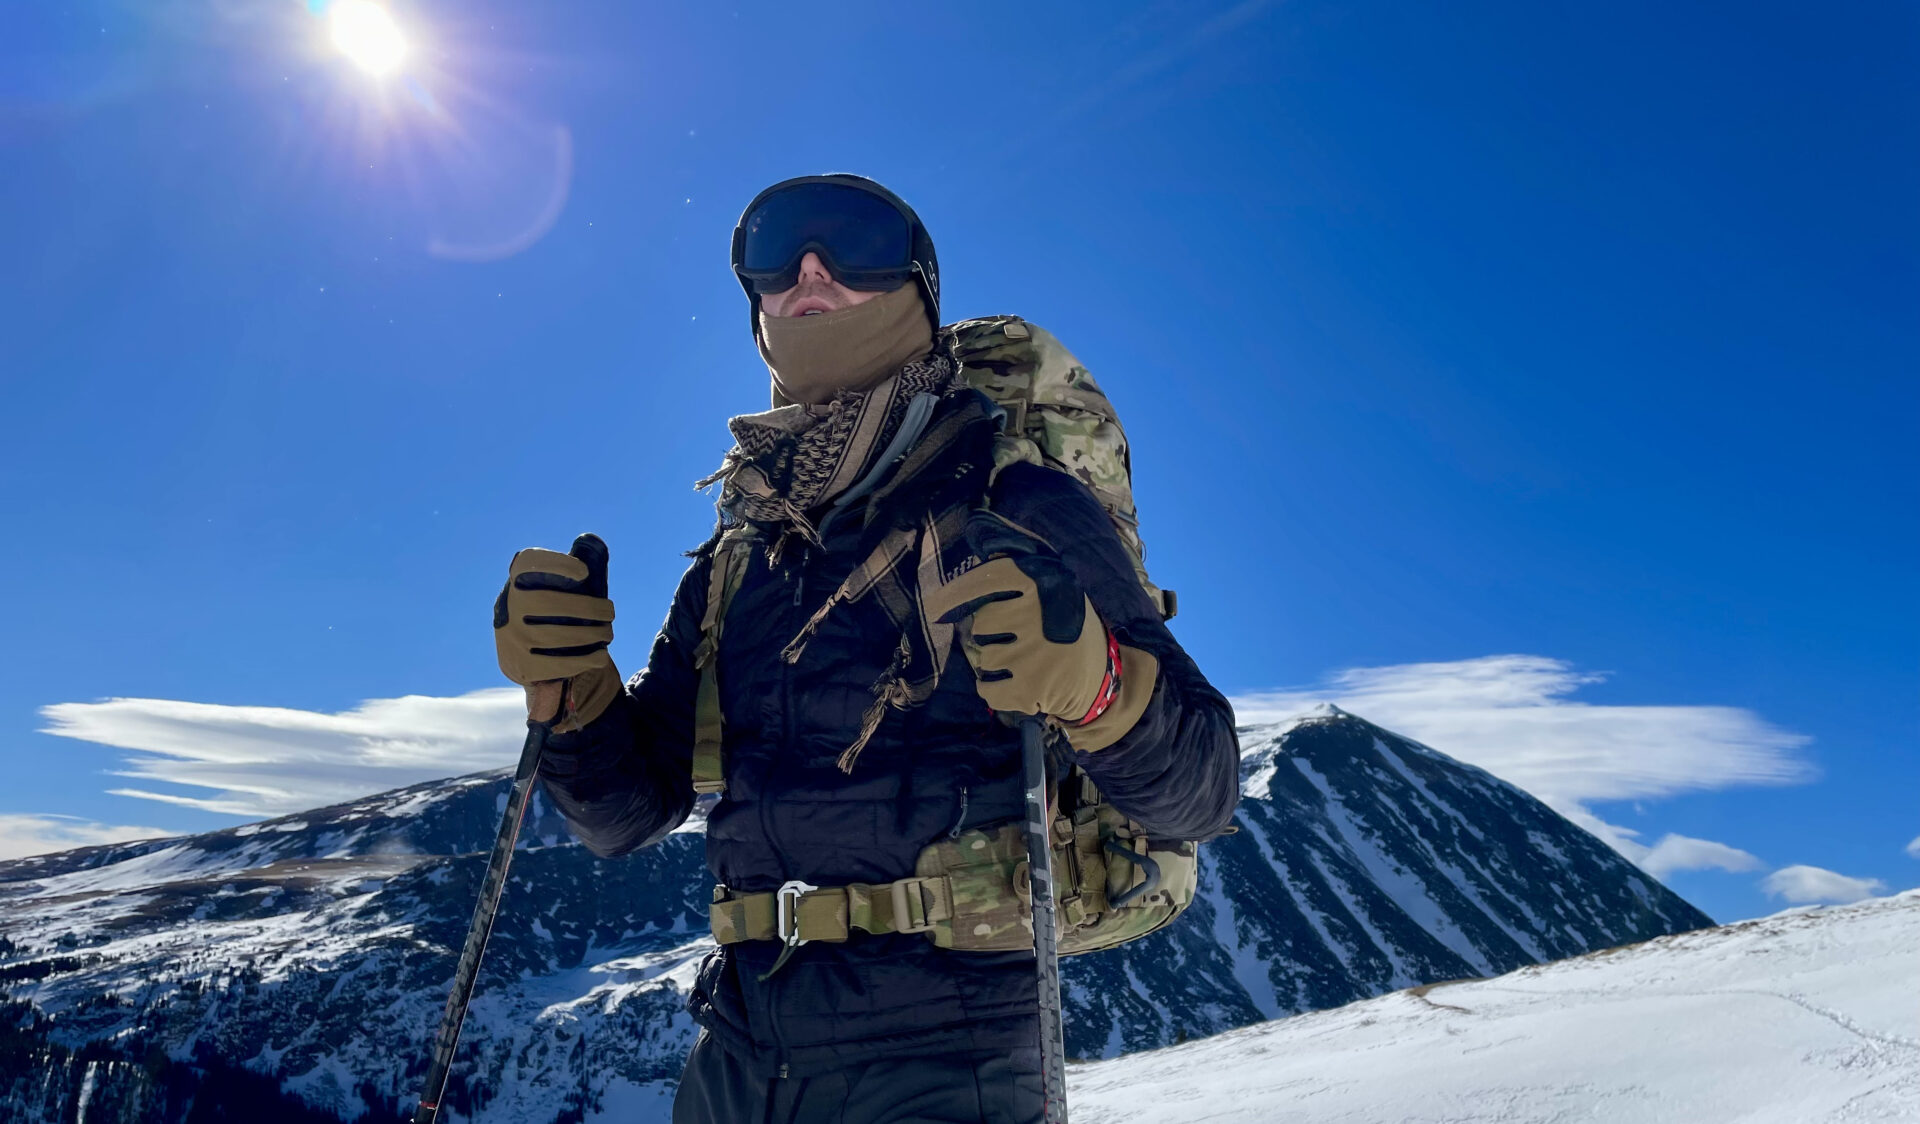 Traction on Ice– Micro-spikes are a good intermediate piece of kit to store in the lid of your ruck during the icy/mud season, they are lightweight and easily stretch around your boot. They’re not exactly able to provide the same traction as a full mountaineering crampon however they do an excellent job at speed in icy conditions. Their advantage is that they can be removed and added in seconds. This is useful if your 10-mile stomp that day begins at the base of a mountain in dry conditions, yet halfway up you start moving into the icy sections. They are quick to deploy and stow, this makes them an excellent piece of kit.
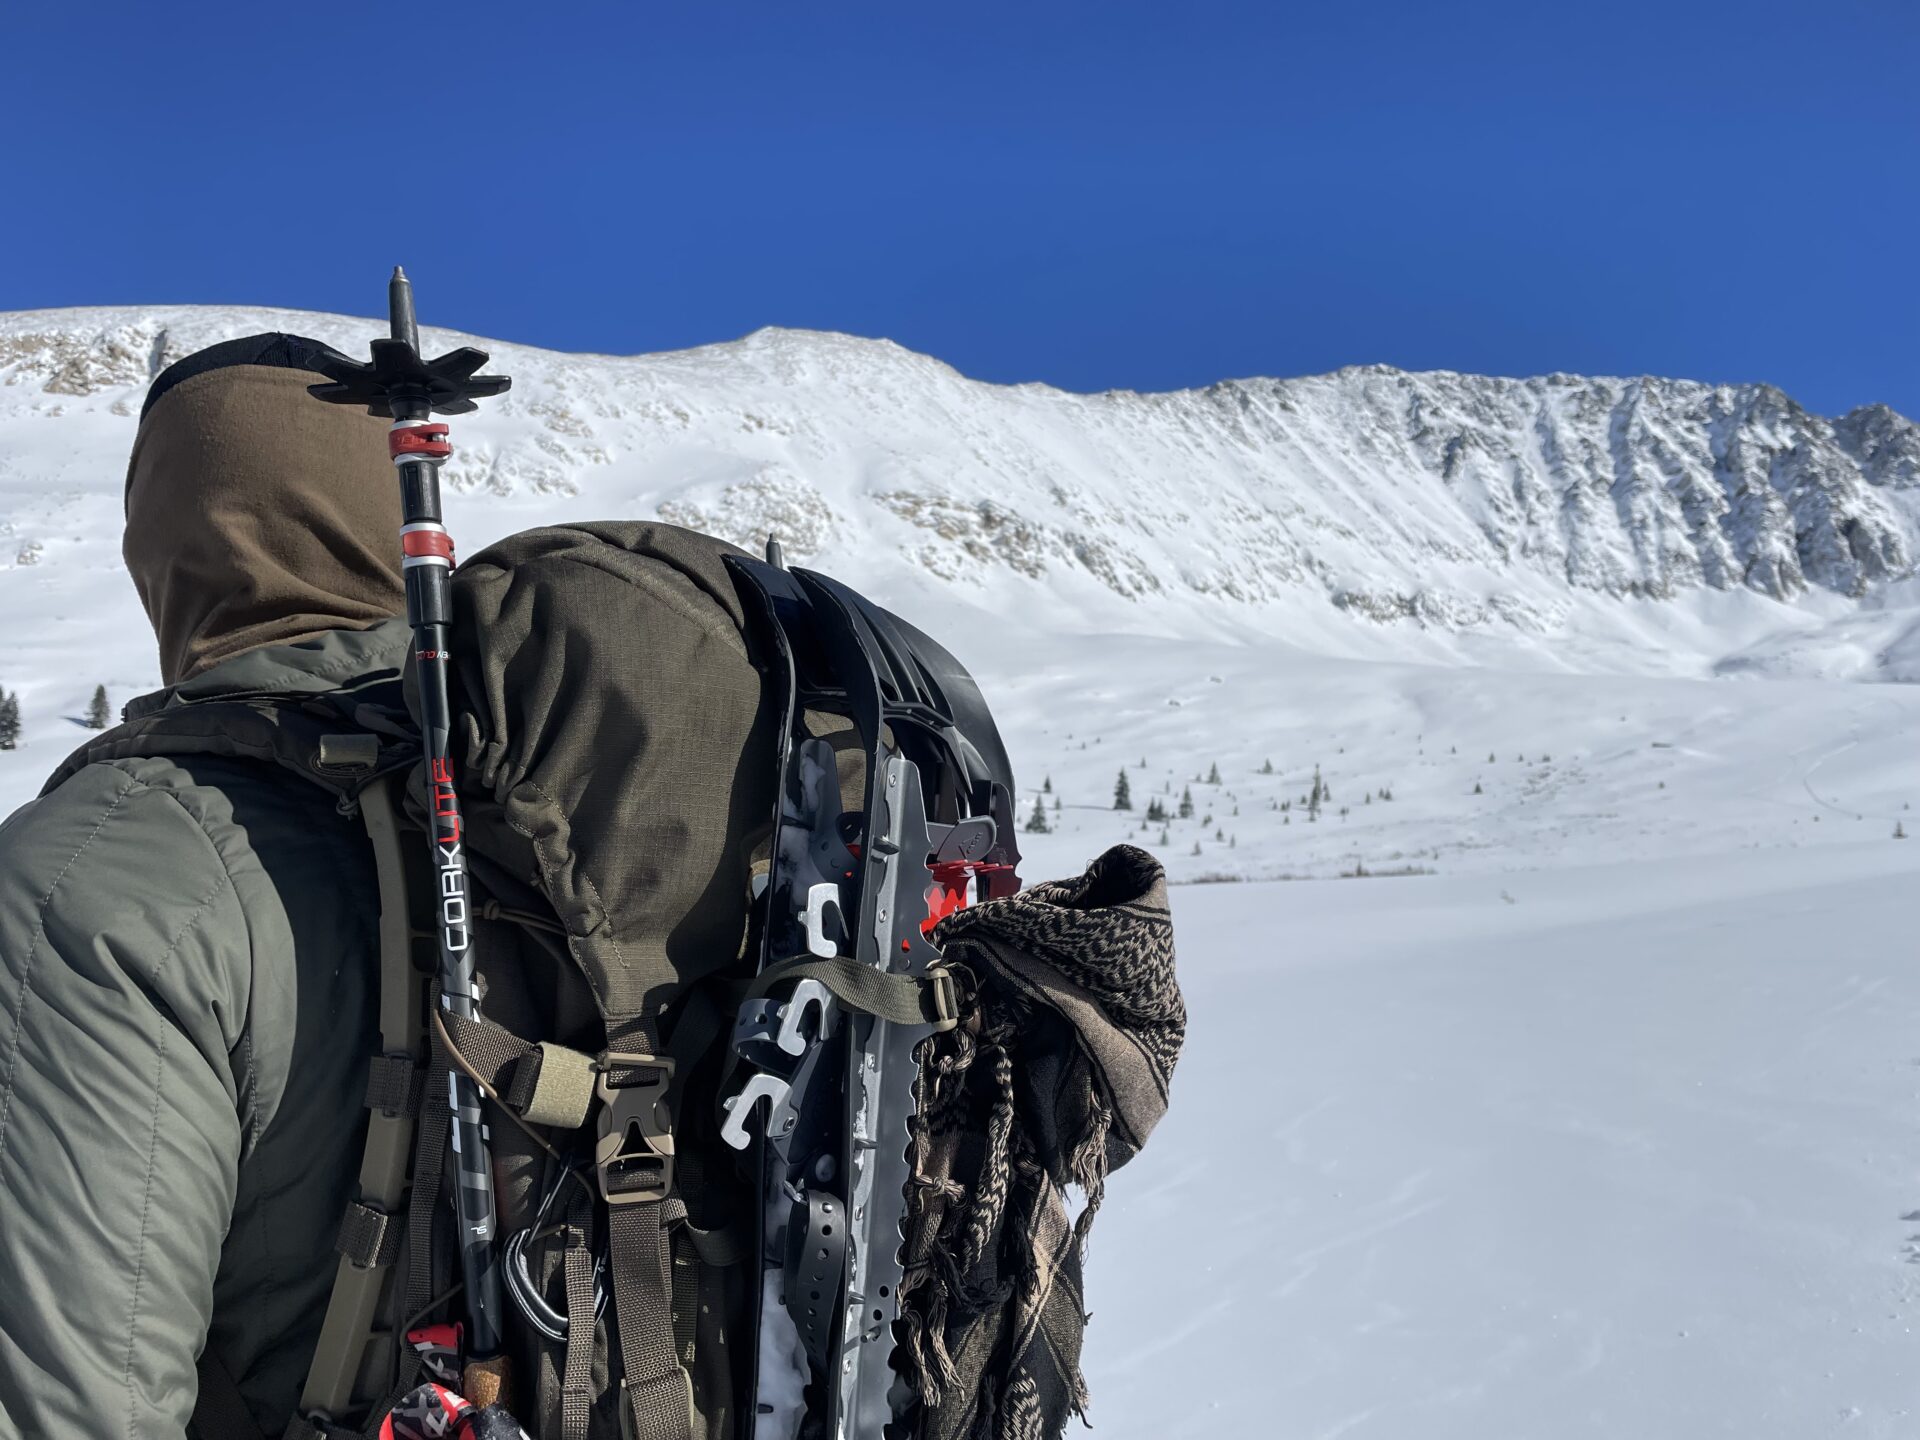
This particularly doesn’t pertain to rucking, however there may be a time where you find yourself getting into more extreme activities which have a pack situated on your back. Activities like mountaineering or alpinism. Carrying load in this kind of environment is inherently dangerous, but fu&$ing awesome, therefore precautions need to be taken. Seeking professional guidance and training is absolutely necessary.
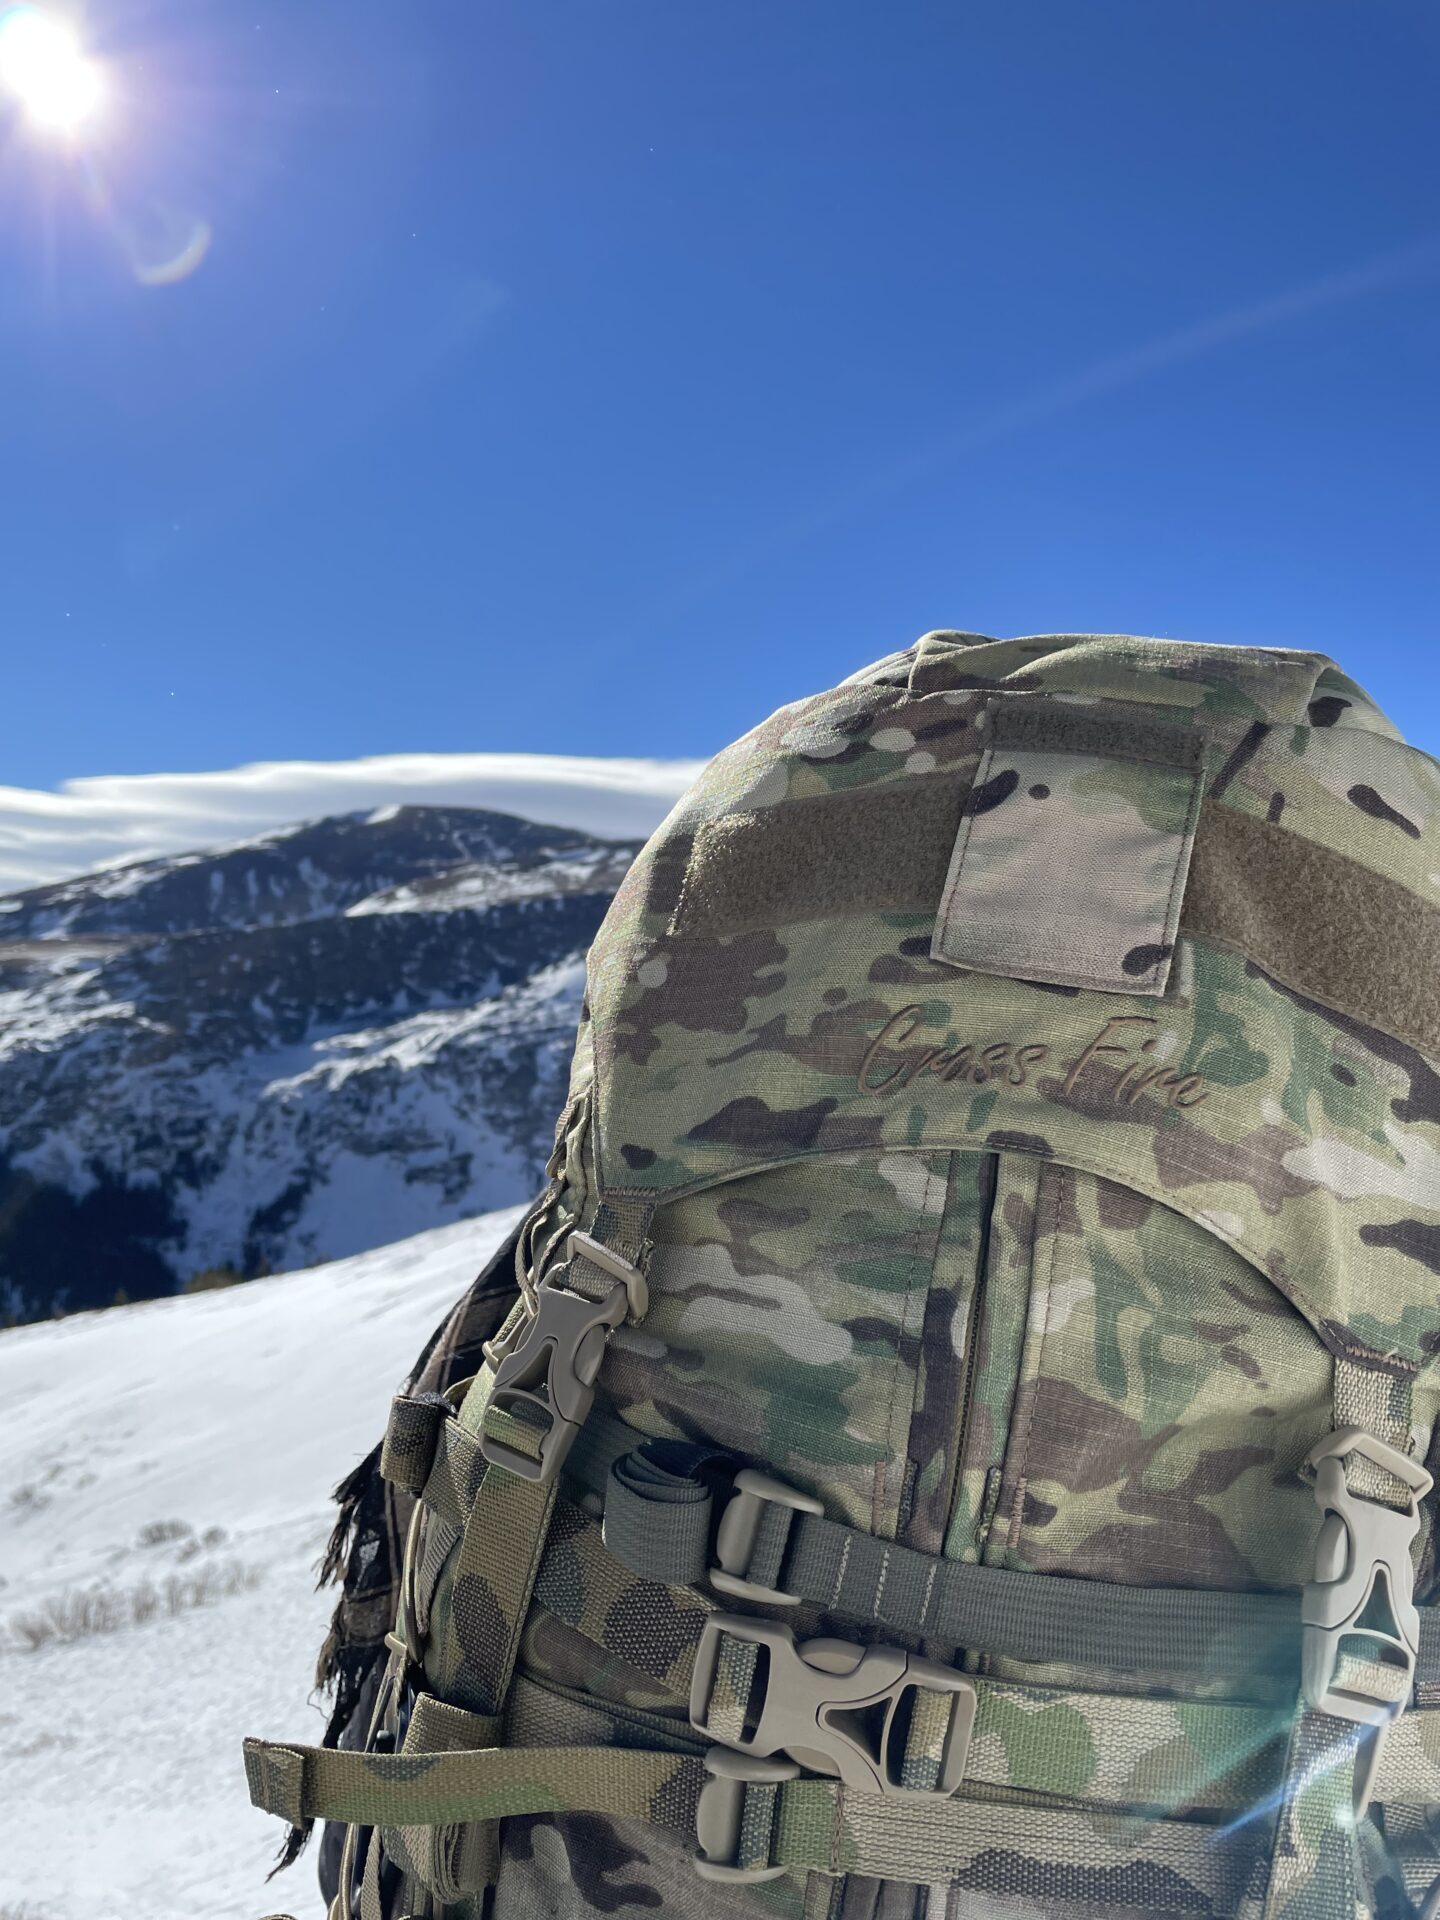
I will touch on a few pieces of kit one might need. The first place to start would be a very good set of crampons. They go back almost 100 years and are essentially platforms with spikes built into the bottom which strap to your boots. Today we have evolved a very long way since their inception. There are several kinds of crampons each specific for different kinds of climbing. There are some designed for vertical climbing of rock and ice, these crampons clip into the heel and toe lip of the specialized boots and secure tightly to become part of the boot. There are also some more traditional mountaineering crampons which are designed for more versatility, with a trade-off for less technicality. These crampons don’t require a special boot and can be used with many boots on the market, they simply have a heel and toe brace which is tightened via a soft strap. They are fast to attach and remove, this gives them the advantage when an ascent is majority rock, with only sections requiring additional ice traction.
Waterproofing-The age-old debate, pack cover or liner bag. There are pros and cons to both, depending on your AO you may benefit from one or the other. Typically, today’s modern military rucksacks are constructed with a 500-denier nylon. The weave on this nylon makes it partially water-resistant however to enhance water repellency a waterproofing application is done at the factory to further improve repellency. As of 2025 while writing this, there has been a global effort of reduction in PFAS use during manufacturing. PFAS are known as “forever chemicals” which are almost impossible to break down over time. This ironically makes them a great solution for waterproofing fabric. New waterproofing products on the market tout being PFAS free. As this is much better for the environment and reduction for the potential of skin absorption, the jury is still out on whether the durability and longevity of fabrics will hold up over time.

Using a pack cover or a waterproof liner bag has their place. It all depends on your local environment. In very wet environments where rain is constantly a potential, the US pacific northwest would come to mind. The advantage of a cover is that it prevents the absorption of water into the pack material. Depending on the design, your ruck may be clad from head to toe in MOLLE webbing, this stuff can retain a ton of moisture under a downpour adding unnecessary pounds and take an eternity to dry out. For this reason and several others, we have deliberately removed a ton of webbing from our packs. As pack covers are very lightweight and can be easily stowed when not in use. They do have their drawbacks. If you are concerned with river crossings and amphibious environments, for example jungles or the US southeast, they fail for keeping contents dry. Furthermore, if you are concerned with camouflage, pack covers tend to shine when wet. If I had one and only one to choose from. I’d go with an ultra-lightweight liner bag, roll top and waterproof/submersible. Unfortunately, many extra-large liner bags are built too heavy adding unnecessary weight. In my miniscule opinion, there is no need for a heavy-duty waterproof bag which is going to remain inside your ruck, the ruck offers protection, the liner bag essentially only needs to act as a membrane. For years I have utilized a simply heavy-duty plastic contractor bag as an internal liner. Over time if it had a puncture, I’d replace it for 25 cents.
Hydration–
 If you’re like me, you are the sweaty guy at the gym. Some of us sweat more while others don’t. On hot summer days rucking along a tarmac road can be grueling with massive fluid loss, make sure to stay hydrated even when you don’t think you need to. Depending on humidity, you may not even realize your hydration levels are becoming depleted. Arid environments are especially prone to dehydration without sweating. Carrying water in a bladder is the most convenient way to hydrate while on the move. Simply strapping down the hydration tube to the shoulder strap of you pack makes it quick to get to. If you are involved in tactical operations, make sure to run it down the non-dominant shoulder to prevent interference with a rifle stock. Location in the pack for a hydration reservoir, “whether in a hard canteen or a bladder” is important. Liquid has a very high density making it one of those items you need to pack close to your body and high in the pack to allow for an optimal center of gravity.
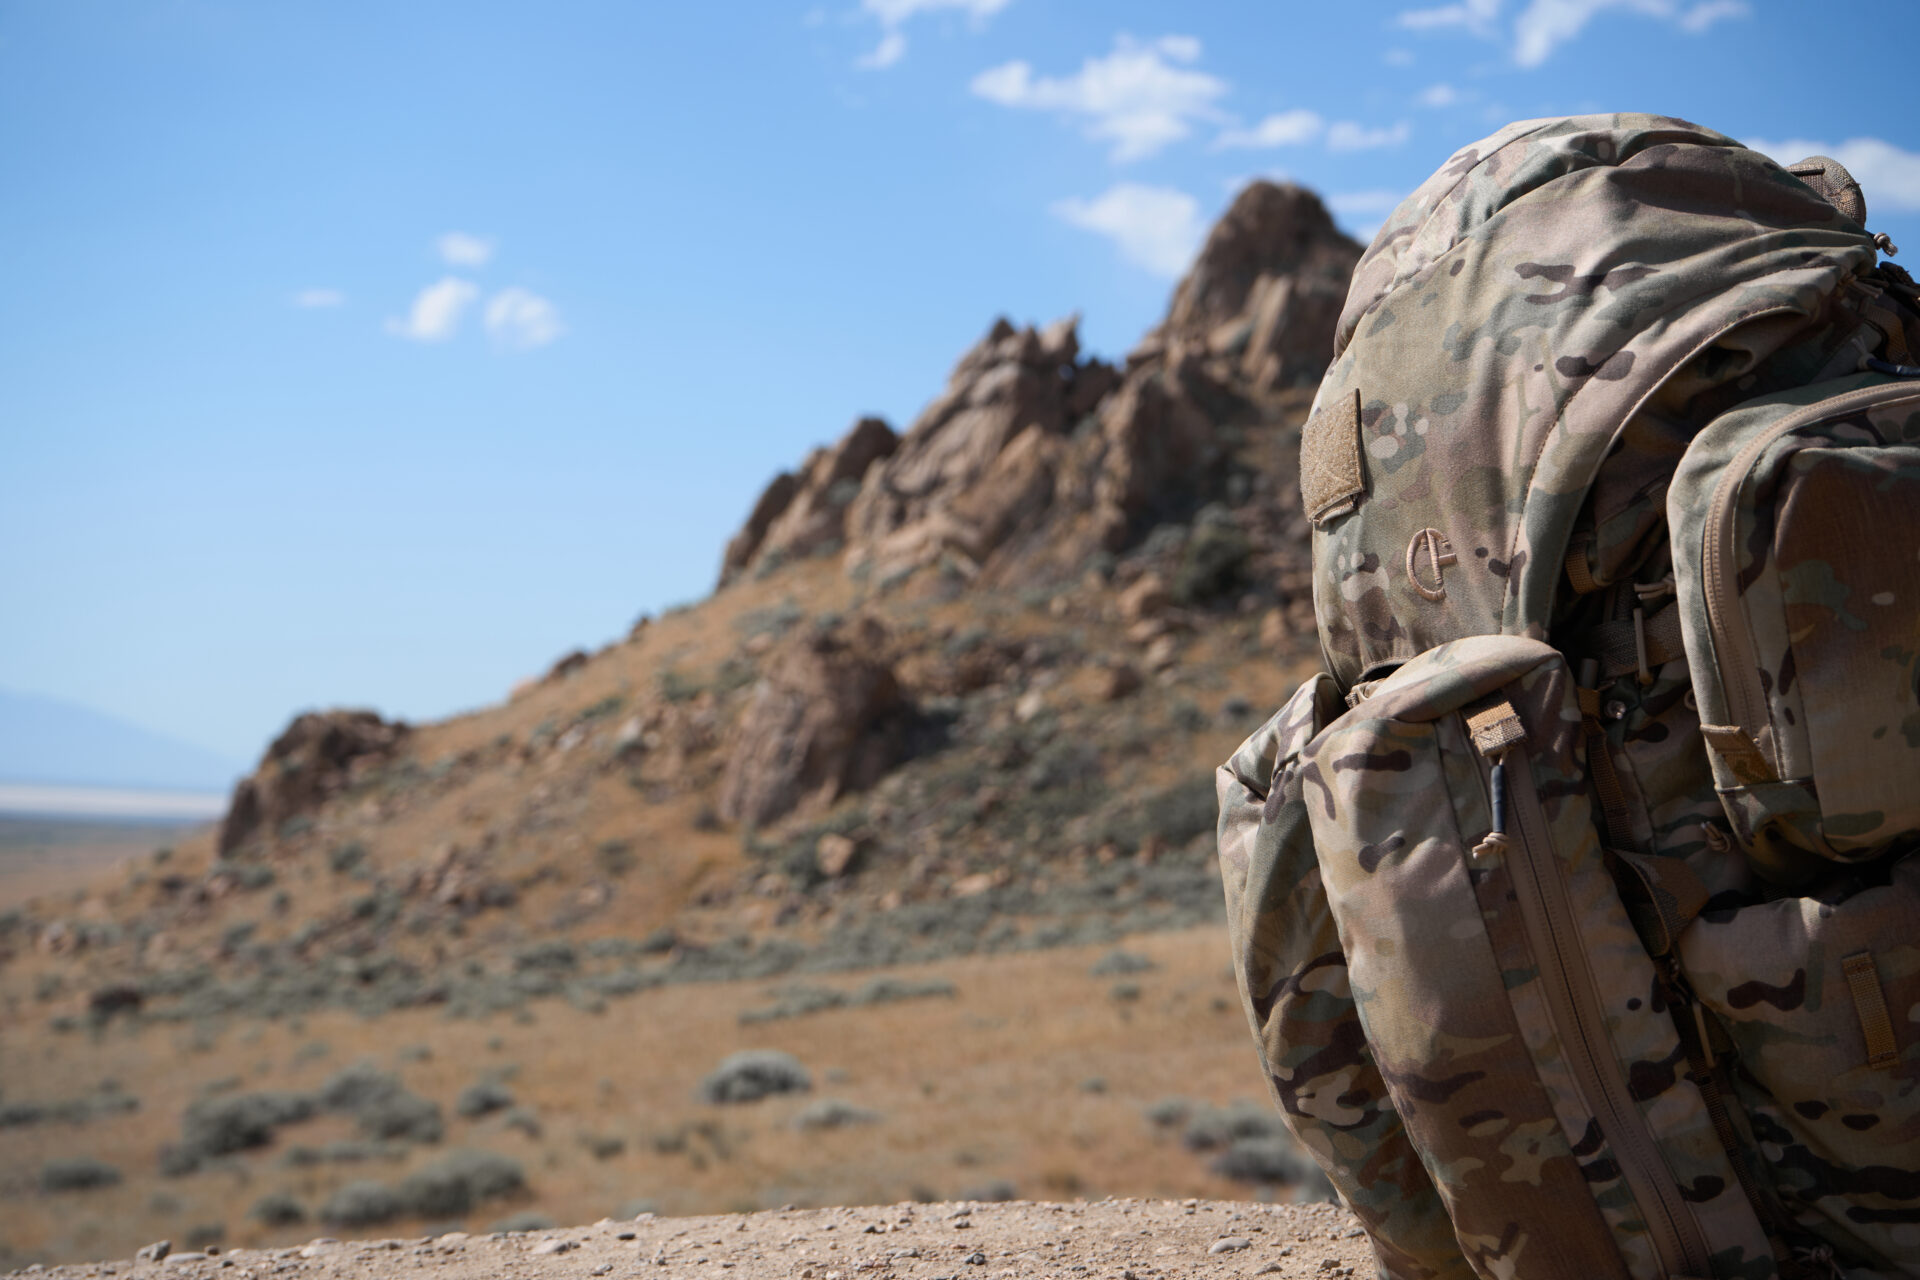
Layering– In cold environments, when beginning a movement, it’s important to prepare by layering for what your maximum body temperature will be. If you haven’t heard the saying “be bold, start cold”. It refers to beginning with less layers and start off cold, don’t worry you will eventually warm up. This is especially important in cold environments, if you start too warm and begin to sweat that moisture can end up causing massive heat loss once you stop moving—stay cool and dry.
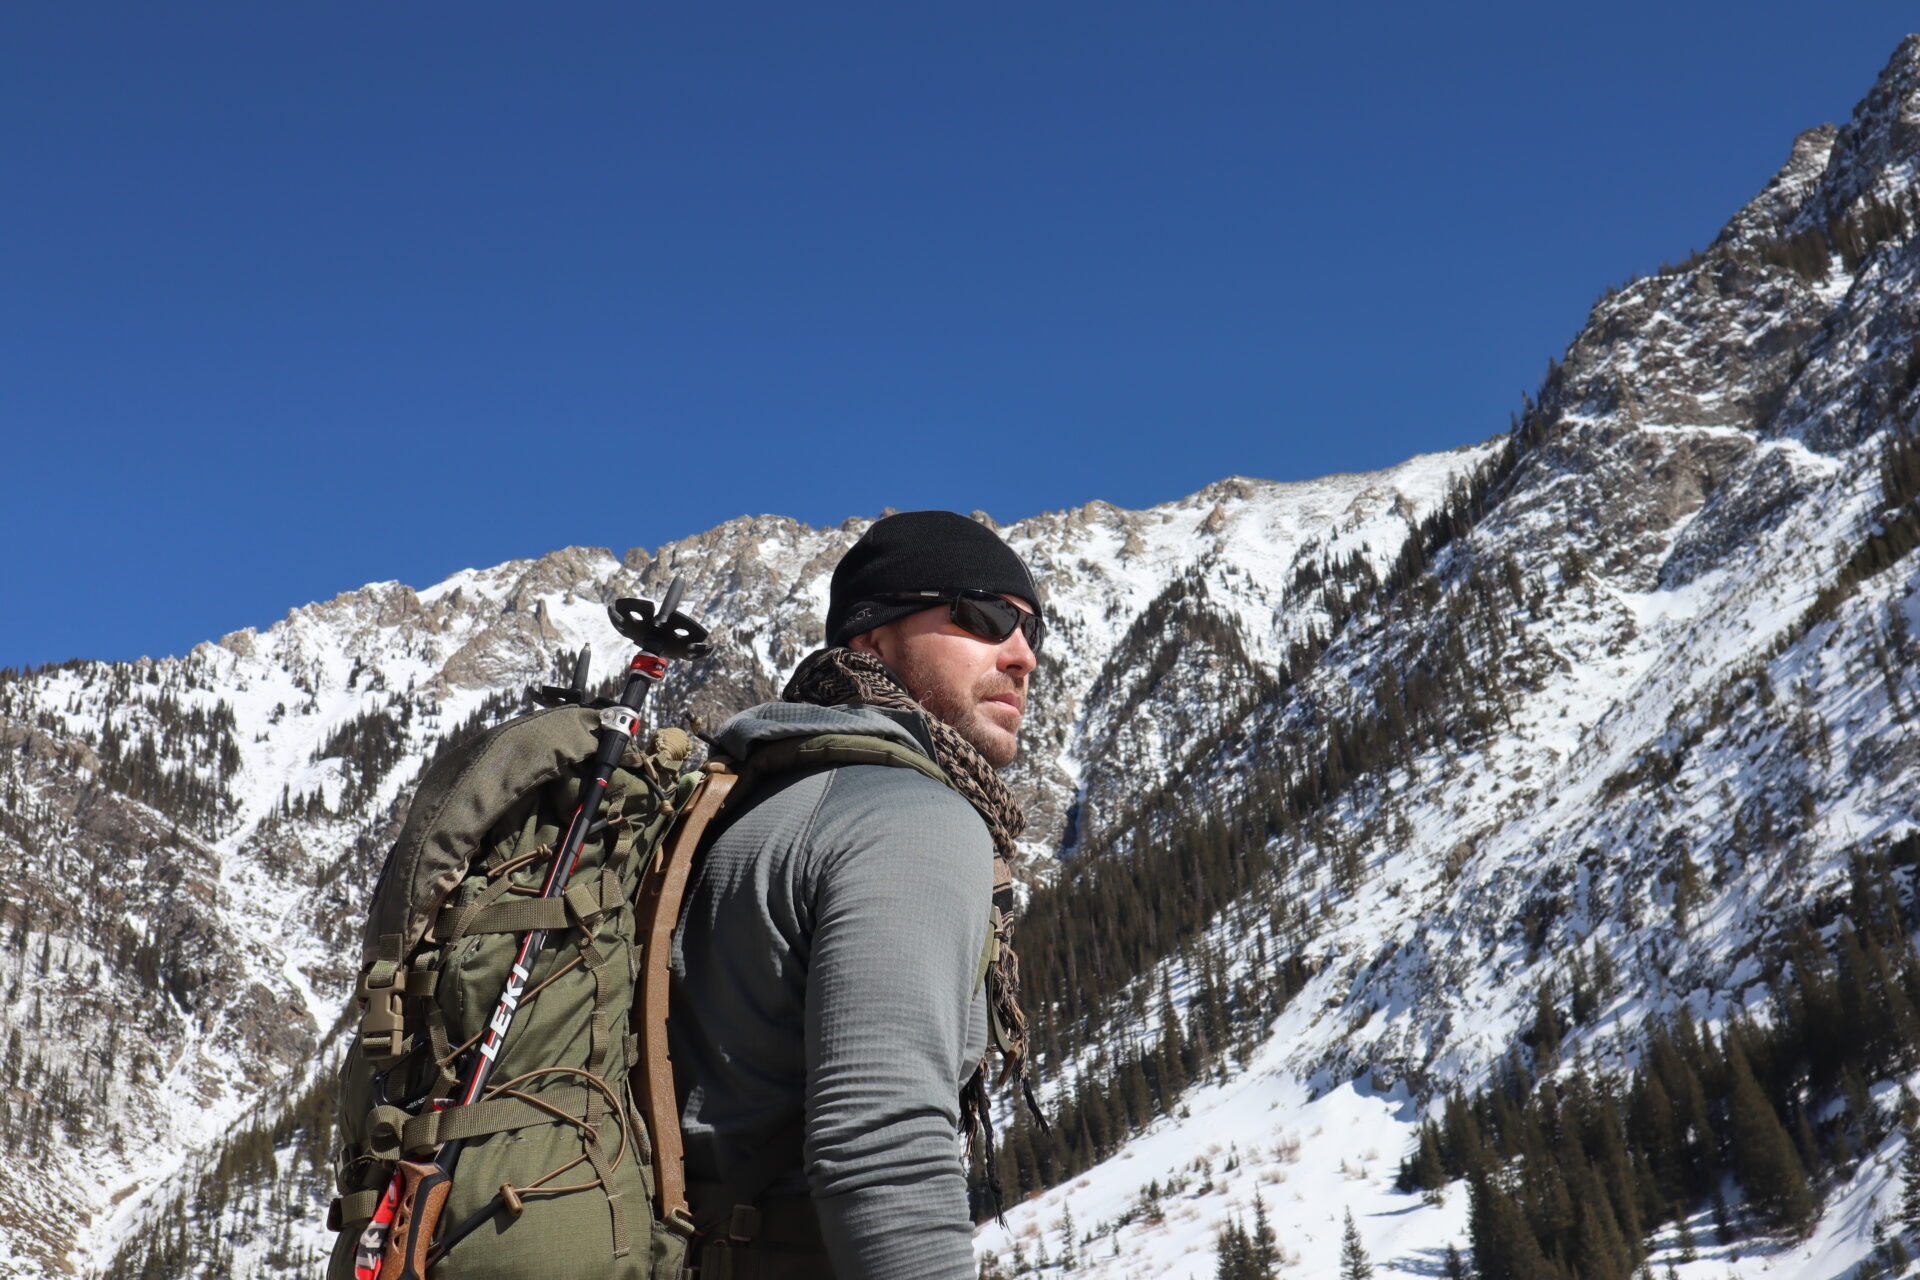
Motivation
Many who have read this far, I would bet are the personality types who have been competitive by nature, they the ones who always have their sights set on the horizon. That being said even the most motivated individuals can find themselves in a desert, without a clue on which bearing to take. Competition in many ways has brought the best out of people. It can help motivate one to achieve new goals, especially when goals are hard to identify and establish.
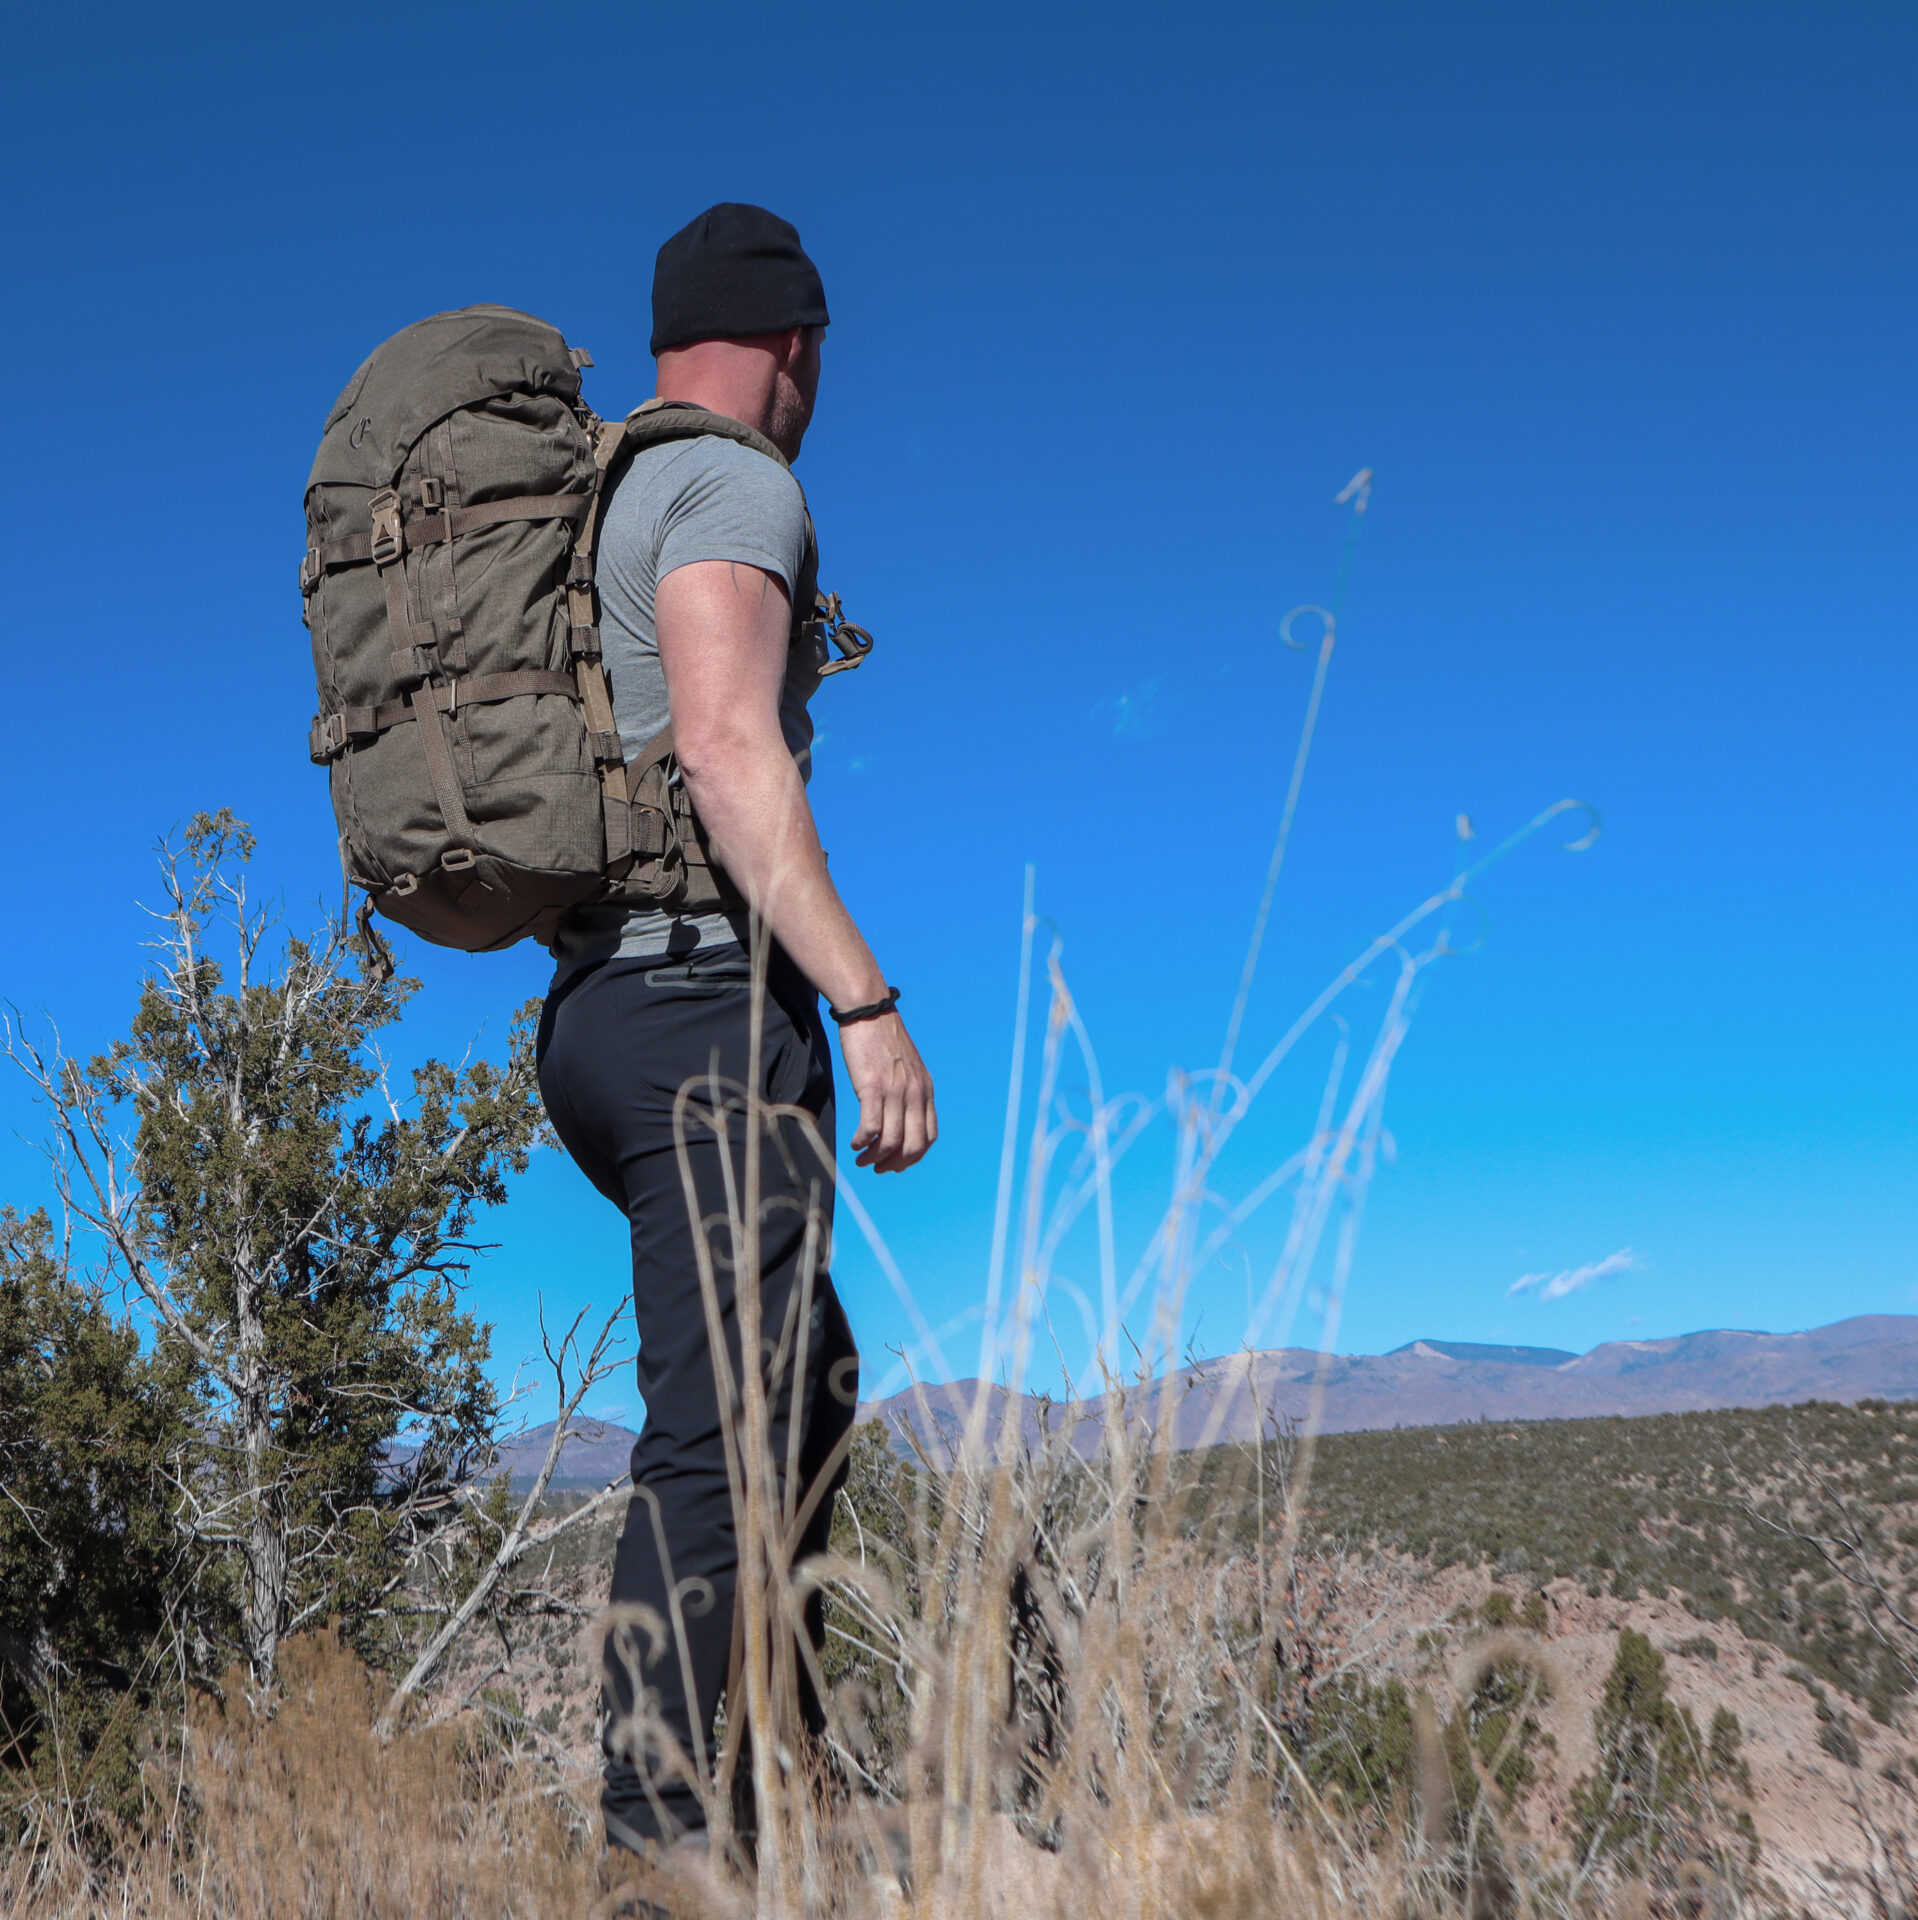
In the world of rucking there are several competitions to choose from, some being quite tame while others being absolutely ruthless. As one who isn’t afraid of a little competition, I always remind myself to remember my long-term goal. Personally, that goal is to continue a high level of conditioning for several decades into retirement years. Fighting the laws of aging is one of the foundational principals to exercise. If one were to receive a torn ACL or meniscus from quickly moving down an icy or rocky trail in the Brecon Beacons it would be the ultimate setback for longevity. Competitions are valuable, remember to be wise while taking part in them. Shaving off a few minutes over the course of several hours for a lifetime of pain and reduced function, just isn’t worth it. You can take calculated risks when the variables can be contained. Manage risk appropriately, make gains where it’s safe and slow down where it would be ill advised.
On the other hand, if competition isn’t your thing, you have a different dilemma. Remaining motivated after many months and years of a particular activity can be exhausting. You need to find a powerful intrinsic motivator; I can’t tell you what that motivator should be, you need to search and establish it for yourself. Write these reasons down and have your plan to achieve it. Daily reminders are sometimes necessary to hold yourself accountable.
I use both competition and the many health benefits to remain motivated. However, my competition isn’t against another human, it’s against myself. After being bedridden for almost a year and learning how to walk again a year later post-surgery (2014), I genuinely didn’t believe I would ever run again, I could barely walk to the mailbox without pain, forcing me to rest halfway. Forget any idea of carrying a pack for miles, back then that idea would have been laughable. I kept pushing for years and surprised myself. It took time, consistency and a whole lot of pain.
As I pushed further, I achieved more, I also cried more—tears of joy mixed with pain. I decided to continually set goals I genuinely did not think my body was capable of. It actually became addictive, but in a good way. Now I climb mountains, they are a different kind of competitor. On one hand the physical challenge of alpinism requires preparing in a broad range of skills and physical abilities.
The physical requirements are immense when looking at the higher altitudes, conditioning the body to not only be strong for load carriage, but the needed cardiovascular conditioning for peak performance. Add the mental aspect of equipment skills, terrain knowledge, decision making, mental toughness and ultimately wisdom over glory. Sometimes failures are lack of preparation, sometimes weather, sometimes the mountain won’t lift up her skirt; there has to be a perfect combination of preparation and luck, which in turn motivates me—there are no guarantees.
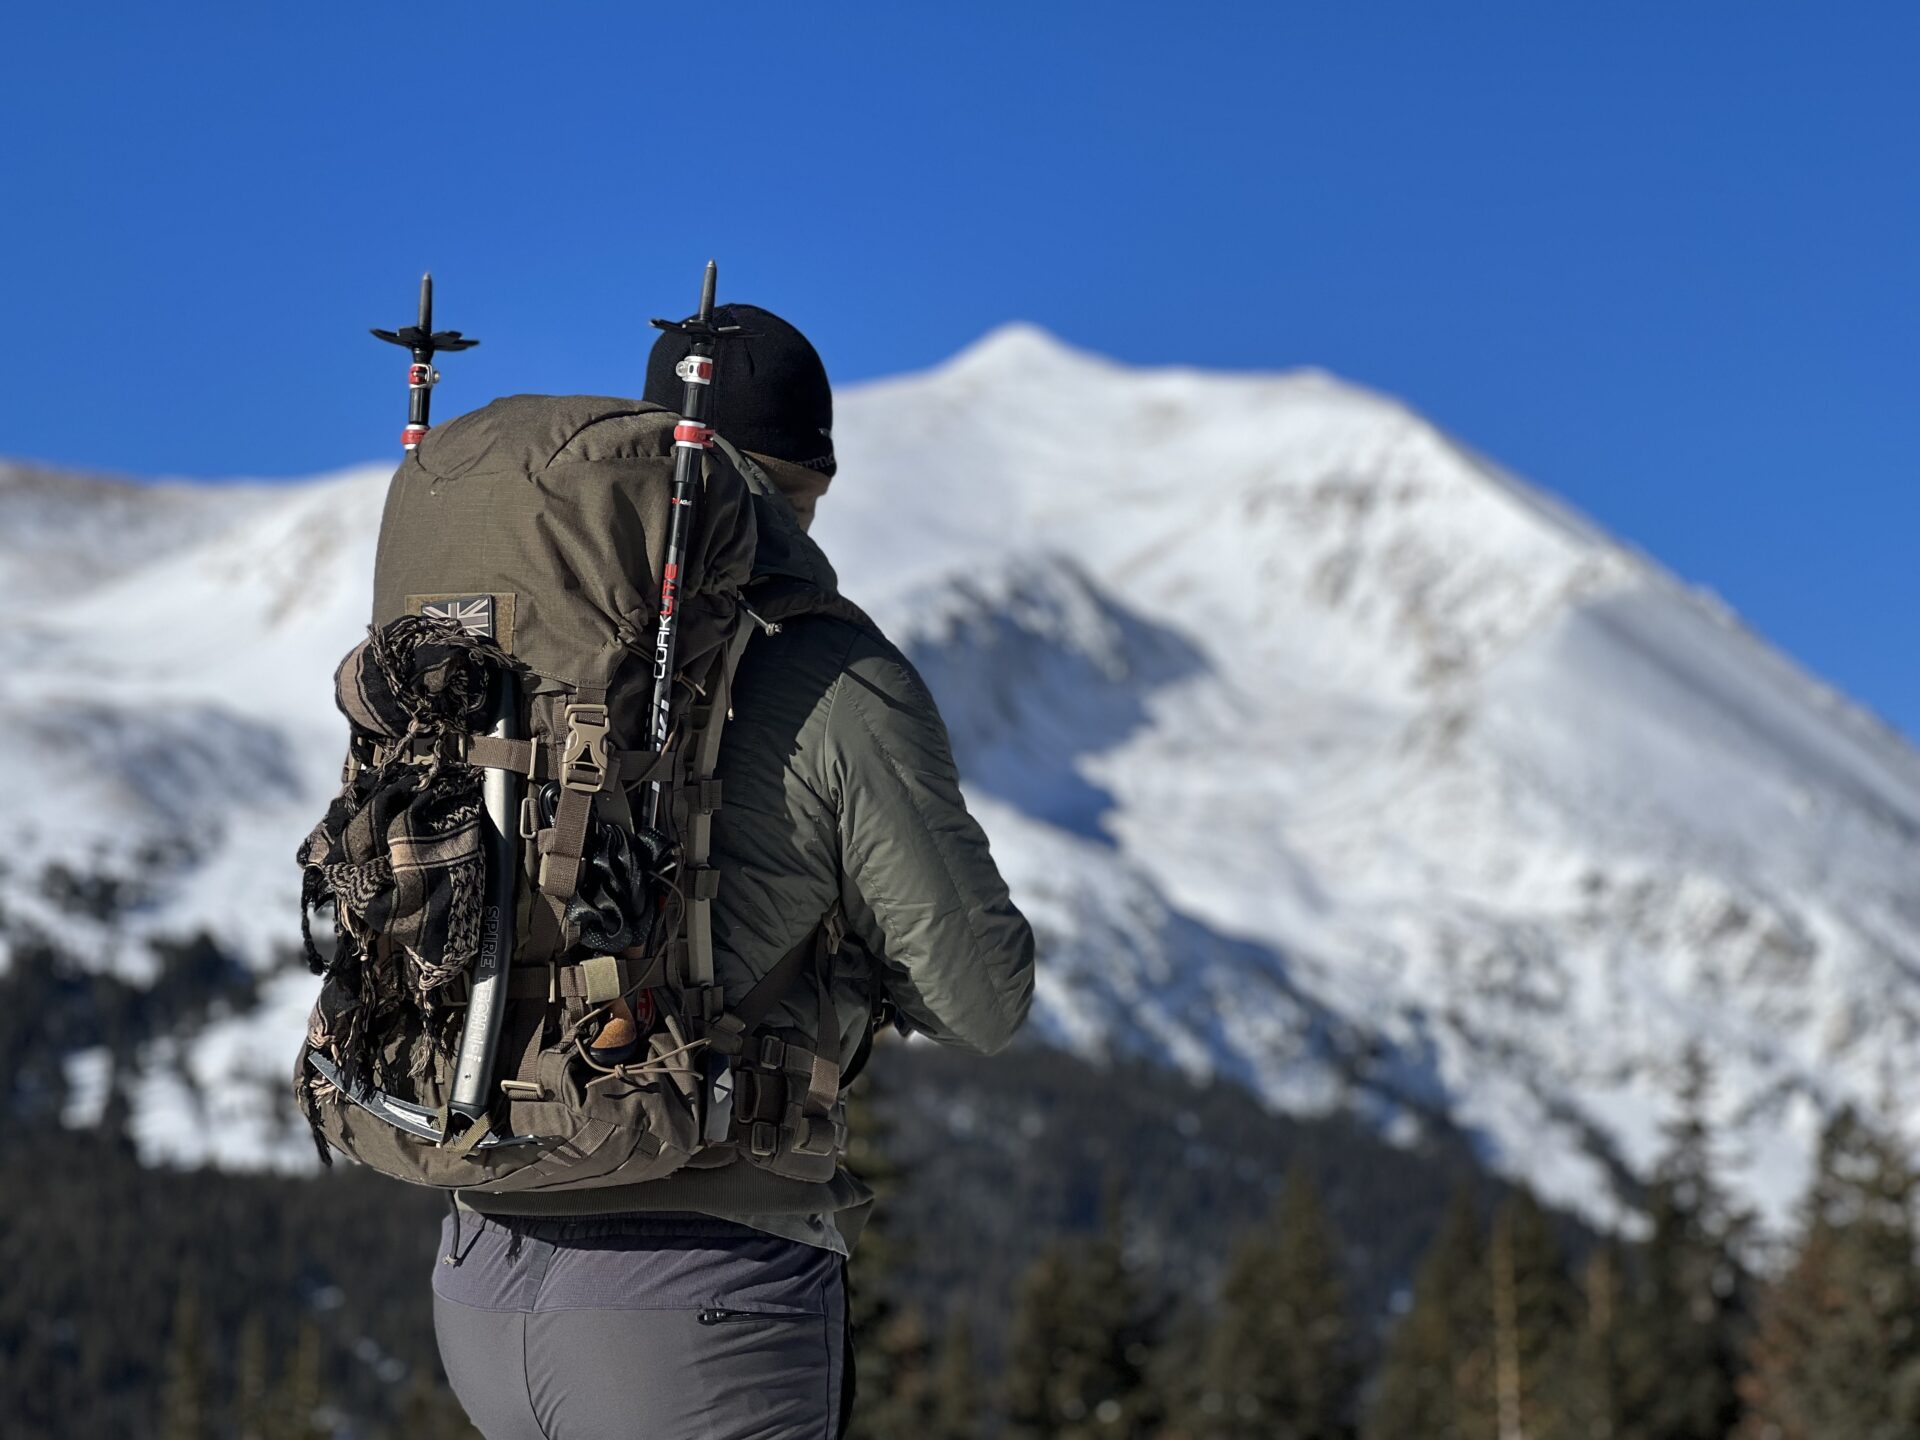
“It’s a unique spot, different on every mountain. It’s somewhere between the base and the summit. It’s a place where the mind will play tricks, the body will lie. This is the place where we establish the reason to why we climb.”
I am grateful for finding a true motivator and wish you the same on your life’s journey in finding your own version of the edelweiss. Thank you for allowing me to share with you.
Blessings on your endeavor ahead,
A Southern Limey